Advertisement

How To: Stuffing Box Upkeep

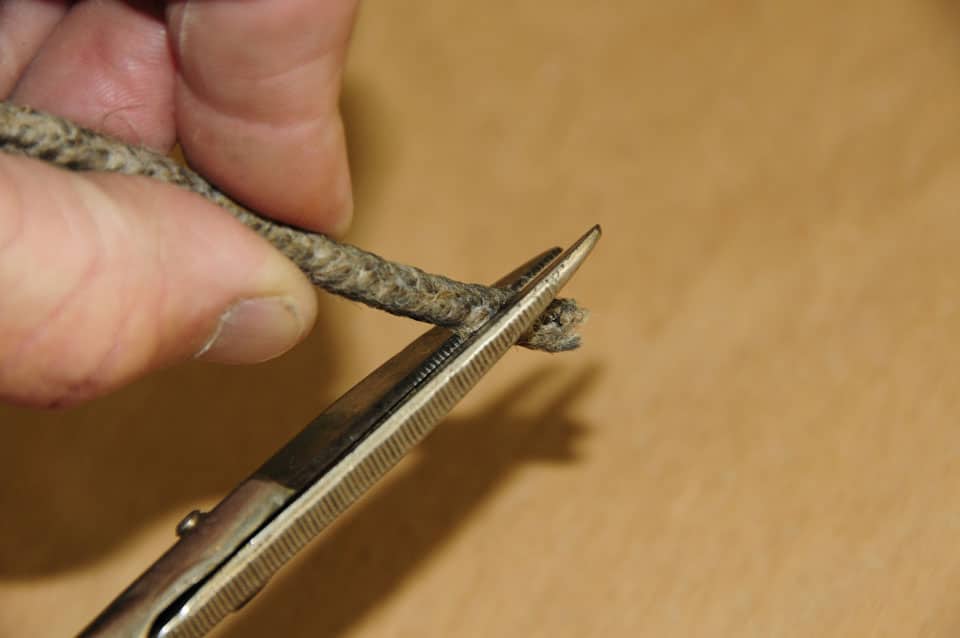
A conventional stuffing box requires little maintenance: 
Periodically change the ropelike stuffing, inspect the hose clamps for rust, and replace the flexible hose every five years or so. "Hands-On Sailor" by Steve D'Antonio from our November 2011 issue.

crw1111_dantonio01.jpg

To repack the stuffing box, loosen the locknut and back off the packing-carrier nut. Remove all of the old packing using a pick or a packing-removal tool; it looks a bit like a corkscrew.

crw1111_dantonio02.jpg

If green and crusty, the threads on the stuffing-box body should be cleaned with a bronze-wire brush, then lightly lubricated with oil.

crw1111_dantonio03.jpg

Three new rings of packing material should be cut, their inside diameter matching exactly the diameter of the shaft; the ends of each piece of packing should be cut on a 45-degree angle so they meet in an overlapping fashion. Apply a coating of marine wheel-bearing grease to the packing sections; it acts as a lubricant, and it helps keep the sections in place as they’re inserted into the carrier. The joints should be spaced 120 degrees apart, or at 12, 4, and 8 o’clock. The packing nut should then be tightened by hand; you’ll likely adjust it once the vessel is launched and the engine run.

crw1111_dantonio04.jpg

It’s critically important that the locknut be tightened against the packing nut using two wrenches, i.e., the nuts need to be tightened against each other to prevent either from moving. After Launching: Check for leakage, which to a small degree is normal. Ultimately, the sign of correct stuffing-box adjustment is temperature rather than drips per minute. The stuffing box should leak little and be no hotter than about 30 F above the ambient water temperature. If it’s overtightened, the wax in the packing will melt and run out of the stuffing box as a liquid, leaving behind little to prevent water from flowing past the packing material.
Advertisement
Advertisement