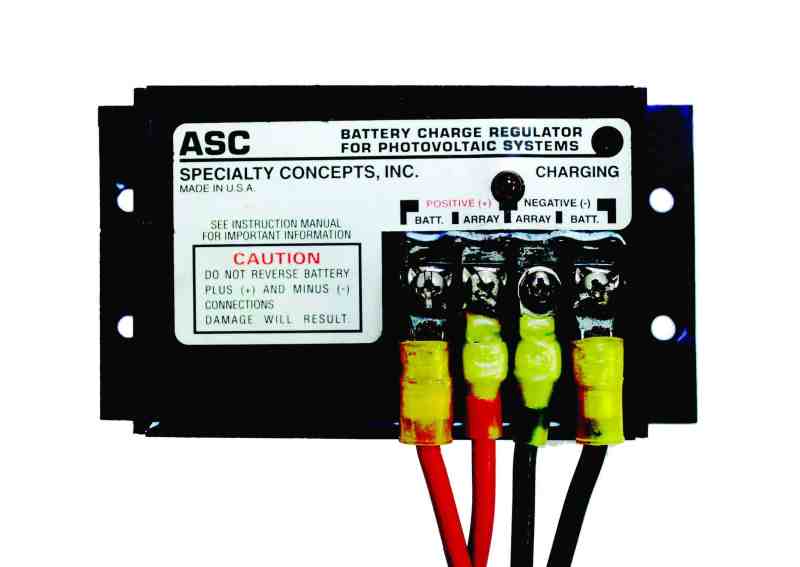
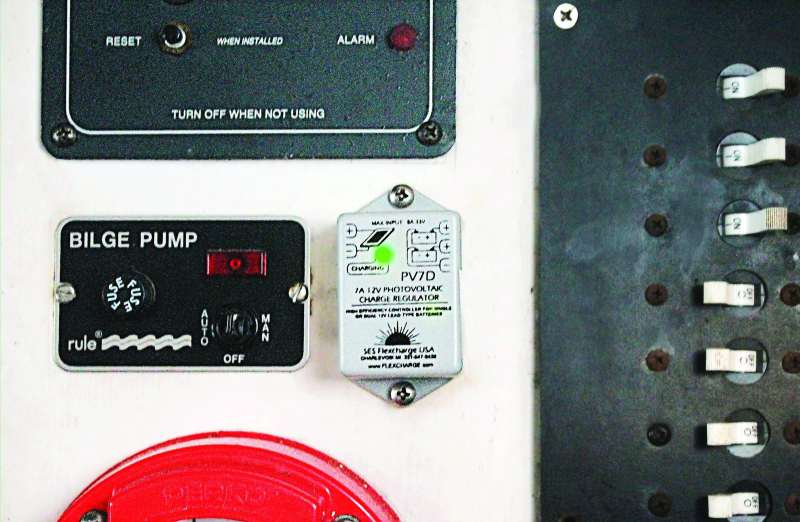
Nine years ago, I took up residence aboard my Ensenada 20 while preparing to move onto Nikki, a Cape Dory 28. During my stay aboard the Ensenada, I outfitted her with two 85-watt solar panels so I wouldn’t be dependent on dockage and shore power. As necessary with all solar systems, the circuitry and batteries were protected by solar voltage controllers to prevent overcharging. Power from the panels not only provided me with adequate interior lighting and an anchor light, but also allowed me to watch my small 12-volt television and charge various appliances, like my cellphone, computer and spotlight.
Part of Nikki’s refurbishment included the replacement of everything electrical, including the panel, all wiring, and every socket and light fixture. I installed a new VHF radio and stereo, and bought LED bulbs for the interior lighting, anchor light, running lights, spotlight and flashlights.
At the end of the year, I moved aboard Nikki and transferred the two 85-watt panels to my new home.
Convenience vs. Power
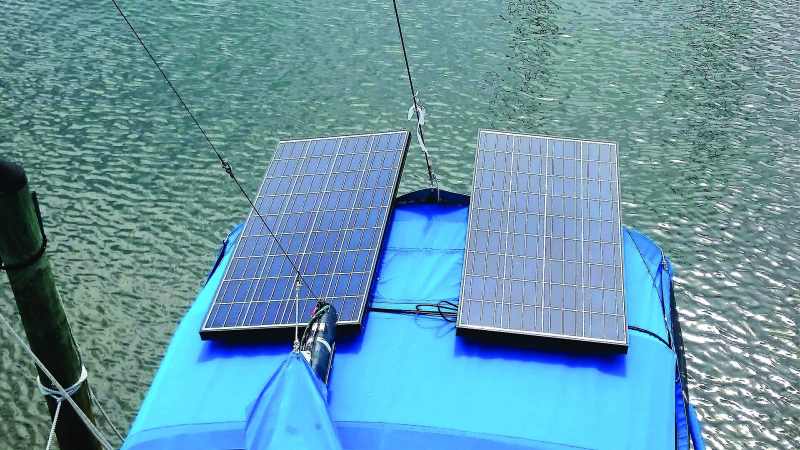
When most sailors approach me to converse and brain-pick on the topic of solar power, the discussion almost always turns first to convenience, then to cost, and lastly to efficiency. Maximum convenience translates to fixed, nonadjustable, horizontal panel installations that require larger panel sizes to provide adequate power.
Panels that can be turned and elevated to aim directly at the sun at any time of day result in markedly greater power output, so they can be smaller and less expensive. The downside is that adjustments due to wind shifts and time of day are necessary to get maximum panel performance, which can be inconvenient.
Panels that are fixed to only one side of the boat will probably produce solar power during a small fraction of daylight time, whereas panels that can be moved, trained and elevated have a much higher rate of success.
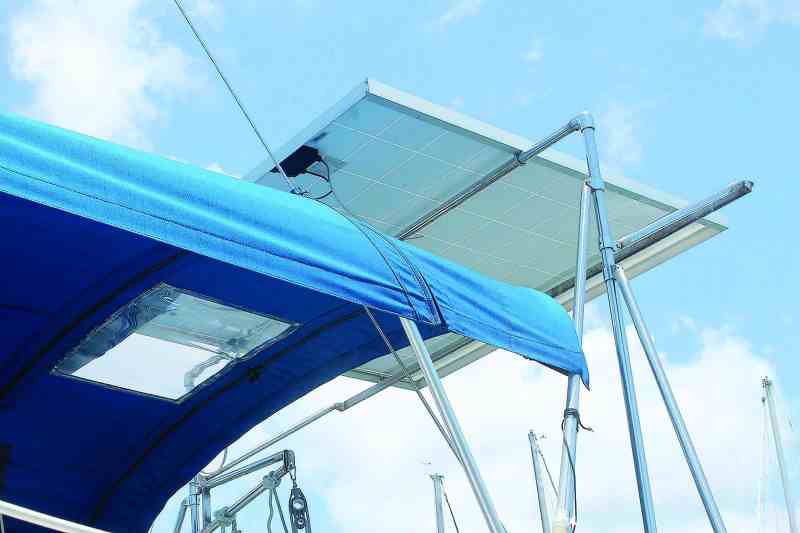
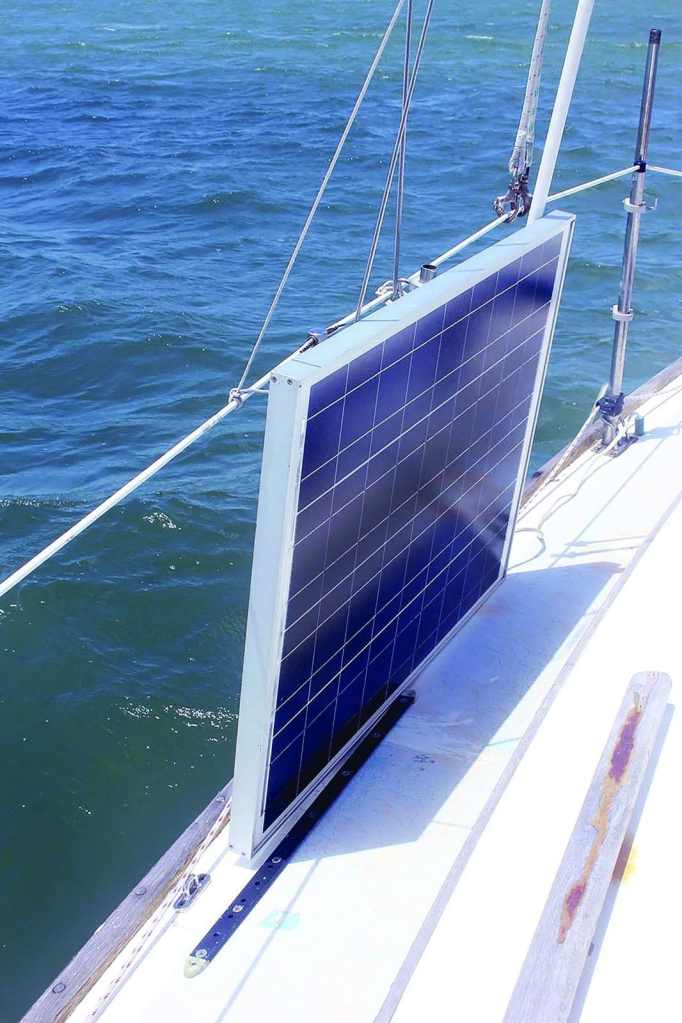
I have seen several boats recently that have panels that raise and lower on a horizontal tube attached to a pair of lifeline stanchions. The panel altitude can be adjusted from vertically stowed to just above horizontal, but the panels are very shadow-prone.
Adjust for Efficiency
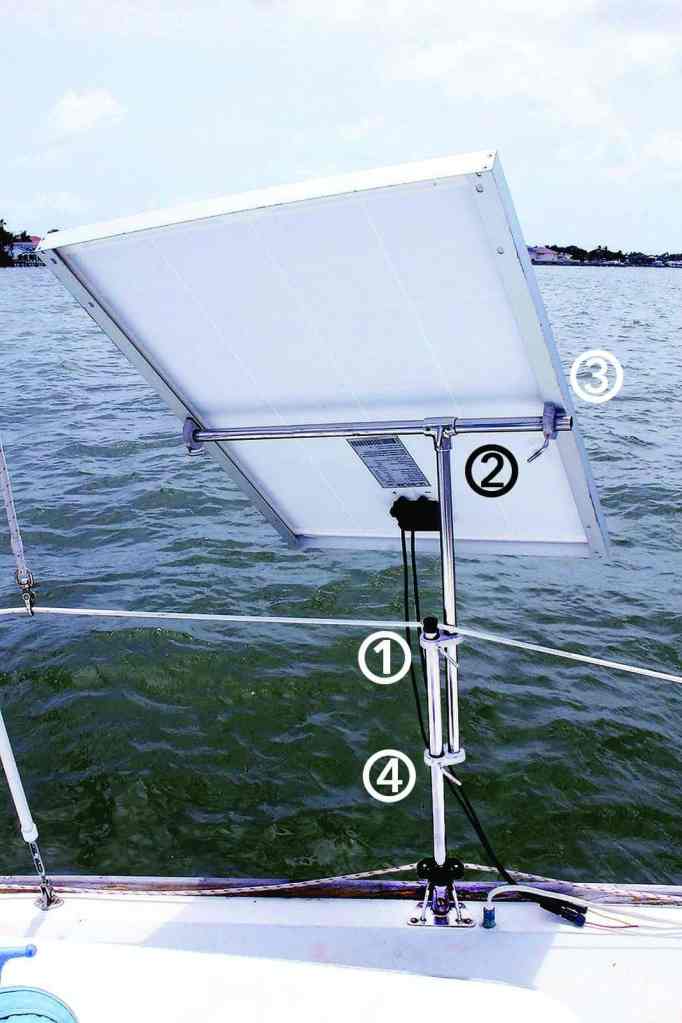
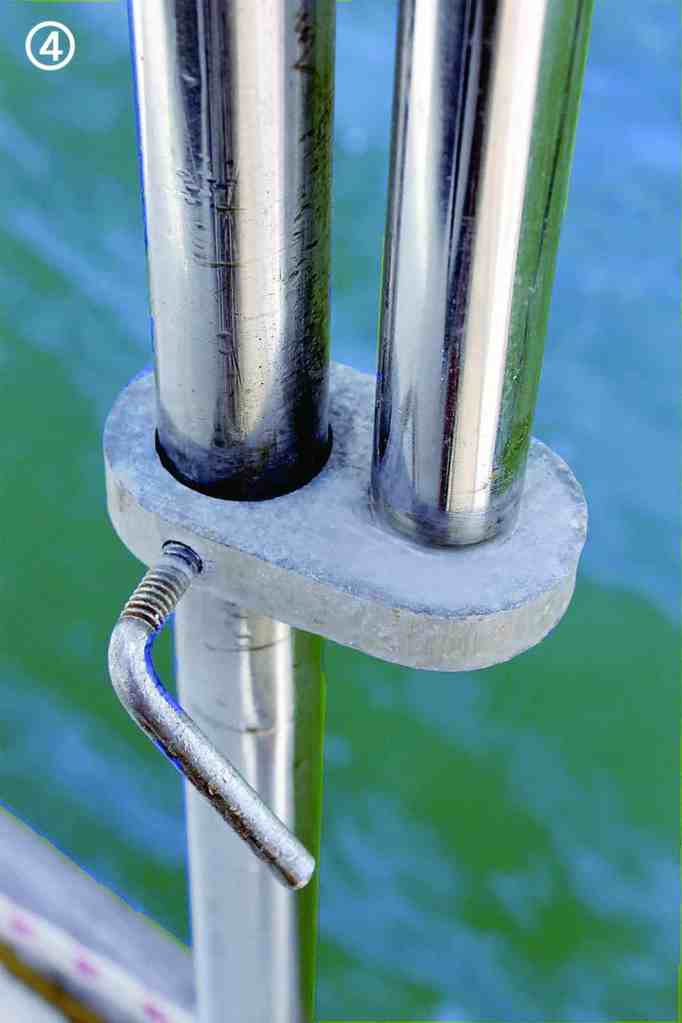
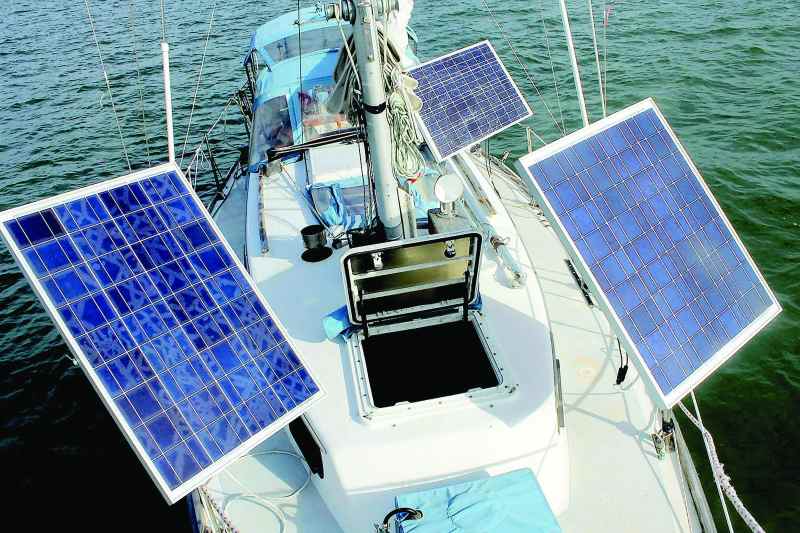
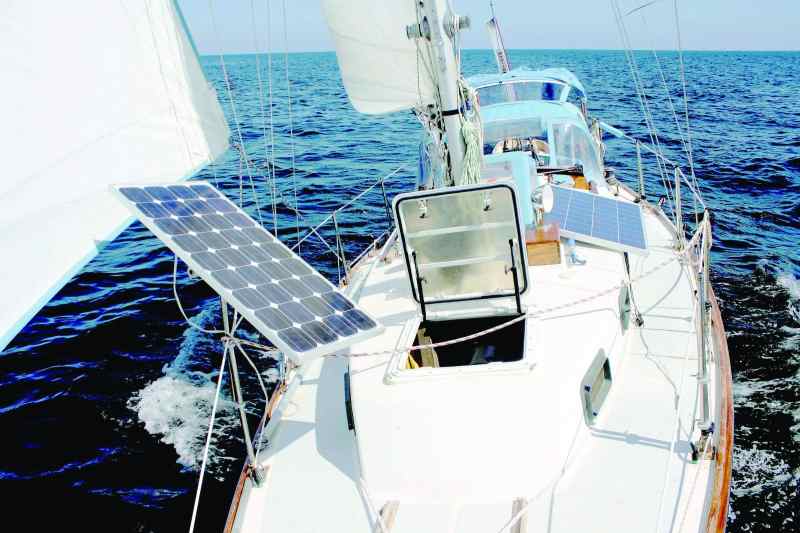
A high priority before moving aboard Nikki was the design and fabrication of panel standards, or brackets, that would allow me to maximize the solar arrays’ efficiency.
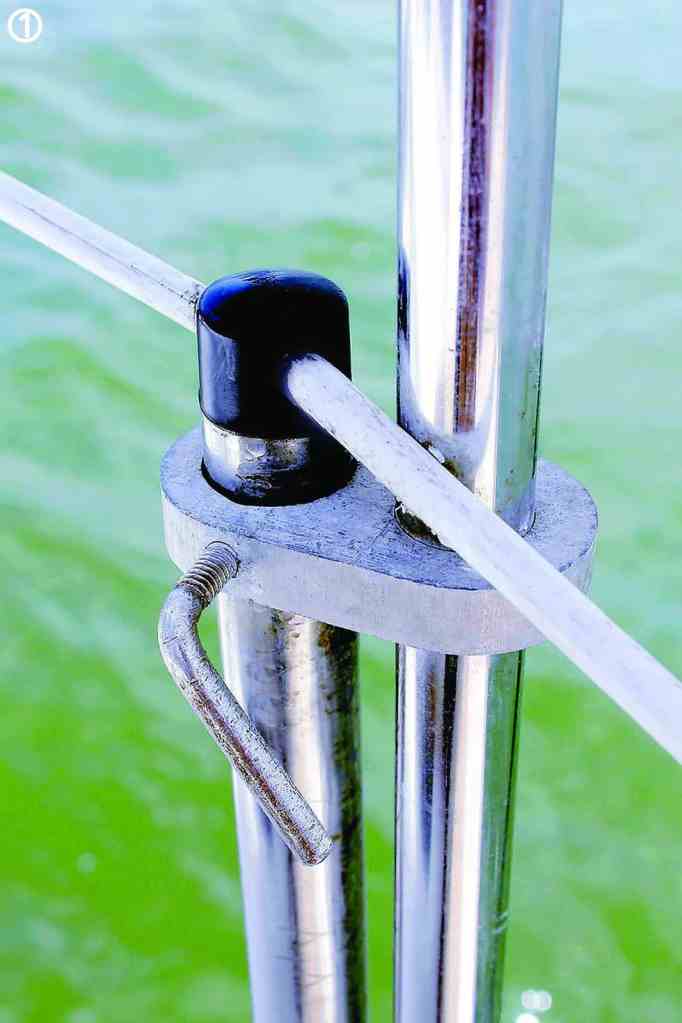
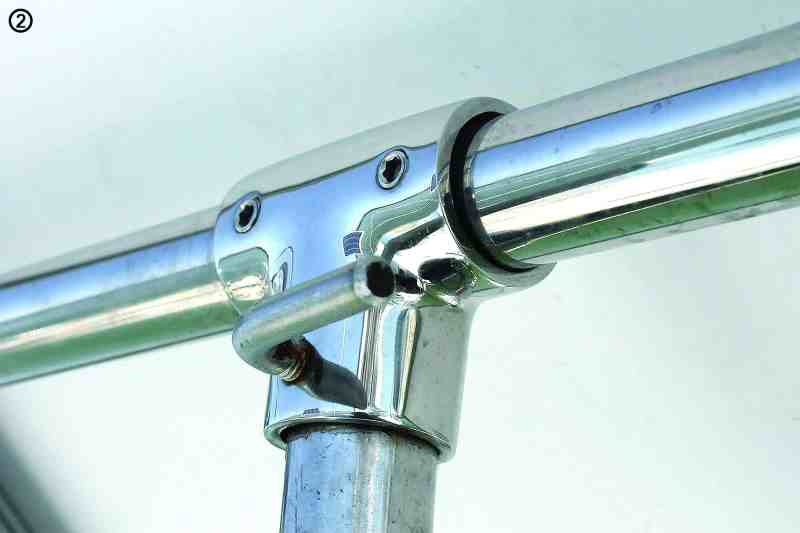
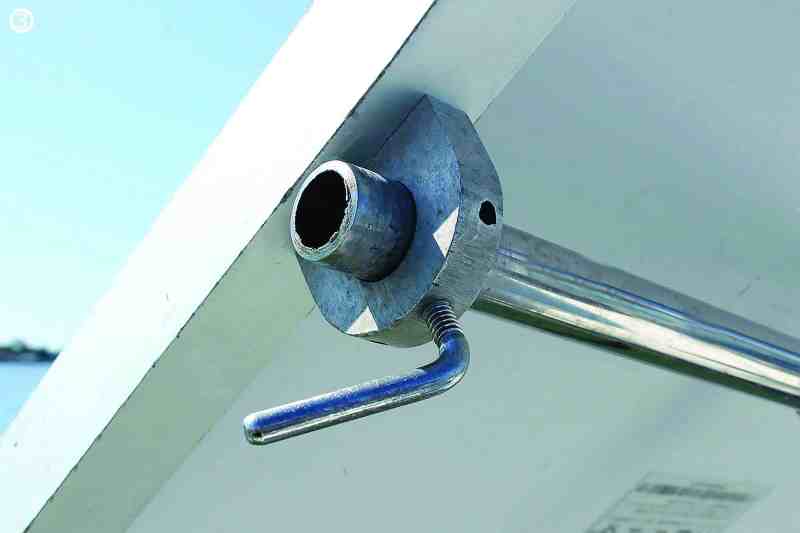
The standards’ design provides 360 degrees of horizontal movement, 180 degrees of elevation adjustment and 18 inches of altitude change to allow raising and lowering the panels for deployment or storage. I made them all myself in my workshop.
Upon moving aboard Nikki, the standards, panels, controllers and all wiring were installed. The entire solar setup has now lasted and served me perfectly for more than seven years. When considering my design, I looked carefully at dozens of panel-mounting systems and quickly concluded that permanently fixed horizontal panel installations were the least efficient of all, due to their inability to aim the panels directly at the sun for most of the time.
The second least efficient solar mounting allows adjustment only along a horizontal axis, and does not allow for training around the vertical axis.
Being able to both train and elevate panels allows adjustments for the sun’s altitude (time of day) as well as its azimuth (bearing) relative to the boat’s heading, thus getting the most bank for the buck.
Avoiding Shadows
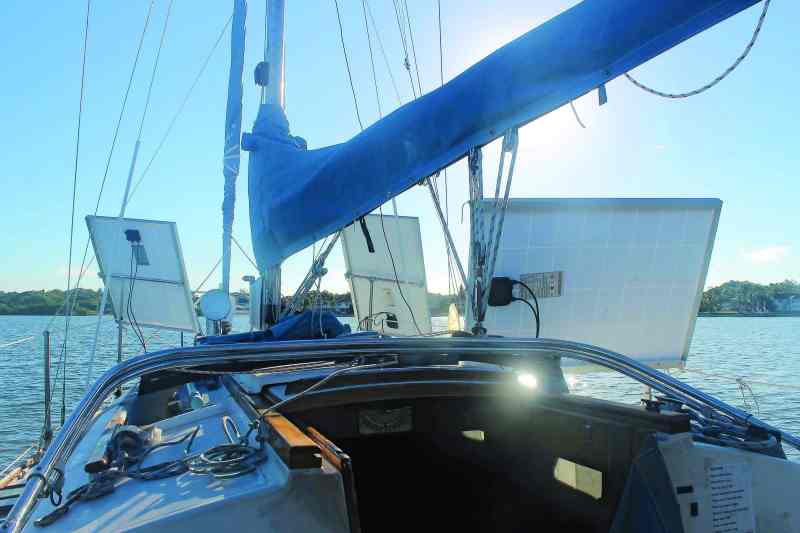
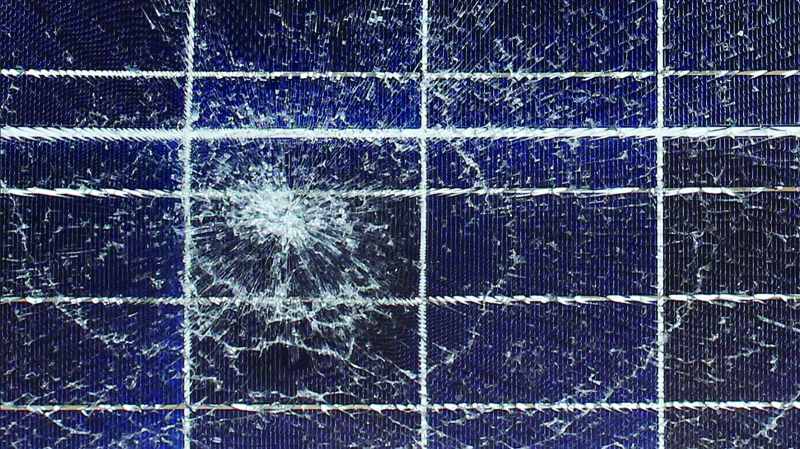
Another factor to keep in mind is that any shadow, however minor, reduces the wattage output of the panel. So the ability to move panels to the largest shadow-free area available increases the opportunity to capture solar energy.
This often prevents one panel’s shadow from covering part of another panel. My panels are usually mounted with the horizontal elevation tube locked off-center in the T fitting. By flipping the panel on the horizontal axis, then rotating the panel 180 degrees in the vertical axis, the panels move more than 2 feet. Another way to move a panel is to remove it from its vertical standard and set it up elsewhere using panel ties.
By the way, bird droppings allowed to remain on a panel also reduce wattage, so clean your panels as often as necessary. I use water and inexpensive microfiber towels purchased in packages of 25 from my local auto-parts store.
Wiring Nitty-Gritty
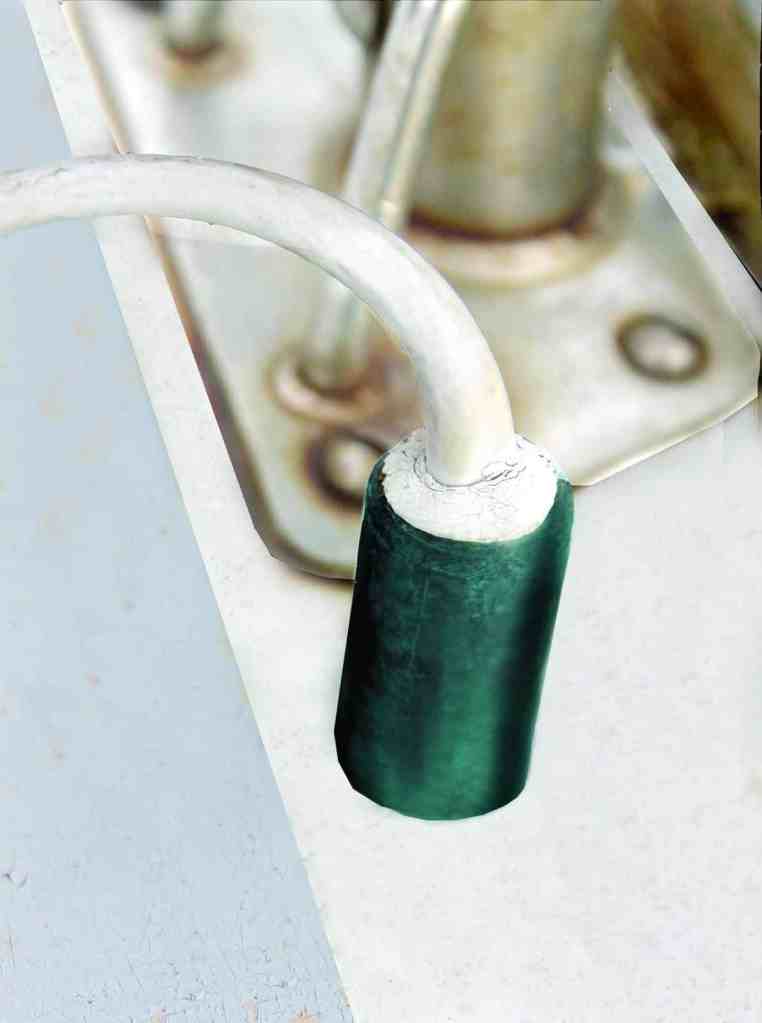
I have tried various commercial through-deck wiring glands with little to no success. I finally made my own installations using 3-inch lengths of copper tubing and lots of 3M 5200. I have never had a single drop of water enter my boat through these fittings.
The hole in the deck is drilled with only enough tolerance to insert the tube; a 45-degree chamfer is fashioned around the upper hole edge. The inside of the hole is lined with the 5200, and the tube is inserted. Then the chamfer is overfilled with sealant and sculpted into a round fillet about ¼ inch above the deck. Once cured, the duplex wire from the panel is passed through the tube with enough exposed tail to allow ample panel movement. The upper end of the tube is then filled with lots of 5200 and another ¼-inch fillet formed about the wire.
I have never had much success with sealing anything with tape. Besides, it never looks good.
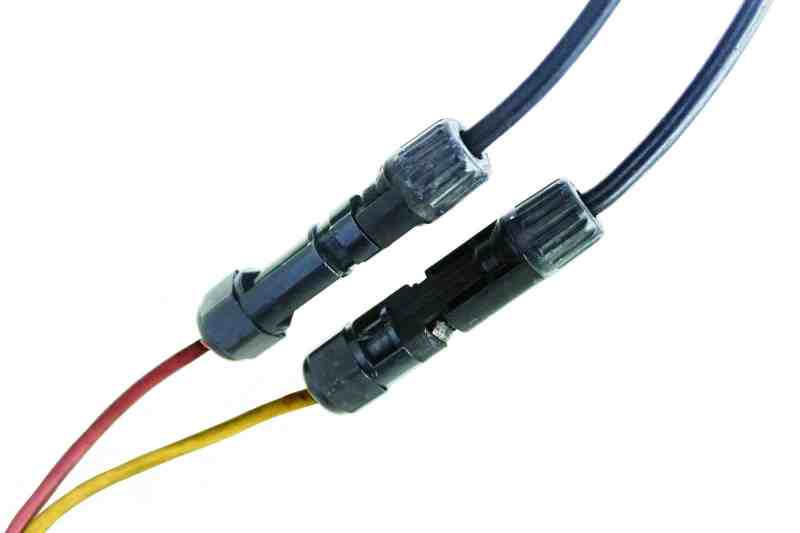
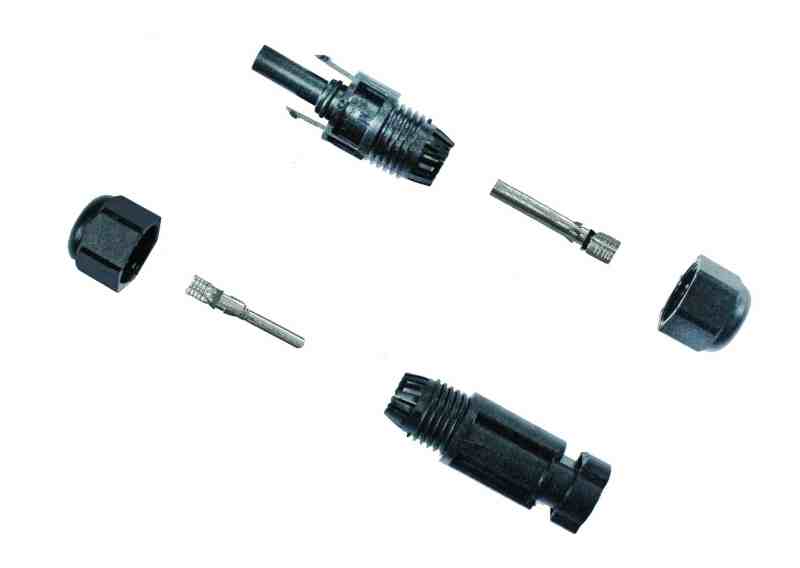
There will be occasions when you want to remove the panels for deck maintenance, or panel replacement or service. Most panels are manufactured with waterproof male and female plugs that connect with sockets called MC4 connectors. (Male and female fittings are used so polarity cannot be reversed.) These are available from your panel supplier and come in packages of mating pairs, one plug and one socket per package, for less than $10.
Your wiring must be sweat-soldered to both your receiving plugs and sockets, which requires using a butane torch and rosin-core solder. Before soldering, make sure the hex-head screw-on wire locks are placed onto the wires first. To ensure the sockets and plugs remain watertight, partially fill the hex-head wire locks with 3M 5200 or other marine sealant.
Under Sail
I usually set up my panels so they don’t interfere with the sails (and vice versa) when under sail for long distances. This usually requires using panel ties to keep them safe as well as efficiently aimed. If the sun is on the leeward side of the sails, solar becomes pretty useless.
In rough weather at sea or when just daysailing, I unmount the panels from the standards and secure them on their long edges to the upper lifelines and the lifeline stanchions. They intrude on my side-deck space by only 2 inches at most, and have never interfered with sailing or getting around on deck.
I have seen many panel installations on adjustable racks or rotating standards located above and astern of a stern cockpit bimini. In these cases, the panels can usually be in excess of 100-watt capacity or more, and rarely if ever interfere with sailing.
Less Is More
To be successful with solar, you must also address your electrical usage by reducing the wattage of as many appliances as possible. There are now LED bulbs to replace every incandescent bulb you have for a power savings of about 60 percent. I do have three overhead double-tube fluorescent light fixtures in Nikki’s saloon, but I use them only when I am confident that there will be much sunlight and my house batteries will have 13.2 volts at the day’s end. The smartest thing I have done is install a four-bud LED overhead light directly above my saloon table, where I spend a lot of time on my computer. I’ve also installed small battery-powered LED stick-up lights in my hanging locker, engine space and large cabinets.
All of Nikki’s running and navigation lights have also been converted to LEDs, at very reasonable cost since LEDs last so long.
I admit that I am addicted to television as well as movies on DVD, and recently I installed a 20-inch HD 12-volt flat-screen TV for $96. It has a sleep timer that I can set so when I slip into deep slumber watching the tube, it will turn itself off. My computer also has an automatic sleep mode that causes it to shut down after 15 minutes of idleness, and my anchor light is equipped with a solar switch that shuts it off at sunrise.
I rebuilt Nikki’s icebox so it is extremely efficient. But I also have installed a 12-volt fridge/freezer unit. Since my yacht club supplies me with free ice, I have very little problem with fresh-food storage as long as I am close to shore. But even then, I super-freeze my ice by turning on the freezer unit for a short period so my ice will last much longer. After a stretch of cloudy days at sea, I also turn on the freezer if I need to run the engine for a battery charge, but this is very rare.
Finally, I have developed the habit of turning off lights when going into another compartment of the boat. When I was a kid, my mom would yell at me for not doing this in our house, but I never took it seriously until I moved aboard decades ago. I am sure that she is now smiling from above, knowing that her admonishments have finally taken hold. Thanks, Mom!
Bruce Bingham is a boat designer and longtime contributor to CW.