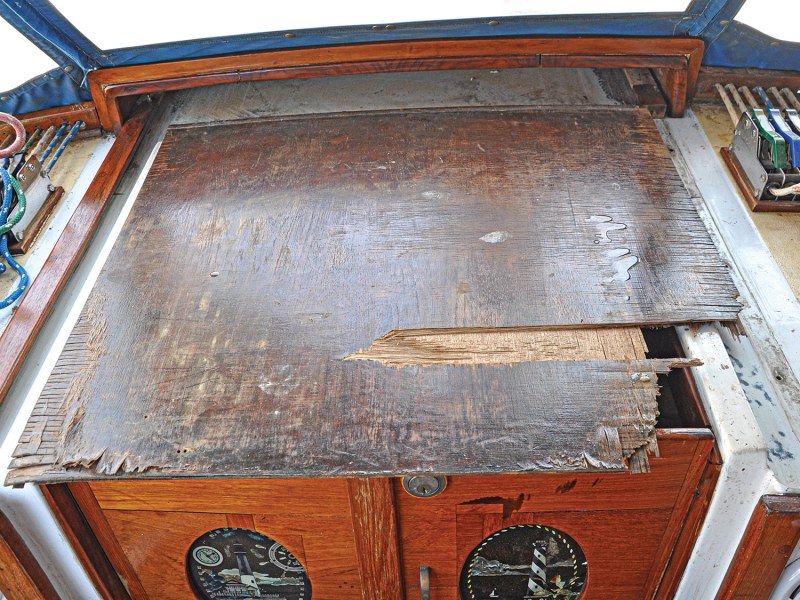
For some time I had planned to repair and modify Britannia’s front door, or to use the more-correct nautical term, companionway. The hatch housing leaked, al- lowing rainwater to seep into the plywood sliding top and causing it to delaminate. My wife and I were also heartily fed up with the two heavy washboards used to close the opening. When in place, the two teak boards completely blocked all light through the entrance.
First the hatch-housing leaks needed sealing, then the hatch itself needed to be repaired. I also had an idea about how to be rid of the horrible washboards and improve the actual companionway access.
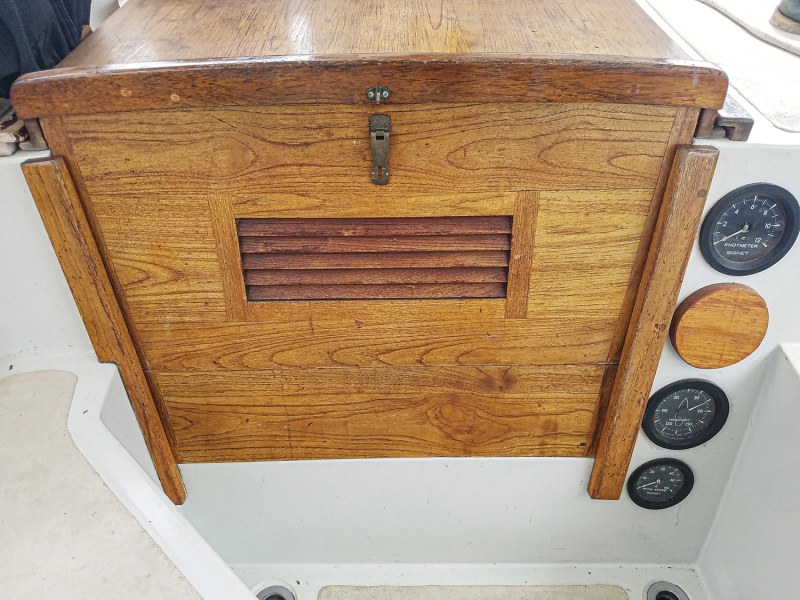
Sealing the cracks in the large teak housing was easy enough. I sanded off all the old varnish, filled the cracks, and then rolled on four coats of Cetol Marine Natural Teak from Interlux paints. The Natural Teak is a brownish color, and I think it enhances the deep color of teak. More important, by not sanding be- tween coats, it created an excellent nonslip surface in an area where I frequently stand when working at the mast.
The large sliding hatch had been built as a permanent structure. By that, I mean it could not be taken out with- out one side of the slider guides first being removed. It came as no surprise to find the guides weren’t just fastened with self-tapping screws like 90 percent of the rest of the boat, but rather they were bolted through the fiberglass deck with 1⁄4-inch bolts, whose nuts were encapsulated in the fiberglass underside.

Down below, I had to re- move part of my new saloon ceiling panels to be able to chisel the resin off around the nuts before I could hold them with vice grips to unscrew them.
To make matters more challenging, the hatch frame was built to where I couldn’t reach all the fasteners, so I had to cut the guide in half with my oscillating saw before I was able to lift the hatch completely out. Who was it who said, “Working on boats, one job leads to another”? Oh yes, it was me!
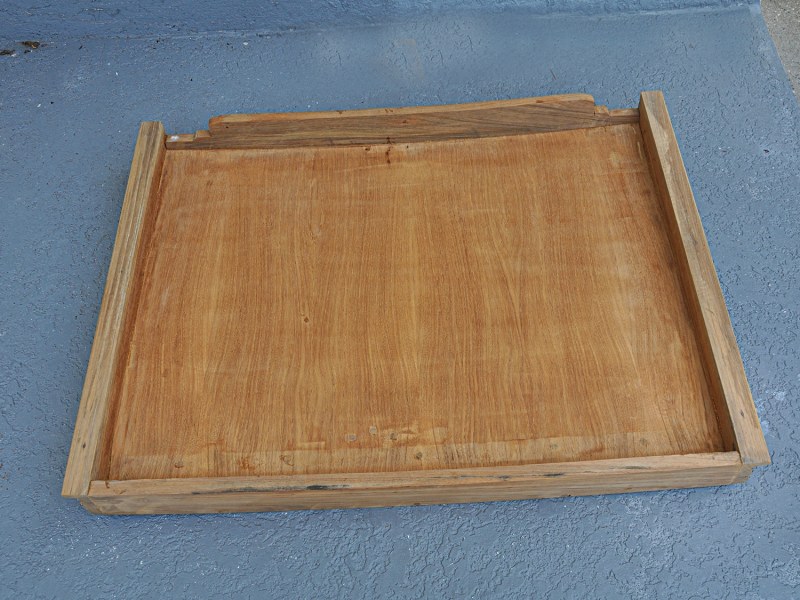
I lugged the deceptively heavy hatch to my garage workshop, where I dismantled it by drilling out all the wood- en plugs and withdrawing the long stainless self-tapping screws holding the four sides to the top.
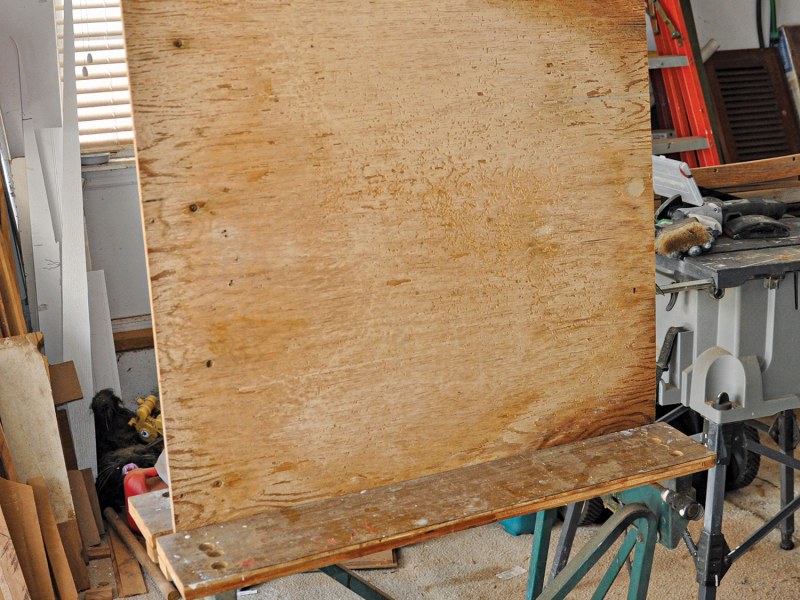
The top was made of 1/2-inch marine plywood with another 1/4-inch teak-faced plywood sheet glued on top. The layer of teak had rotted and was beyond repair, but the 1/2-inch- thick base was still good, except for some delamination around the edges. I wanted to reuse it to save having to curve a new sheet into the same shape. Using screwdrivers as levers, I pried open the damaged edge laminations, one edge at a time, then squirted wood glue into the seams. I then clamped the panel in my woodworking bench vice and left it overnight.
The next question was what to replace the rotten wooden top with?
Having dismantled the hatch, I made short work of the flaking varnish on the sol- id teak sides and stringers with my belt sander.
I then took all the parts back to the boat because I wanted to see if it was possible to make the hatch slide farther into the housing, to give more companionway headroom. I also wanted to sand and varnish the companionway surround, which was now much easier to get to with the hatch removed.
By trial and error, I found I could cut 2 inches off the back of the hatch so it would slide that much farther into the housing, and provide more headroom when descending or ascending the ladder. The hatch was then carted back to my workshop for modification, reassembly and final finishing.
At Lowe’s I bought a sheet of fiberglass paneling made by Crane Composites (cranecomposites.com). It’s a little more than 1/8-inch thick but very strong and completely water- proof and mold-proof. One side is dimpled and the other smooth, so I used the smooth side uppermost to match the surrounding deck. This would waterproof the top and prob- ably be stronger than the original plywood. I glued the fiberglass sheet to the plywood using Loctite Power Grab adhesive, a type of waterproof glue suitable for fiberglass and wood. After the glue set, I trimmed the new top flush with the edges of the renovated underpanel.
Luckily, the underside of the original 1⁄2-inch plywood panel that I was able to reuse had a teak-veneered face, so I care- fully sanded this before reassembling the hatch.
I reattached the hatch trim pieces with waterproof wood-working glue and fastened them using the same stainless screws I’d taken out. The original assembly appeared not to have been glued, which I think allowed water to eventually seep into the end grain of the plywood. With its fiberglass top and glued sides, that won’t happen again.
Completing the job required quite a bit of finishing off by hand. I sanded the side trim flush with the new top, and then glued 28 teak plugs into the screw holes and sanded them flush. As an added touch, I ran a molded edge along both sides of the top using my hand router.
After masking the top panel, I applied a coat of Cetol NaturalTeak to the sides.Then I turned the hatch over and rolled Cetol on the teak underside. I then applied three coats of Cetol gloss all over, rubbing down between coats with 250-grit sandpaper. This produced a beautiful glossy finish that further enhanced the appearance in the saloon when the hatch was closed.
The finished hatch sat in my workshop for a week while the Cetol hardened, and I sanded and varnished the remainder of the teak surrounds framing the companionway.
When everything was thoroughly dry, I simply lifted the hatch back into the left-side guide and refitted the right guide—but this time I used 1⁄4-inch stainless self-tapping screws to fasten it to the deck, bedding it with 3M 5200 adhesive caulk. This will be more than adequate, since the guides carry no load, just acting as guides for the hatch. I filled the screw holes with 1⁄2-inch teak plugs, and the hatch was finished.
Next up: Make new weather doors.
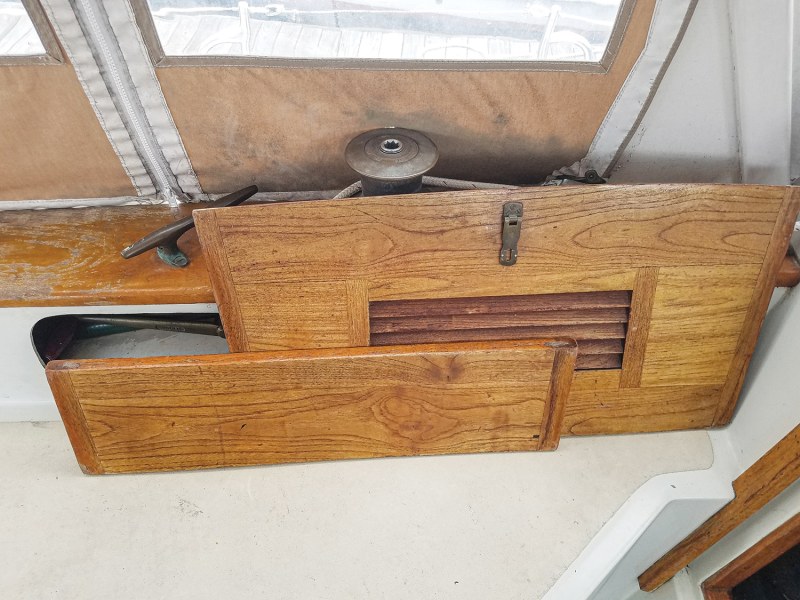
Originally the companionway had two large sol- id-teak washboards, which stacked one on top of the other in slots. As I said, they were heavy and cumbersome, and my wife could hardly handle them. Then, when they were out, there was nowhere to store them in the cockpit.
The washboard concept is part of a traditional design, which hypothesizes that if a giant wave floods the cockpit, the boards would stop water from entering the saloon. That, of course, presupposes the boards would actually be in place. In practice, they are nearly always removed when we’re aboard because they completely prevent access to and from the cockpit. For a short-handed crew, I consider semipermanently closing off the companionway in this way to be actually dangerous, because it effectively prevents quick access, both in and out. Also, the prospect of a total cockpit flooding is remote, especially on a center-cock-pit boat like Britannia, with its high freeboard and coamings that are 7 feet above the waterline.
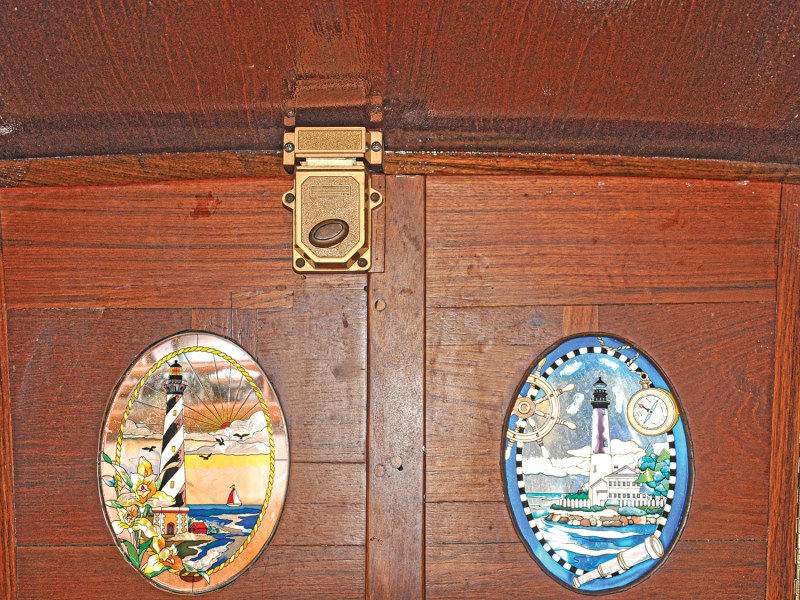
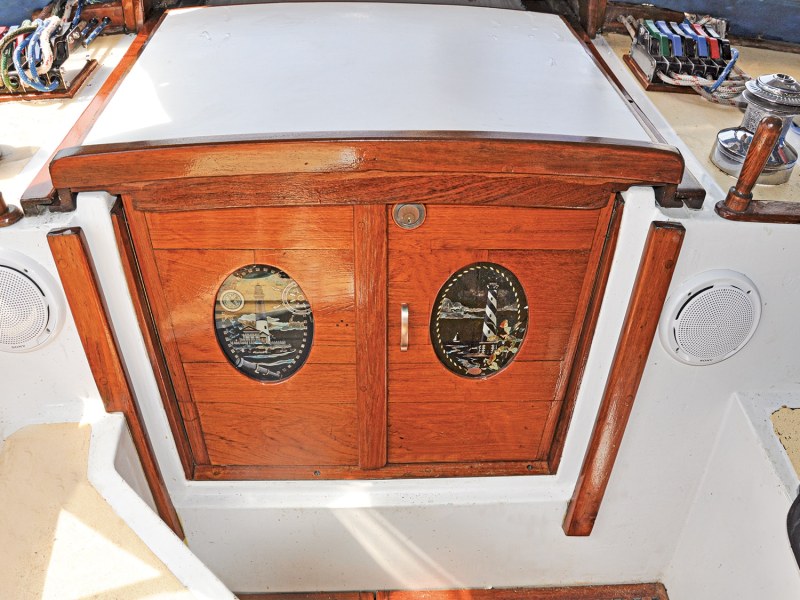
I used the 3⁄4-inch solid-teak boards to make two doors, which I hung with piano hinges on either side of the companionway. One side locks with a sliding bolt into the bottom sill, and the other with a heavy deadbolt into the solid beam of the sliding hatch. We can now easily close one door, or both, as we wish. To complete the job, I bought two oval glass panels of light- houses from amazon.com, and recessed them into each door, adding a touch of elegance when daylight filters through.
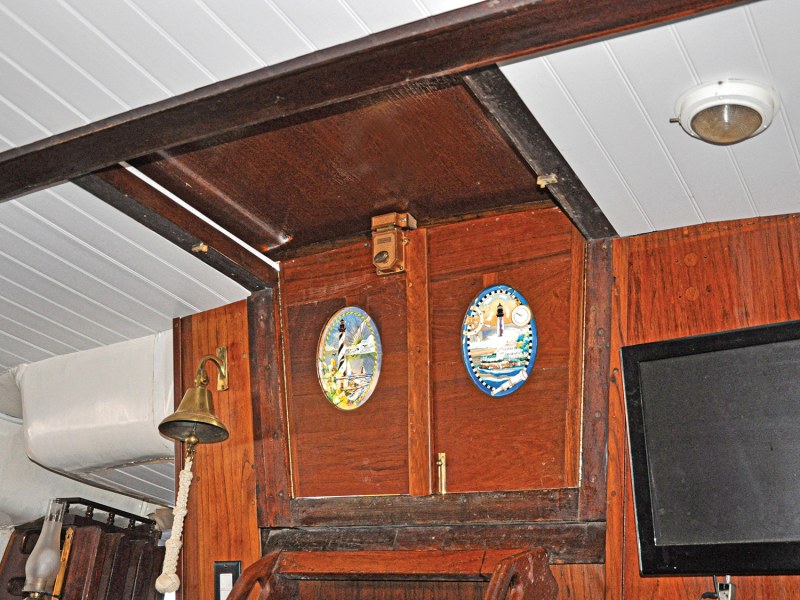
In addition to now having a waterproof companionway hatch, the refurbished entrance presents a very classy appearance. It’s our new “front door”.
Roger Hughes is a dedicated do-it-yourselfer and a frequent Hands-On Sailor contributor.
Supplies and Costs:
- Cetol Natural Teak: Johnstown Distributors, $30
- Fiberglass panel: Lowe’s, $39.20
- Adhesive: Lowe’s, $7.99
- Piano hinges for doors: Lowe’s, $15
- Oval glass inserts for doors: amazon.com, $85
- Total: $177.19


