Sooner or later, all boats leak. It’s a fact of sailing life.
Tracing topside and deck leaks, however, can be tricky. In order to track down the leaks on my customer’s Islander Freeport 41, I devised a method that is similar to the way you might locate a leak on an inflatable tender.
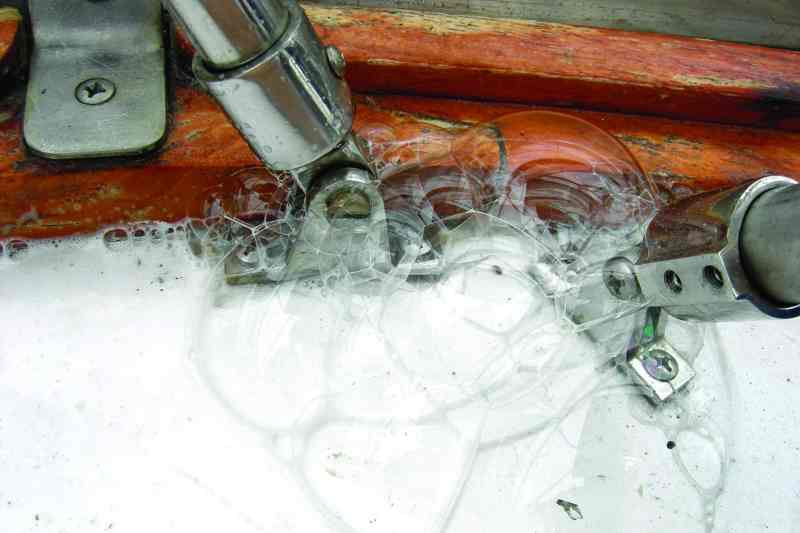
With minimal skill and equipment, you can turn this into a fun half-day DIY project. The idea is to pressurize the inside of the boat’s cabin and spread soapy water on the deck to identify any leaks, which are easily spotted as streams of bubbles.
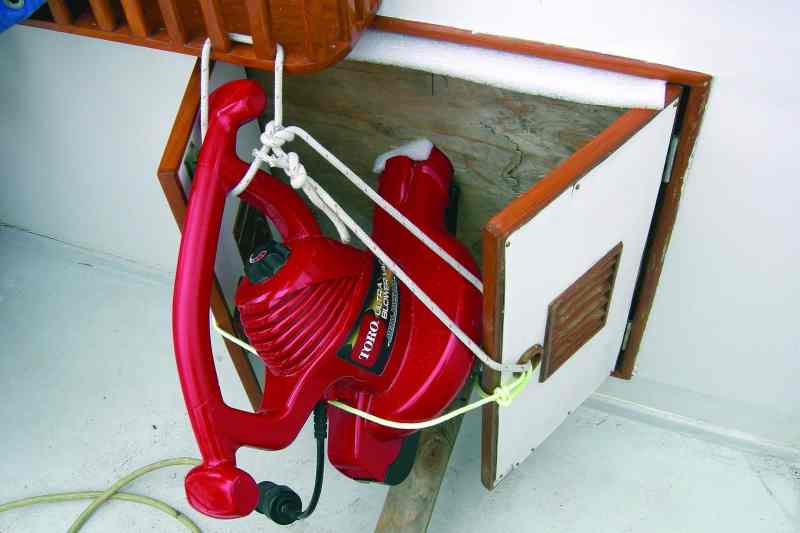
For pressurizing, I used a Toro Ultra leaf blower. A good-size Shop-Vac-style vacuum cleaner can also be used if a hose can be secured to its discharge side. You’ll want all the power you can get, and removing the filter will increase the vacuum’s capacity.
Other items you’ll need for the project include a piece of plywood to fit in the companionway, masking tape or other tape that can adhere well without leaving residue, plastic bags, several throw rugs or pieces of foam that can be used to plug larger air leaks, a drill, and a jigsaw. To document the test results, have paper, pen, marker and a camera ready.
Here’s How:
1. Tape over the sink drains.
- Seal the centerboard or retractable keel if the boat has one, and is not in the water.
- Open and secure all doors, cabinets and closets, including engine-room access.
- Cut a piece of plywood to mount the blower in the companionway opening, an access door or over a hatch.
- Secure the plywood and blower using line or bungee cord. Soft foam can be used along the perimeter.
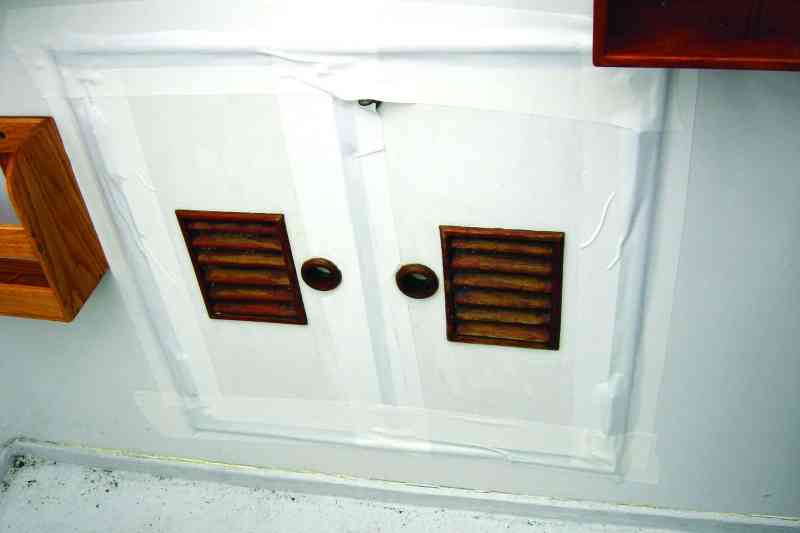
- Tape the edges of the companionway and blower from the inside, and exit through the forepeak hatch.
2. Seal the deck.
- Secure hatches.
- Tape cockpit locker lids.
- Plug bilge pump through-hulls.
- Tape, plug or secure a plastic bag over all vents (dorades, engine intake, solar).
- Seal anchor-chain deck pipes.
3. Start the test.
- Turn on the blower.
- Start applying soapy water, then observe. Make notes of where you see bubbles, and take pictures.
- Make a few slow rounds, as some leaky items will produce a foamy appearance over time.
Test Tips
• It’s best to conduct testing in calm weather, as wind will impede bubble formation.
• Headliners and tightly fit ceiling or wall panels may restrict air access and could affect test results. In some cases they should be removed or loosened.
• Creating good pressure is important. Before applying soapy water, it’s a good idea to walk around and make sure no large air leaks are missed. With the blower on, you can feel the air leaks with your hand. A wet hand is even better. Small air leaks are not a problem if you’re using a strong blower.
• Using a spray bottle or sponge, you can start applying the soapy water immediately — it takes only a few seconds to build pressure. You can identify pressure buildup by observing plastic-bag inflation, say, over the dorades.
• If a suspicious hardware piece shows no bubbles, try to flex it.
• The interior spaces on most sailing vessels are interconnected; therefore installing a blower at a single location, like a companionway (or any hatch), will pressurize the entire vessel.
• In my experience, this test demystifies most leaks, and very often with unexpected results. Afterward you may still have some stubborn drips that will only develop when the hull, deck or rigging is flexing under stress while underway.
Michael Tetelbaum lives aboard his Najad 343, Panthalassa, in New York City. He is a professional captain and former mechanical engineer and computer programmer.


