In warm climates, where so many of us keep boats or aspire to cruise, fabric bimini tops and spray dodgers suffer the wrath of year-round sun and exposure to the elements. First they start leaking, and have to be waterproofed periodically. Then the thread breaks down, requiring more and more re-stitching. Finally, at least on Silverheels, my ketch-rigged Pearson 424 built in 1978, the whole shooting match needs to be replaced every five to seven years. It’s a bothersome, costly, recurring maintenance item.
Not surprisingly, permanent fiberglass and composite hard dodgers and biminis have gained wide popularity among sailors seeking longevity and low maintenance from their cockpit protection. However, unless your craftsmanship is well above average, designing and fabricating such structures is best left to professionals, and that can get expensive.
All that said, I’m possessed of modest carpentry skills and an equally modest cruising budget, and yet I’ve come up with what I believe is an excellent compromise for the casual do-it-yourselfer. When Silverheels’ spray dodger top and bimini needed replacing, I made my own with fiber-reinforced plastic (FRP) panels from Home Depot. Yes, Home Depot.
Durable, flexible FRP panels come in 4-by-8-foot sheets and, last time I looked, cost less than $40 apiece. Commonly used for paneling bathroom walls in homes, they feature a raised, textured, high-gloss white finish on one side, and are flat and dull on the other. The best thing about FRP is that it can be cut, drilled and shaped using ordinary carpentry tools.
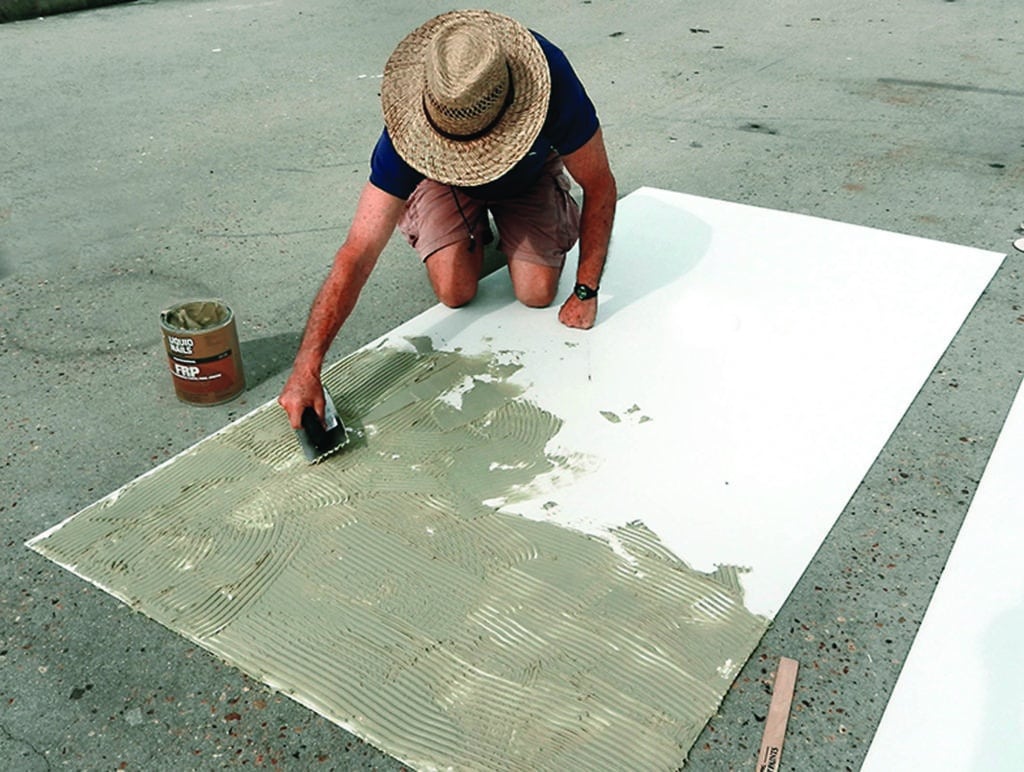
I wanted something substantial on my bluewater cruiser, so I opted to laminate a pair of panels, back to back, for my dodger and bimini tops. I scuffed the flat sides and glued them together, leaving the handsome texture facing out on both the top and bottom. One-gallon cans of the FRP adhesive made by Liquid Nails sell for around $25. Pick up a grooved trowel to spread the stuff properly. The only other material expenses of note are the stainless-steel fasteners to mount the pieces. You could also add a foam core for an even stiffer, stronger structure. The other option is to keep it really light and simple by using single sheets and skipping the laminating process altogether.
I actually made my dodger hardtop years before the bimini, when I was first refitting my good old ketch. It turned out well and has lasted perfectly with zero maintenance, so recently I decided to do something similar to replace my aging Sunbrella bimini top. In both cases I used the existing stainless-steel tube framework, simply replacing the Sunbrella covers with FRP.
The dodger top was relatively quick and easy to fabricate. I made a template with door skin (thin, flexible wood veneer), cut the first pieces from an FRP panel with a jigsaw, and then cut mirror-image pieces to glue on top. Clamping the bottom pieces onto the dodger frame, I then spread on the adhesive and clamped on the top laminate. These FRP panels are quite flexible, and easily made the pronounced bend at the outboard ends. I also laminated a ⅜-inch plywood core in the center section of the hardtop for mounting a hinged boom crutch.
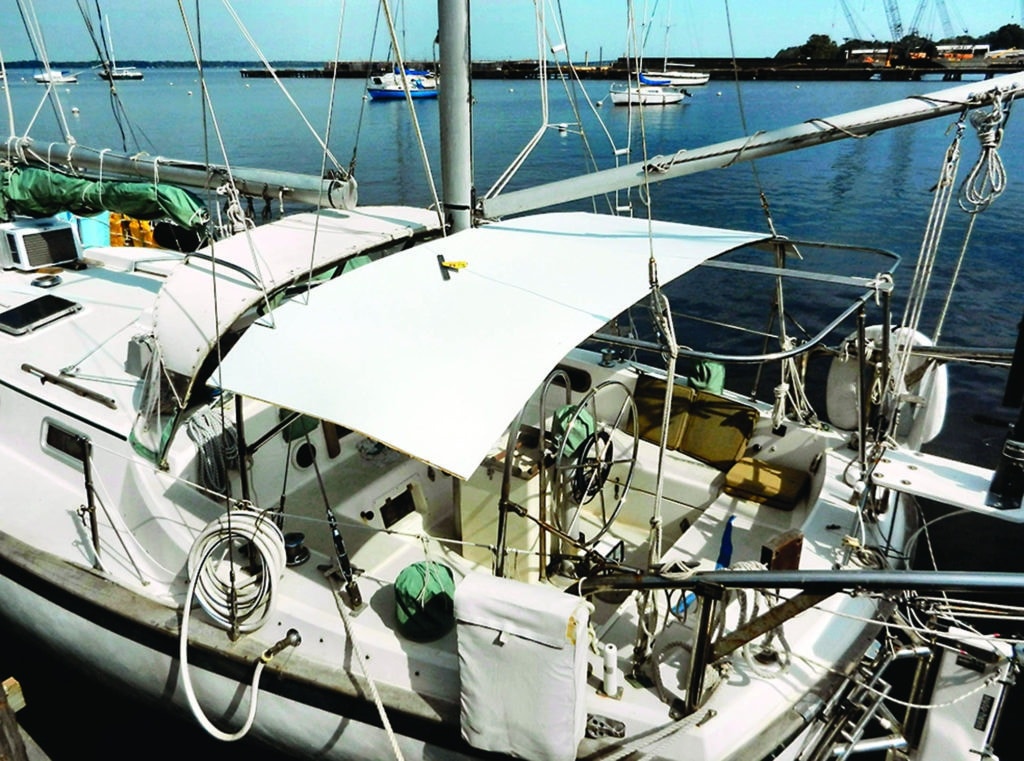
While the adhesive was setting up, I screwed the laminated pieces directly onto the frames with stainless-steel, self-tapping sheet screws. After smoothing off the edges with a wood rasp, I primed and painted the top to tone down the high gloss of the panels’ stark white finish, and to add a little extra protection against the elements. Finally, I installed an awning track beneath the forward edge and had its counterpart boltrope sewn onto a Strataglass windshield so it would slide into place. Presto! I had a permanent, maintenance-free, rainproof dodger top.
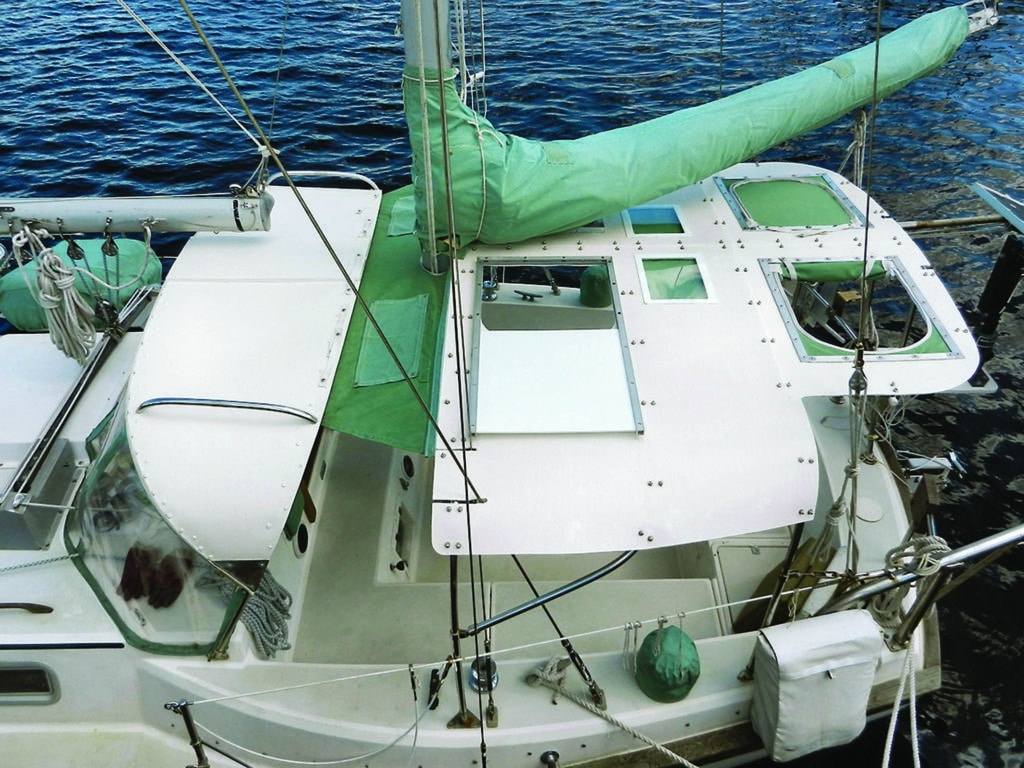
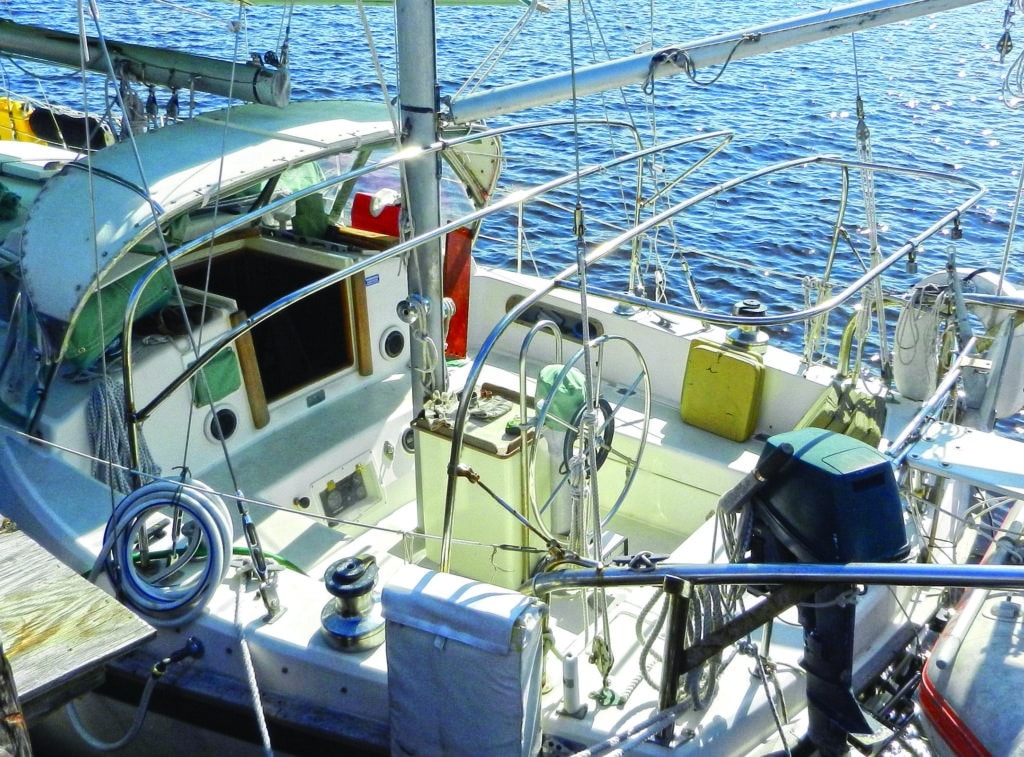
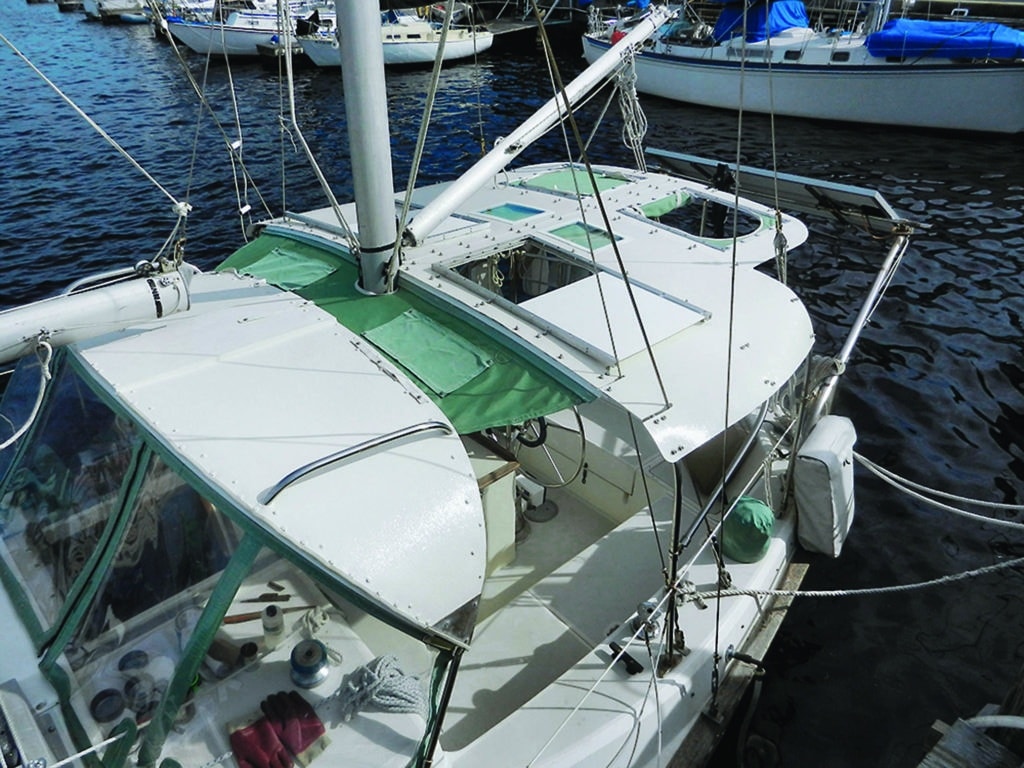
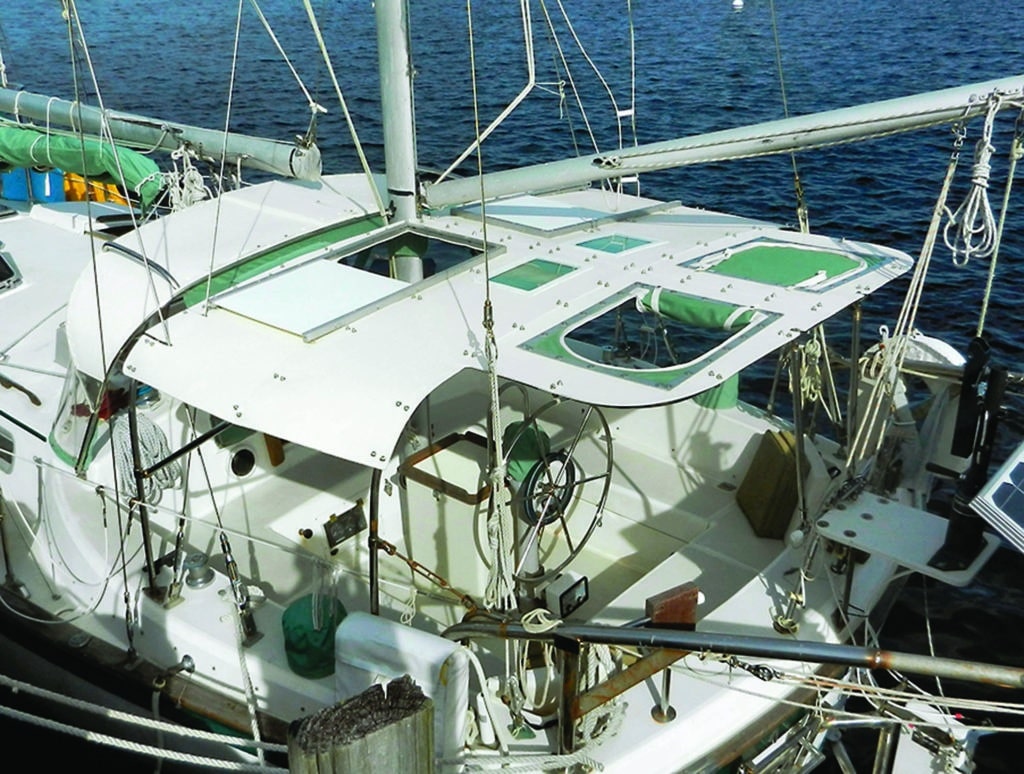
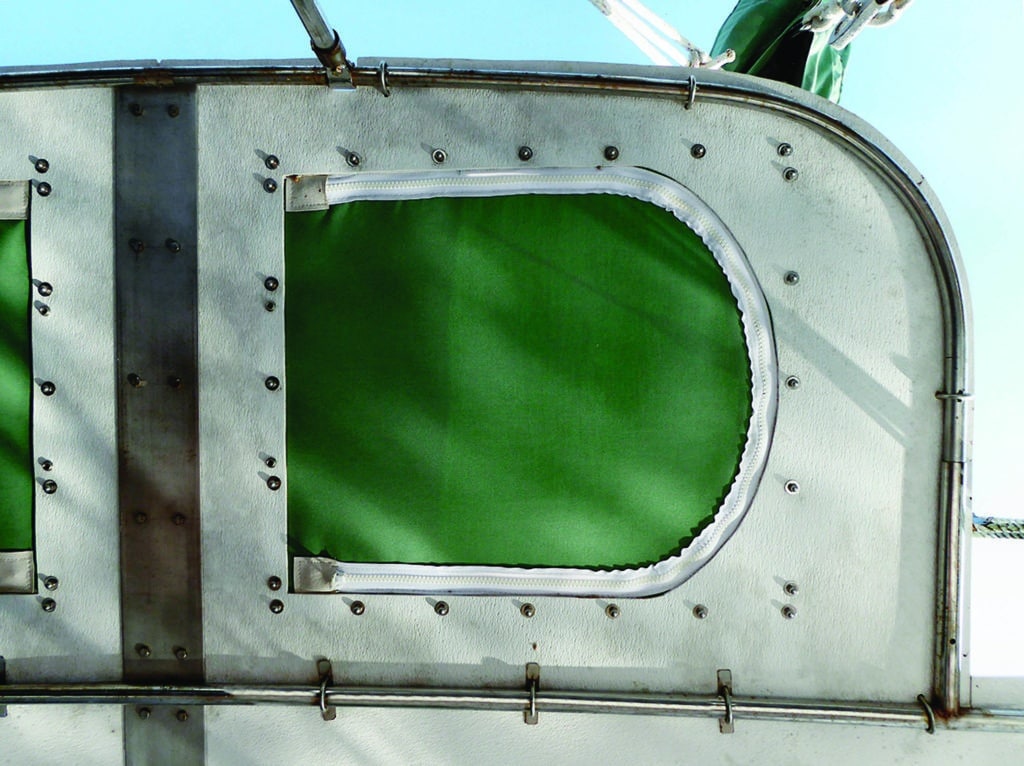
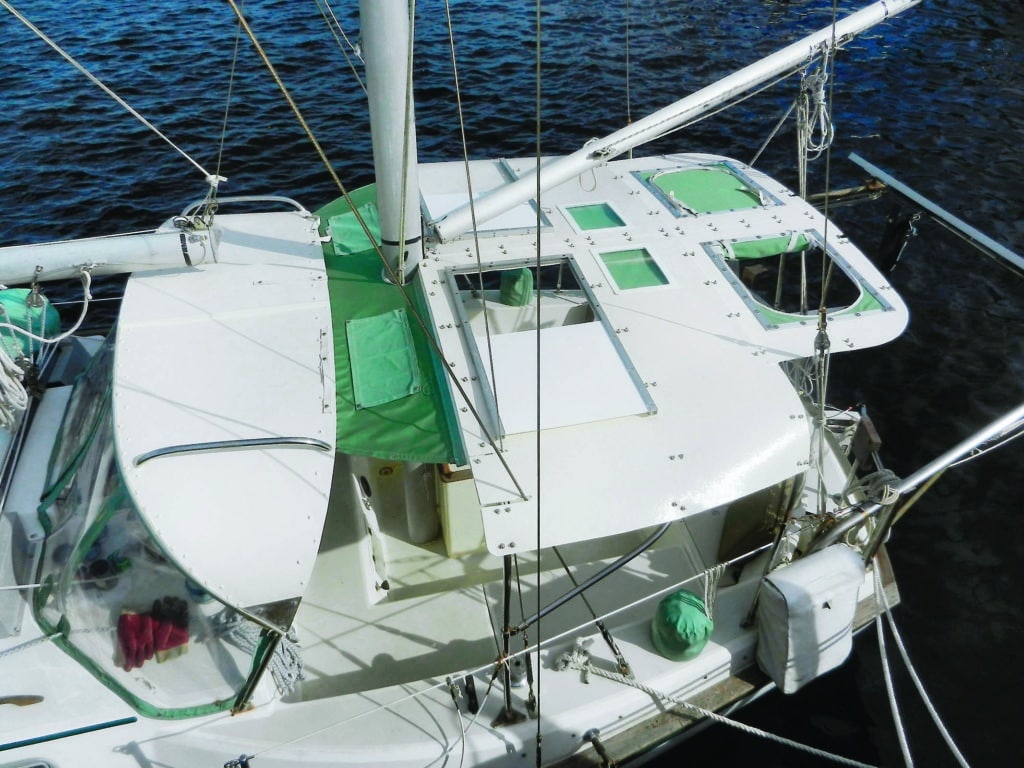
Because Silverheels is an aft-cockpit ketch, her bimini top was more complex to design and fabricate. To sail the boat properly, I need ready access to the mizzen boom and sail from the cockpit. This requires some kind of opening through the bimini top. I had accomplished this in my original Sunbrella bimini with zippered “hatch flaps,” and I incorporated them into the after-section of my new hardtop as well. But to cover the two forward access cutouts, I made a pair of low-profile sliding hatches. Of course, most cruising sailboats, not having a mizzen, won’t need access hatches, thus making their hardtop bimini much simpler, quicker and easier to fabricate.
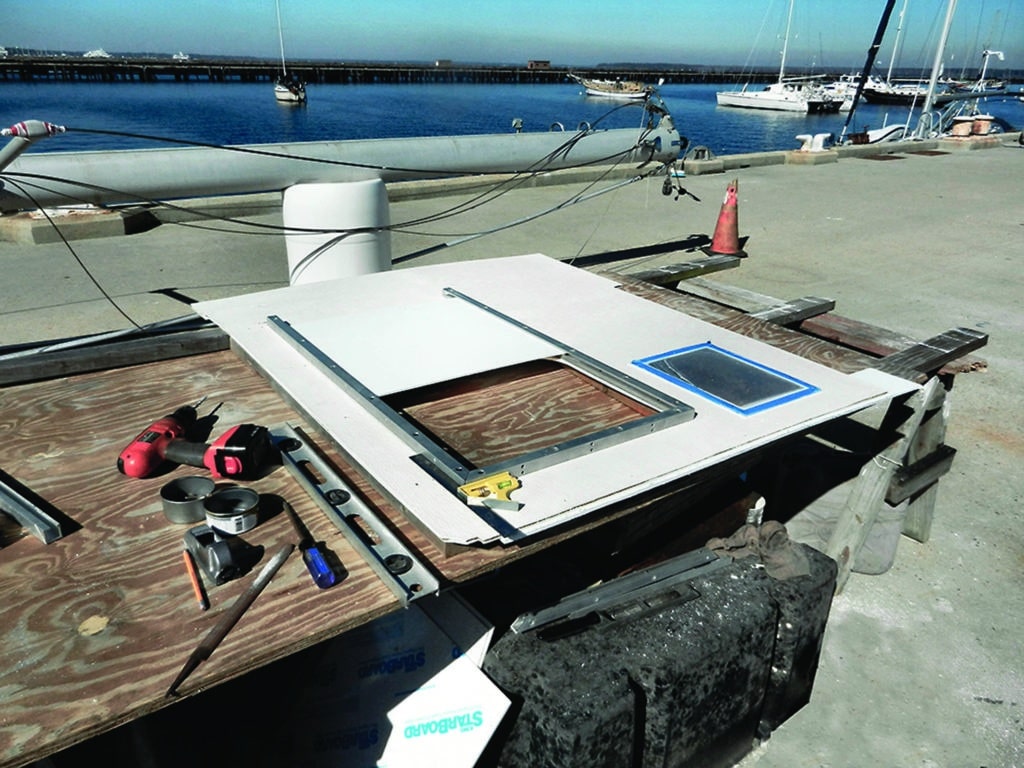
It made sense to laminate, cut and shape the bimini panels on a temporary dockside workbench instead of in place on their frames (as I had done with the dodger), and this time I fastened them to the frames with U-bolts rather than self-tapping screws. Because my boat’s cockpit is wider than a single 8-foot panel would cover, I had to use port and starboard sections, seamed in the middle, which necessitated a stainless-steel “backbone” for the center joint. There are also two smaller panels aft, shortened to leave room for Silverheels‘ mizzenmast’s running backstays.
Laminating the panels on the broad, flat pier was quick and easy. However, fitting the bimini entailed several dry runs, each time refining the fit and features on the frames and then removing the pieces to the workbench for execution, where I also painted them and installed the “sail view” windows just prior to the final installation. Once it was all bolted down, a bead of bedding compound sealed the center seams. An awning track along the forward edge holds a zipper for a Sunbrella filler piece that connects the dodger top to the bimini top in wet weather. Still to come are a gutter for rain catchment along the bimini top’s outboard edges, and perhaps port and starboard solar panels on top. For boats that keep the spray dodger and bimini top up all the time, replacing the fabric with inexpensive, easy-to-work FRP panels is an alternative worth considering. It’s a simple, straightforward project that provides lasting benefits.
A longtime contributor to CW whose first article appeared in 1979, Tor Pinney is a writer, photographer, marine consultant and veteran cruising sailor with 150,000 nautical miles under sail. He’s also the author of the acclaimed reference book Ready for Sea! How to Outfit the Modern Cruising Sailboat. For more on Tor’s ventures, visit his website (www.tor.cc).