This month, we’re rolling out a new Sailing Totem series featuring hindsight intelligence from our massive refit, beginning with the forward head. Totem’s smallest cabin underwent very big changes and was a showcase for many of the decisions that would shape the refit overall.
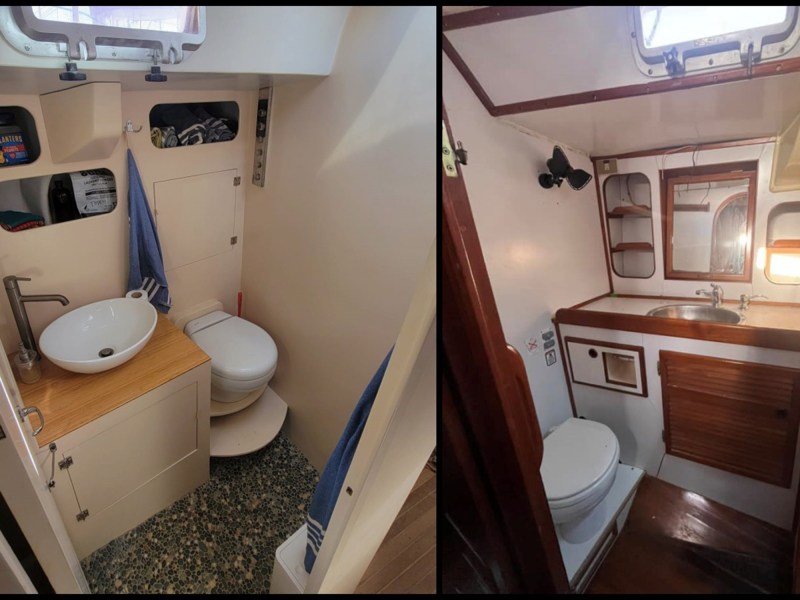
When we bought Totem in 2007, the forward head retained the traditional look of a white finish with varnished wood trim. We destroyed that early on for practical reasons: chainplate replacement, better storage and then holding tank migration. They were the right moves, but it was never an appealing space—until now, which goes to show how significantly a boat’s interior can be changed.
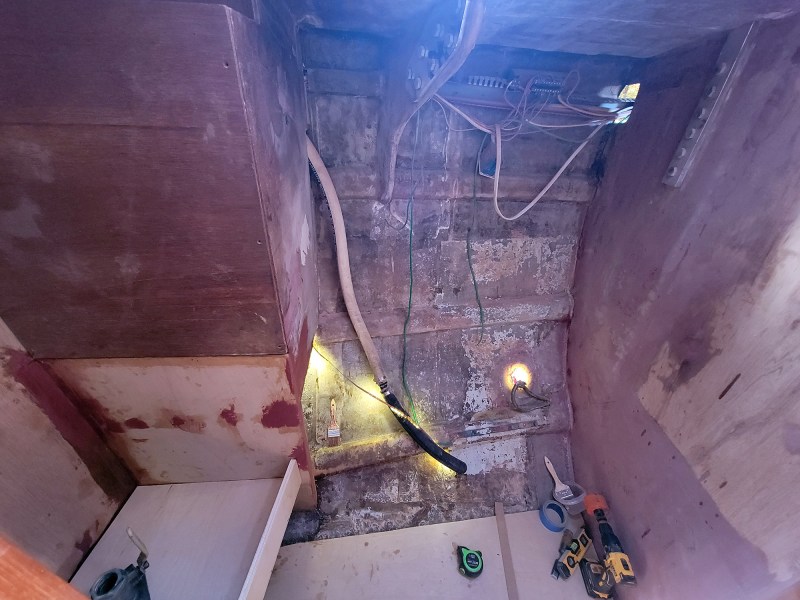
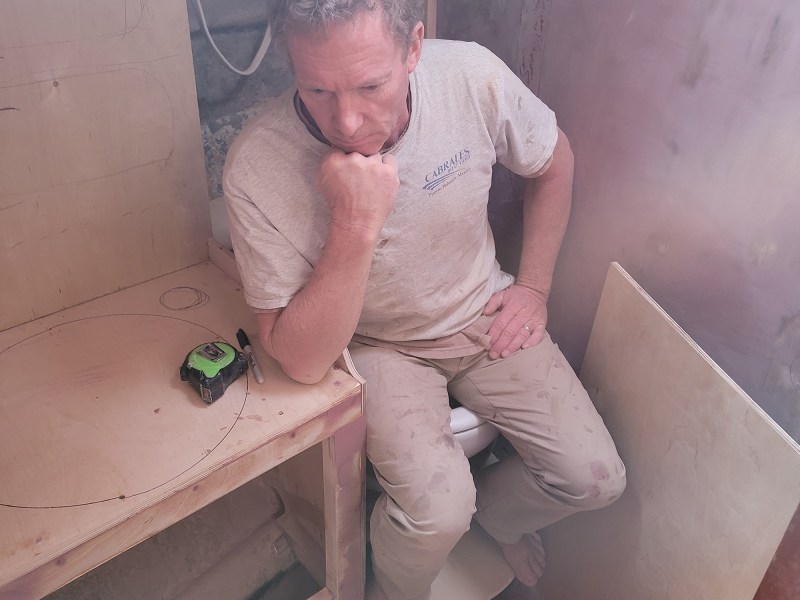
This started as a simple repair (this is a theme—the domino effect of a small project). The original sole was a fiberglass shower pan with teak grating, intended as a wet head. In early Totem days we removed the shower, but in its wet head lifespan, the seam between the pan and a bulkhead opened up. Water found its way through and rotted the lower portion of the bulkhead. The area was not visible nor accessible, but Jamie noticed small bits of rotted plywood in the bilge.
He cut a small access hole through the shower pan to assess, and, well, throughout the day it became a large access hole, followed by the decision to rip out the entire pan. A two-foot-wide section at the bottom of the bulkhead was dry rot. (Every boat has it, boss.)
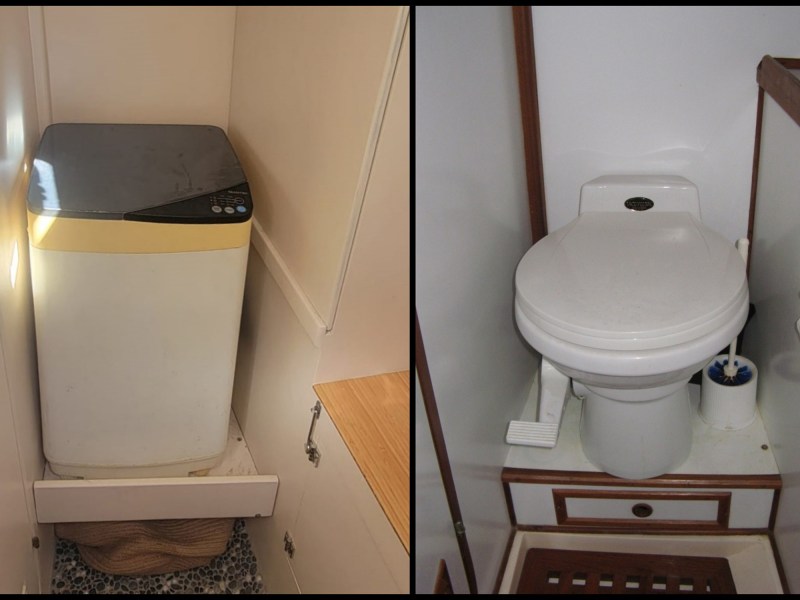
As he cut out the bad section of bulkhead to begin repairs, other possibilities rolled around his head: We could get rid of the 40-year-old cracked Formica. We wanted to decommission the old VacuFlush toilet and upgrade to a newer type, but it would need a new base. Why not move it from the awkwardly narrow location as well? The washing machine sat inside a locker; that placement could be better. Why not rebuild the adjacent vanity while updating that storage? Why not relocate the holding tank seacock that was barely reachable? Heck, why not just rebuild the whole cabin? In the end, only the holding tank (which we installed in Australia in 2011) remained in the same place.
Form and Function
It’s nice to have an appealing cabin after years of strict utilitarianism. It’s also more functional and more comfortable. The bulkhead was rebuilt in a way that no water can ever reach again. Stating the obvious, we made a conscious choice to move away from the wood-paneled interior look of a classic bluewater boat. I expect this will garner some hand-wringing from the traditionalists, and I don’t care. We love the clean, fresh feel and tones of the new finishes.
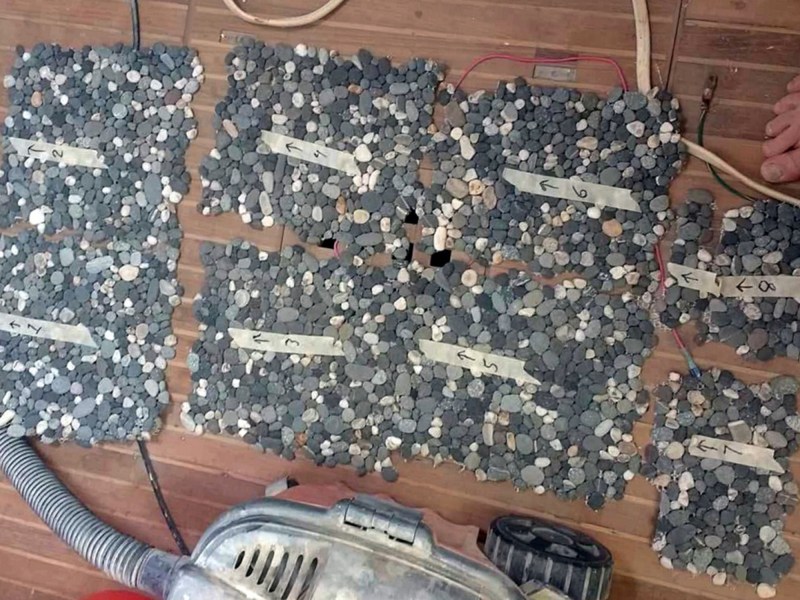
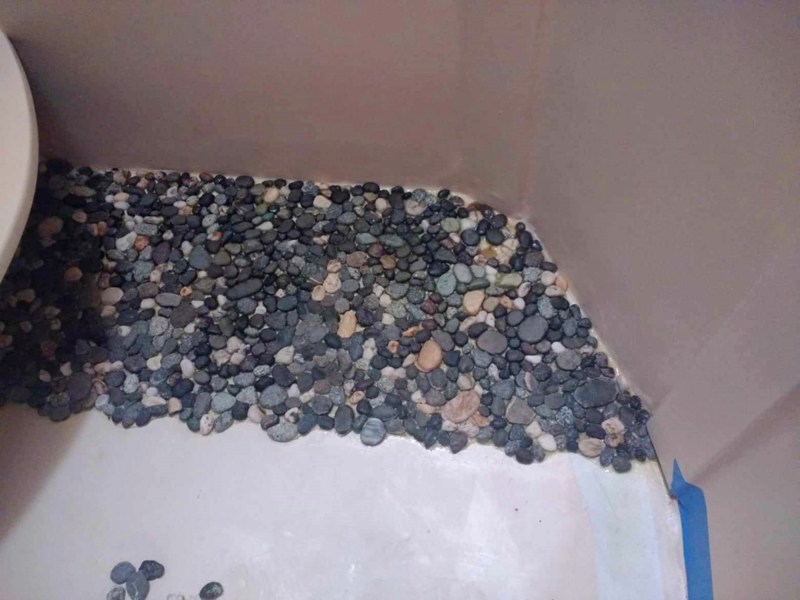
To counterbalance the loss of warm tones (still not missing the sterile white Formica), we looked for natural materials to bring back an organic feeling of warmth. A bamboo vanity counter and river rock sole fit the bill nicely.
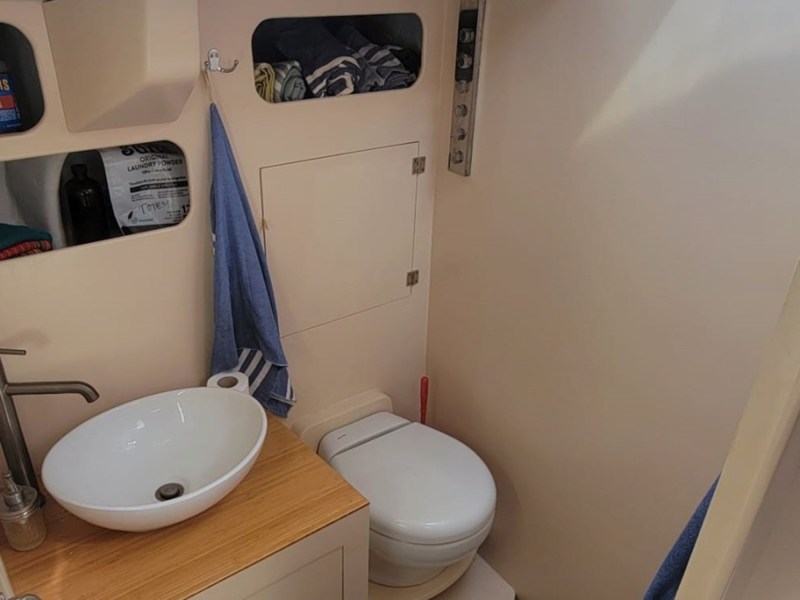
As for function, the new toilet location and orientation allows easier use while sailing. The washing machine is out of obvious sight and fits the small space perfectly. The existing vanity area storage is more accessible. The vessel style of sink—not normally a favorite—has the subtle benefit of less small counter space. And, it just looks cool!
Material Selection
Bamboo, for the vanity, was honestly a bit of an experiment. It had to be perfectly sealed, as any moisture will wick, stain and damage. Our fingers are crossed for now. We purchased it in plywood sheets from Cali Bamboo, saturated them in multiple coats of epoxy, then used a matte two-part polyurethane finish.
River rock was an unconventional choice for a boat. It feels incredible underfoot. Every time I set foot into the head now feels like a bit of reflexology therapy. To make the install easier, we purchased it in tiles designed to nest together from Pebble Tile Mosaics. They were set in epoxy, sealed, and a boat-friendly grout was applied.
We use AlexSeal for Totem’s hull, and we used the same for the interior. The goal was a durable finish that would feel almost like gelcoat for easy cleaning and permanence. What we didn’t want was the shiny look of a hull, though, which meant adding a lot of flattener. Warmer whites (the cloudlike Fleet White for the headliner, and the warmer toned Lunar White for the walls/bulkheads) give the space a homey glow. The folks at AlexSeal and San Diego Marine Exchange, where we purchased the paint, answered our many questions to achieve the look we wanted.
Product Selections
Toilet. Out goes the VacuFlush, in goes the Tecma Nano. We’ve used Tecma for several years in the aft head, and are impressed. Fresh water (and it doesn’t use much) means no smell. A composting head was never part of our consideration set, since the lone benefit for us is storage space by getting rid of a holding tank. Not compelling, especially when weighed against the tradeoffs. The head’s location changed in the refit. It’s now oriented so when seated you face across the beam instead of fore/aft. Much easier underway.
Sink. The Vitreous China Sink was an affordable (about $60) Wayfair purchase. With a 16-inch by 13-inch oval, opting for a vessel style instead of inset, the counter space was effectively increased, which makes a big difference such a compact space. The faucet is a household Delta model, and while it felt too expensive at nearly triple the cost of the sink, we had been frustrated by faucets and taps that failed quickly and we appreciated that the “guts” of these ones are better made.
Washer. Nothing new here. This is the same Giantex we’ve had since 2018, after finally graduating from the five-gallon bucket. We’ve considered upgrades, but this simple, affordable (we paid around $200) machine has been great. Check out our washing machine discussion for ideas here.
Favorites
I posted a list of reasons I love the new head on our social media, and the response inspired a more detailed summary. So here goes. A few things stand out: First, how clean this looks, even with the open cubbies. Okay, don’t laugh about the peanuts on that top cubby. That container is actually holding kibble for our ship’s cat, Panchita. Her toys, treats and first-aid kit occupy part of the storage locker behind the head.
I finally embraced a feeling of settling into our home again while rolling up a new set of Marmara’s Turkish towels. We treated ourselves to a new set when we moved back abaord, saying goodbye to the prior towels we’ve had for eight years. Fringe-less, this time. For me, hanging a bath-sized towel by the door and a hand towel by the sink was that moment. If you’d like to support small businesses like Marmara, and their yummy, soft organic towels, we highly recommend.
So, what’s missing? Well, the space could use a little more personalization—some artwork, especially. I have a couple of favorite prints that I’m really tempted to put in the head, but I’m afraid I won’t see them often enough. Maybe the right piece will become apparent while wandering a market here in Mexico; something to remind us of this country we’ve come to love.
Reality Check
The understated material, which is not visible and yet we couldn’t have done the refit without, was epoxy. Jamie’s preferred brand is West System, and he sure went through a lot of it—around 38 gallons for the entire refit. He used epoxy and fiberglass to rebuild the bottom of the rotten bulkhead: epoxy thickened with colloidal silica to fill holds and filler inside corners; epoxy thickened a little with easy-to-sand fillers to saturate every interior wood surface to make it waterproof, tougher and prepared for paint. Where there is epoxy, there is sanding—so much sanding—which required sandpaper, respirators, and two overworked random orbital sanders for one very tired sailor who would much prefer to be sailing.
Jamie is very clear about one thing: that he’s not planning to do a refit of this scale ever again.
What do you like about our refit and the changes to this cabin? Got ideas for what to add in our sparse head? Let us know in the comments!
Don’t miss our March TOTEM TALKS, with a special guest!
Notice how I dropped that mention of our cat’s first-aid kit above? We’ve recently been lucky to connect in person with Dr Sheddy, the cruising veterinarian of Vet Tails. She’s been aboard S/V Chuffed for seven years, bringing free health care to animals along the way. (To be honest, I’d never thought about a first-aid kit for a cat, but, as it turns out, of course we need to.) She’ll join us on Saturday, March 30 at 9am Pacific/Noon Eastern to tell stories from her cruising adventures as well as share some highly practical information about taking care of a pet aboard. Register here, and feel free to send questions in advance!


