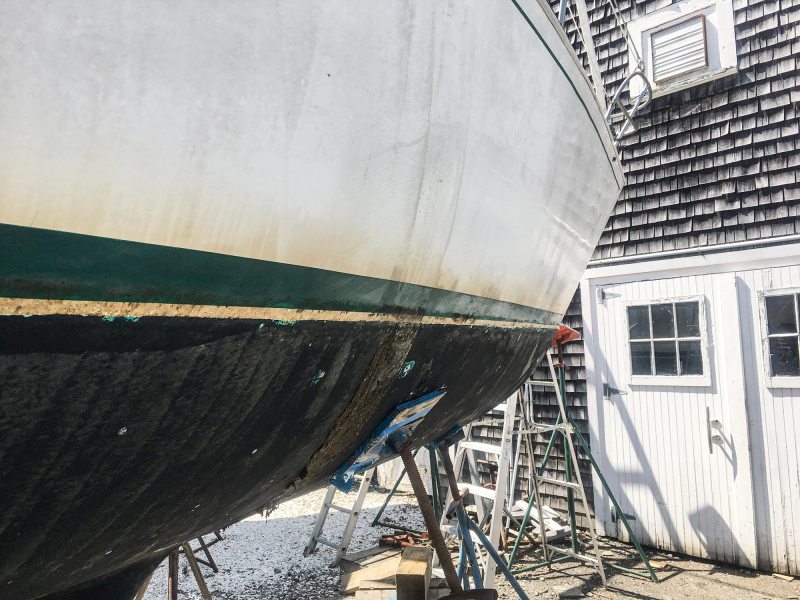
After spending back-to-back intervals of a couple of years with us living aboard between haulouts, the white hull of our 1978 Sabre 34 began to look a bit worse for wear. Oxidation on the gelcoat gave the boat a drab finish and, to make matters worse, try as we might to keep after it with scratch pads and detergents, a dull yellowish-orange stain clung to the area just above and below the boot stripe.
In the winters, we kept the boat at a marina in Newport, Rhode Island, where we had ready access to fresh water and electricity, but come spring, work and weather often conspired to keep exterior maintenance to a minimum. Sure, we made feeble attempts to wash, wax, and use an electric buffer to polish up the hull, but working from the dock or from an inflatable just didn’t seem to set things right. And then, soon as you knew it, mid-May arrived, and we had to be off the dock and out on a mooring for the summer. It’s tough to run an electric buffer at a mooring.
In the end, we decided that we had two choices if we wanted our boat to look shipshape again: Paint the topsides or do a proper haulout to restore luster to the gelcoat.
In recent years, a number of good coatings have made a do-it-yourself paint job a realistic option. A dock-neighbor couple took this route, and after a short spell on the hard that included rolling and tipping with a good-quality paint, their boat reappeared with a mirrorlike finish. It was gorgeous.
As good as it looked, though—and as persistent as my wife was that we should do the same with our boat—I was determined to give the original gelcoat one more chance. Once you paint, I reasoned, you’re committed to paint forever. And even the best paint ages. Aside from that, it’s susceptible to scratches and chafe from lines and fenders, and it can be hard to blend in repairs if they’re required. Gelcoat, on the other hand, is rugged stuff, and white is an easy color to match if the finish gets scratched or dinged.
So, in the end, I decided to go the elbow-grease route and see where it would get us.
Let the Fun Commence
The following spring, once we were on a mooring we’d rented from a boatyard on the other side of Narragansett Bay, I waited for their parking lot where boats were stored to clear out so that we could haul out and spend a few days in an out-of-the-way corner. In the meantime, I began to amass supplies so that we could get to work as soon as the Sabre was secure on jack stands.
The first order of business was to decide how to proceed and just how deep to jump into the project. Gelcoat, after all, is a relatively thin layer of resin that is sprayed into a boat’s mold at the start of the layup process. The trick to restoring its luster is to scour it enough so that it’s clean and shiny, but not use excessive abrasives that will wear it out.
In the past, we’d tried hand-polishing the hull with several one-step products that combine a mild abrasive with wax. They worked OK in places, but I couldn’t say that the hull shone when we finished.
On the other hand, the oxidation wasn’t so severe that you came away with white dust every time you touched the hull. Had that been the case, we may well have wanted to resort to wet sanding, starting with, say, 300-grit paper, then working up to maybe 800- or 1,000-grit (or higher) sheets before compounding and polishing.
Instead, I chose a more modest approach with 3M’s Marine Compound and Finishing Material, thinking if that didn’t work, I could always go back and try a stronger cutting compound. To apply the material, and later wax and buff the hull, I bought a variable-speed electric polisher and a variety of foam and wool polishing pads.
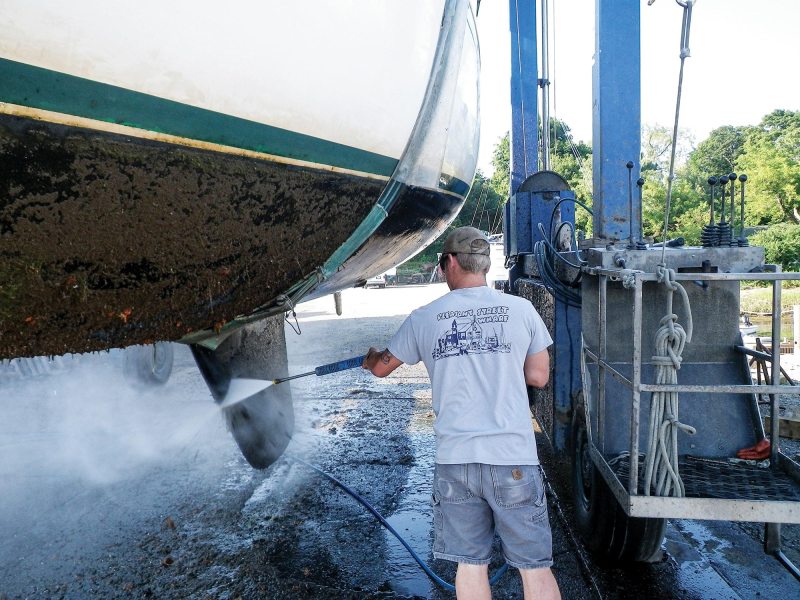
Once the boat was out of the water, pressure-washed and set on jack stands, I set up staging using a plank set on the rungs of a folding ladder, as well as a stepladder that was tall enough to reach the deck.
The first step was to wash the topsides from stem to stern using a scrub brush, sponge, and bucket of water and boat soap. This soap is designed to release dirt and oil and to wash off without leaving a residue—and it’s kind to the environment. I took my time and worked in sections, scrubbing and then rinsing the hull with a small electric pressure washer.
Next, I attacked the remaining stains near the waterline with Star brite Instant Hull Cleaner. I love the stuff. It’s a mild acid that you can apply with a sponge (be sure to wear rubber gloves). Wait a few minutes, hit it with fresh water from the hose, and presto, the hull is clean.
For rust stains around the fasteners of our stern ladder, and on any persistent blotches elsewhere, I used a paintbrush to apply a coat of MaryKate On & Off Hull Cleaner. It’s a stronger acidic solution; you definitely want to be careful with the stuff and not get it on your skin. But it works great, and again, all you need to do is use a hose to wash it off.
Polish Makes Perfect
Once the hull was clean, I was ready to go to work with the variable-speed polisher and rubbing compound. As much as possible, I tried to work in the shade, partly to escape the early-summer heat, but also to keep the compounding material from drying out too quickly.
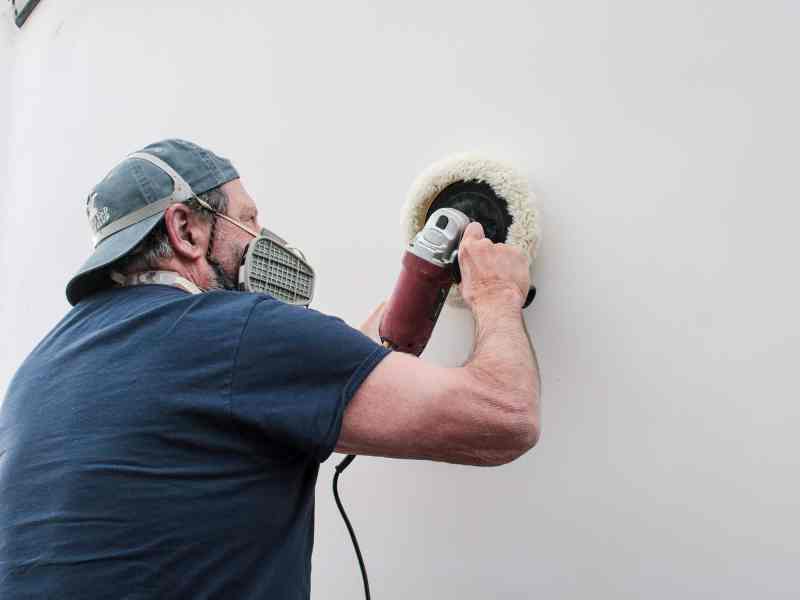
I set the staging so that I could hold the polisher somewhere between chest and head high, and planned to work in small sections at a time. I kept a spray bottle with water handy and occasionally lightly misted the area to extend working time. I would run the polisher at as high a speed as felt comfortable, moving it from side to side and up and down to avoid swirling or, worse, burning through the gelcoat. Whenever the polisher was running, I made sure that I had on a respirator to avoid breathing in the abrasive dust.
I experimented a bit, applying the rubbing compound by squirting it in small amounts from the bottle and dabbing it on with a sponge. I’m not sure if I ever decided which was the more efficient technique. As I worked each area, I kept the polisher going until I could see the hull shine and any hazing disappear.
I quickly learned to take care and slow down the polisher near obstacles. The machine has a lot of torque and can suddenly reveal a sinister mind of its own if your attention wanders.
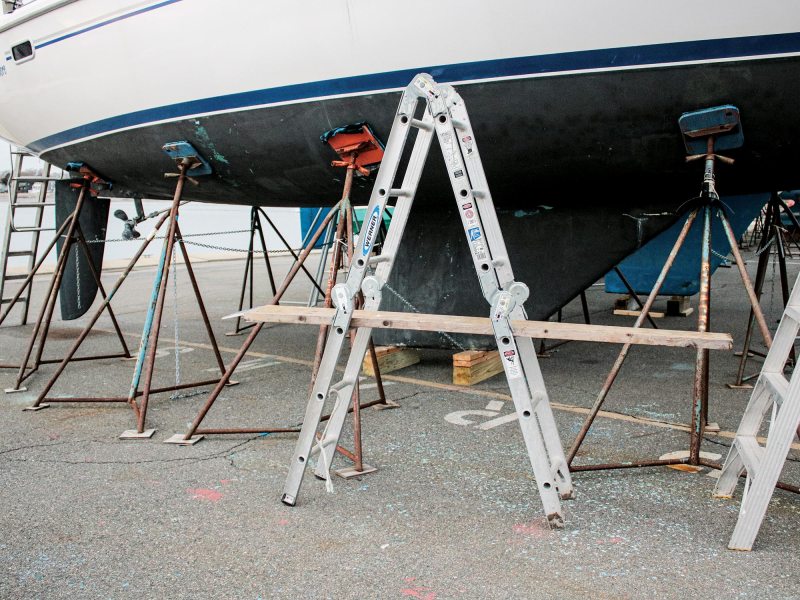
Frequent repositioning of the staging was necessary, and I needed to adjust the height of the plank as I went if I wanted to avoid holding the polisher overhead. It’s a relatively light tool, but it felt heavier and heavier as the hours passed. One trick I found helpful was to position the folding ladder ahead of me so that I could slide the plank onto its two rungs and drag them forward together before repositioning the stepladder. It was a relatively slow process, measured in feet per hour, making me glad I had a 34-footer and not a 50-foot yacht.
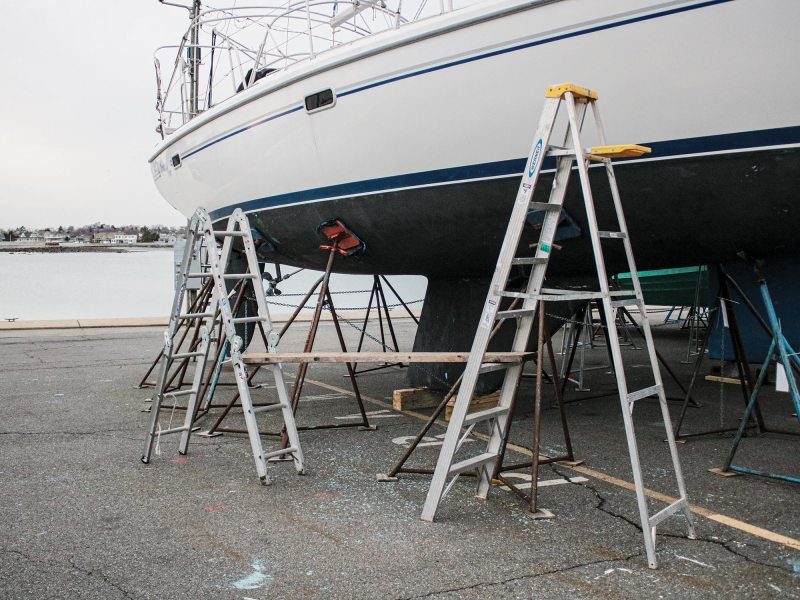
In the end, it took about a day to cover each side of the boat, and a few hours more to spruce up the transom.
Well-Waxed
Before applying wax, I took time to walk around the boat and look for any remaining smudged spots. Using just the stepladder, I went over any area that still looked hazy with a little more compound and the foam pad and polisher. Then it was time to begin the final step of applying a coat of Meguiar’s Marine Paste Wax.
For the record, I did not pick the wax for any particular reason other than I had a sample can of it on hand. I believe when it comes to picking a wax, the “to each his own” rule applies. The best advice I could find online was to pick a marine wax, one that’s designed to seal and protect the gelcoat.
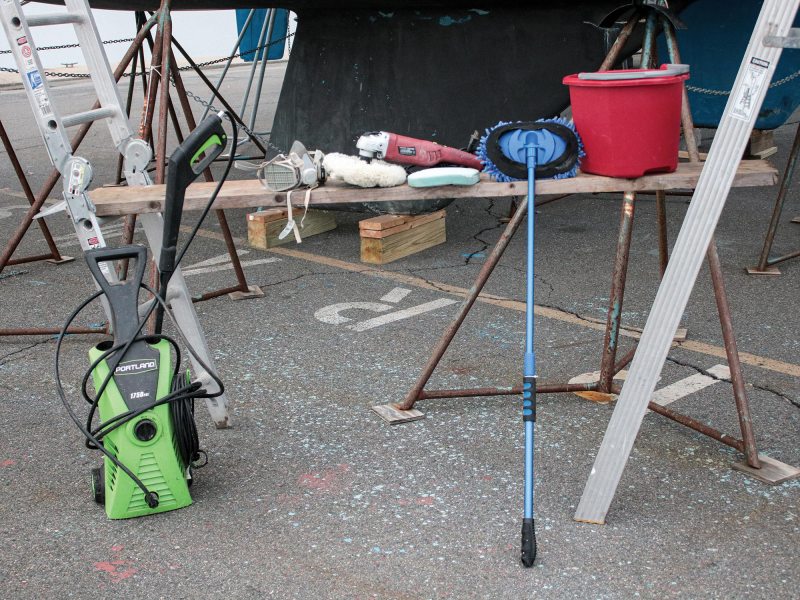
Once again, I set up my makeshift staging to hold the electric polisher about chest high. To begin, I used a wax applicator pad to apply the paste wax, rubbing it on in a circular motion. After applying a few feet’s worth of wax, I went back to where I started, and once the wax had dried, I grabbed the variable-speed polisher, now equipped with a wool polishing pad. It buffed the surface to a smooth shine.
Just like compounding, it was slow-going. For yuks, I tried using a random orbital buffer I’d brought along for backup. I can’t truly say which was the better tool; they both felt pretty heavy by day’s end.
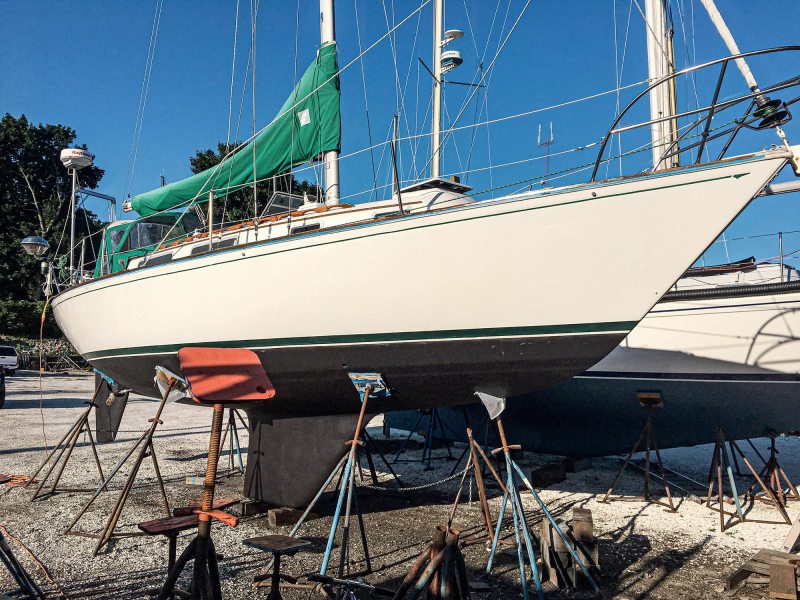
But the work was well worth it. On the last night in the yard (yes, we were staying aboard the boat on the hard, my wife working on her own set of haulout chores on deck and down below), we stood by the boat as dusk settled in, sipping cocktails to celebrate the tasks we’d completed. In the glow of the streetlight, the buffed-out hull shone.
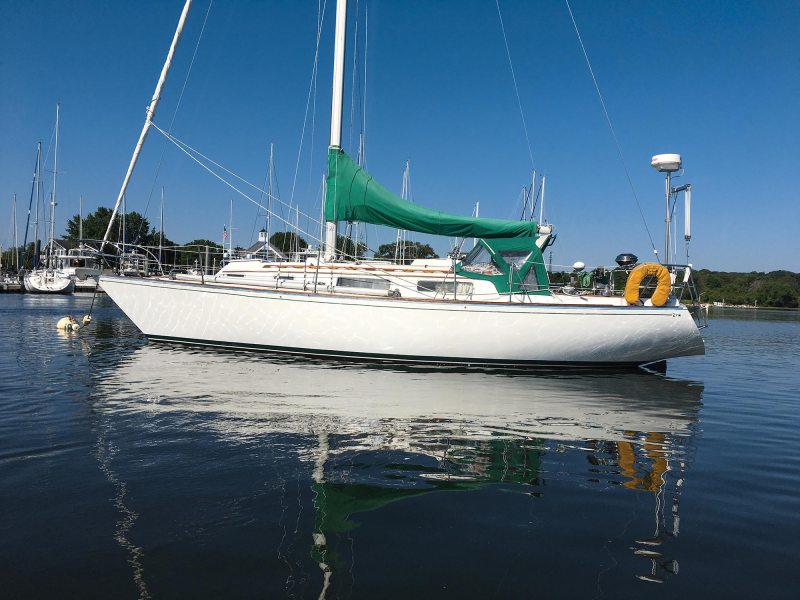
Better yet, early the next evening, with the sailboat back on its mooring, we took an inflatable ride as the sun sank low. Returning to the boat, we couldn’t help but notice the reflection of the waves dancing along the hull. The way a sailboat should look.
Mark Pillsbury, Boat of the Year judge and CW editor-at-large, is a die-hard sailor who has owned a number of sailboats, including a Sabre 34, on which he lived for 15 years.


