It was during a periodic evening visit to my schooner, Britannia, floating quietly in her cozy dock in New Bern, North Carolina, that I heard the bilge pump running more or less continuously. The float switch was activating it in the lowest part of the bilge.
There was obviously a water leak somewhere, probably within the complicated plumbing or the air-conditioning cooling pipes. This kind of problem happened periodically, and I was not too concerned.
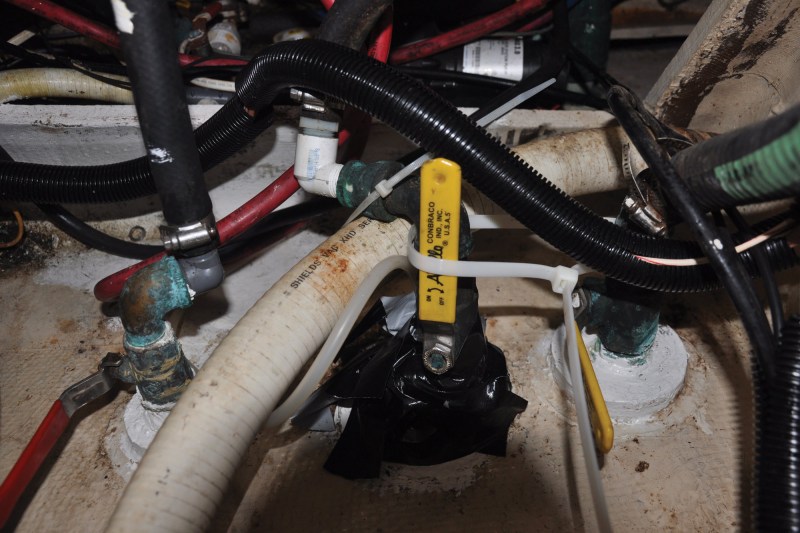
After a few minutes, though, I had traced the gushing leak to the seacock feeding the pump for the twin AC systems. The seacock is in the center of a row of three, about 30 inches below the waterline. Water was spouting through the reinforcing caulk below the valve itself.
Now, I was concerned. The leak was below the closed ball valve. That is not a good place to have a leak, because closing the valve will not stop it. And the bilge pump was barely keeping pace with the increasing inflow.
The valve stem was encased in solid calk that had somehow split. I pressed the valve with my hand and the flow diminished, but it immediately increased when I released the pressure. I tried to wedge in a piece of wood but it kept slipping off. I succeeded in stemming the flow a little by wrapping the valve with duct tape. I also had the usual assortment of tapered wooden bungs, but I was afraid to disturb the valve in case it broke completely off, and I didn’t have a bung to fit into the gushing hole.
The obvious answer would be to shove a bung into the seacock from the outside of the hull. Using the boarding ladder, I slid into the water directly opposite where I thought the seacock was located, but I couldn’t feel the opening. I couldn’t find the hole.
Fairfield Harbour Yacht Club has an emergency help committee, and as the word went out, two members brought portable pumps. My friend George Stateham’s opinion was unequivocal: “Get a diver over here quick to fit a bung properly and stop it. Then you will be able to remove and inspect the inside fracture.”
Kirk Hathaway arrived half an hour later. He’s a diver who brought a handful of bungs in different sizes. “All of these are too big,” he ultimately said.
I only had one more, which I thought would be too small, but it fit perfectly. The inrush stopped, and I could start breathing again.
With the temperature inside the boat at 95 degrees and no way to run the air conditioning, I went home and drank a stiff scotch instead of sleeping aboard to keep an eye on the temporary fix. Early the next morning, I was pleased to see that the area around the valve had completely dried out.
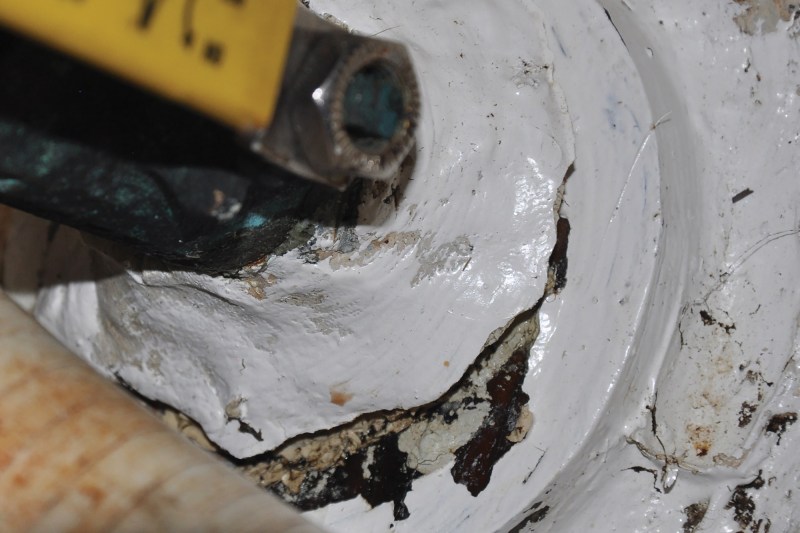
I carefully cut off my crude duct-tape bandage and removed the pipe to the a/c filter bowl. That maneuver let me lift the top of the valve off the through-hull stem. Amazingly, it took little effort to pull apart. Only the caulk around the rim had been holding it in place. If that caulk had let go entirely, the boat would have quickly flooded.
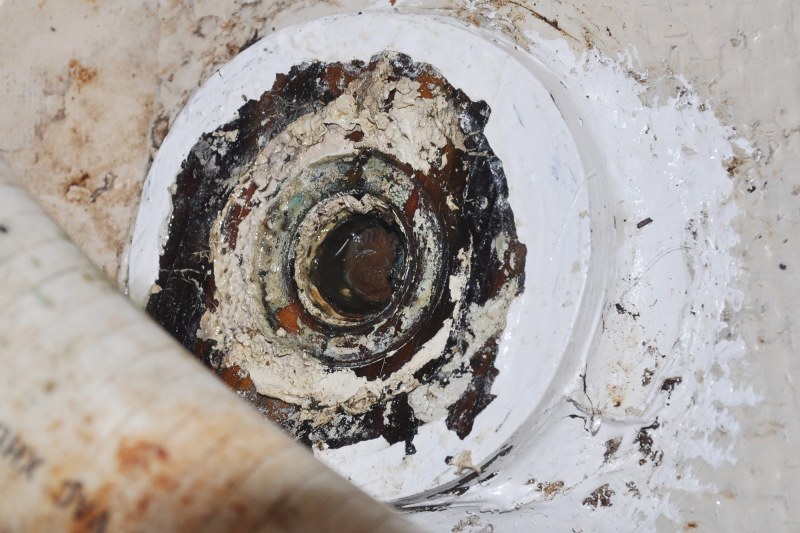
The threaded stem of the valve had sheared from the valve body, and I could see the end of the bung in the through-hull stem. It was dry. To this day, I still don’t know why that stem parted, because it was encased in hard caulk from the hull up to the valve to stop any possible vibration. And the stem was bronze, like the valve, so no dissimilar metal fatigue had occurred. It had just snapped.
With hindsight, if I had known the size of the bung that was needed, it would have been possible to yank the fractured valve out of the way and quickly hammer the bung in from the inside. That would have stopped the leak.
But, I could only go forward from where things had ended up. I didn’t feel entirely comfortable leaving the solitary bung in place for any length of time, and constantly worrying about it popping out.
Then I had an idea. Around the outside of the valve stem is a wide, circular, half-inch-thick wooden backing plate. It’s bonded to the hull to give extra thickness to screw a seacock together. I found a block of teak 2½ inches square and an inch thick, and I drilled a hole in each corner. I then coated it liberally with waterproof wood glue and screwed it down on top of the valve opening. This would form a waterproof seal to keep Britannia safe until I could get her lifted and fit a new seacock.
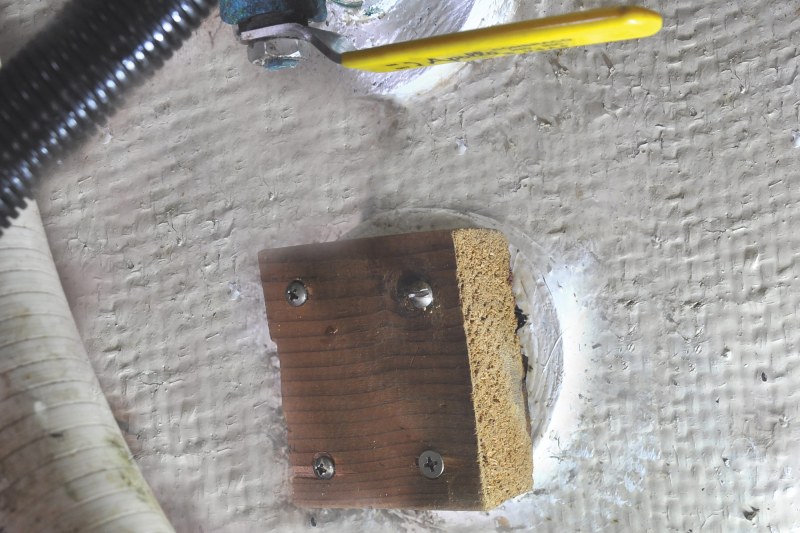
Additionally, I transferred the a/c inlet pipe to the generator seacock next to it, which enabled the a/c to be switched on. I never use the generator while on shore power, but I definitely do need the air conditioning.
The good news is that this incident occurred at a dock where a diver was quickly available. We should always be grateful for small mercies with boats.
With the help of the diver, I’m confident we will be able to replace the through-hull while still in the water, which if successful will be a very interesting exercise to report. (To be continued.) I also closely inspected the other nine underwater hull fittings inside and out.
There is now a bung of the correct size tied to every seacock. It is a small cost to assuage what could become an expensive seacock leak. the boat would have quickly flooded.