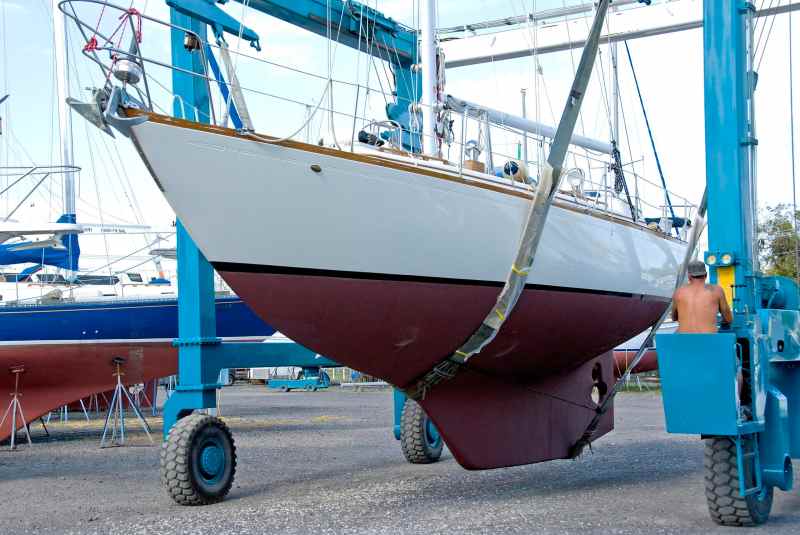
After 20 years and many thousands of miles, our 1961 Pearson Invicta developed some hull blisters. After fixing those, the hull remained solid as a rock until we sold the boat in 2010. We now know that a reasonably well-built glass boat will last more than five decades. We also have learned to expect some laminate deterioration in the outer layers of the hull below the waterline when dealing with “mature” vessels. When my wife, Nancy, and I bought a 1990 Mason 44, a thorough examination of the hull was the top item on the long work list we drew up to prepare the boat for high-latitude sailing. The first step was to blast off the thick layers of old antifouling paint. Once stripped, the hull sported several obvious bumps in the gelcoat. Opening them with a grinder revealed patches of dry laminate, but luckily, no foul-smelling liquid seeped out.
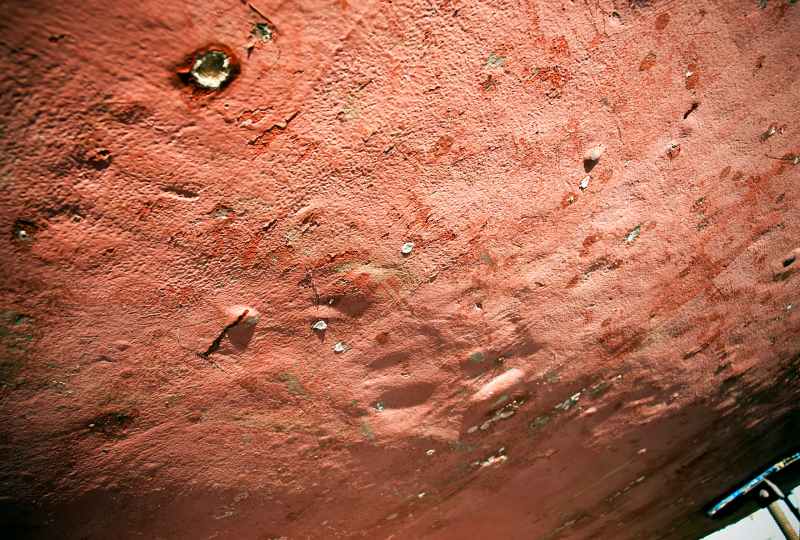
Many below-the-waterline issues on older fiberglass production boats can be traced to their original layup. First, the gelcoat was sprayed into the mold to ensure a gleaming hull. To guarantee an absolutely smooth surface, the builders next laid down a layer of random mat, which unfortunately was difficult to saturate evenly with resin. The builders could’ve employed better materials, like glass cloth or woven rovings, but those cause an unsightly “print out” in the finished hull. That’s why many owners of classic fiberglass boats end up with a hull consisting of a hidden layer of mat that’s full of dry spots unsaturated with resin. Over time, the aging gelcoat becomes permeable to water, and the unsaturated spaces in the mat may start blistering. With luck, this results only in small areas of dry glass. However, if the laminators were sloppy mixing the resin and hardener or the quality of resin was poor, the boat will suffer from the infamous weeping pox (see photo above).
Essentially, dealing with a deteriorated glass hull boils down to shaving off the rotten material—by blasting, machine peeling, or grinding—until the healthy, solid laminate is exposed. If it’s dry, coating with several layers of an epoxy-based barrier coat can prevent future problems—but remember: This job is harder than it sounds. Even then, you must determine the moisture content of the remaining glass; most boatyards have experience working with moisture meters or will call in someone who has. The hull must be completely dry before applying epoxy barrier coats. Leaving the boat on the hard will do it, even though, in the worst cases, this may take months, or the hull can be tented with dehumidifiers.
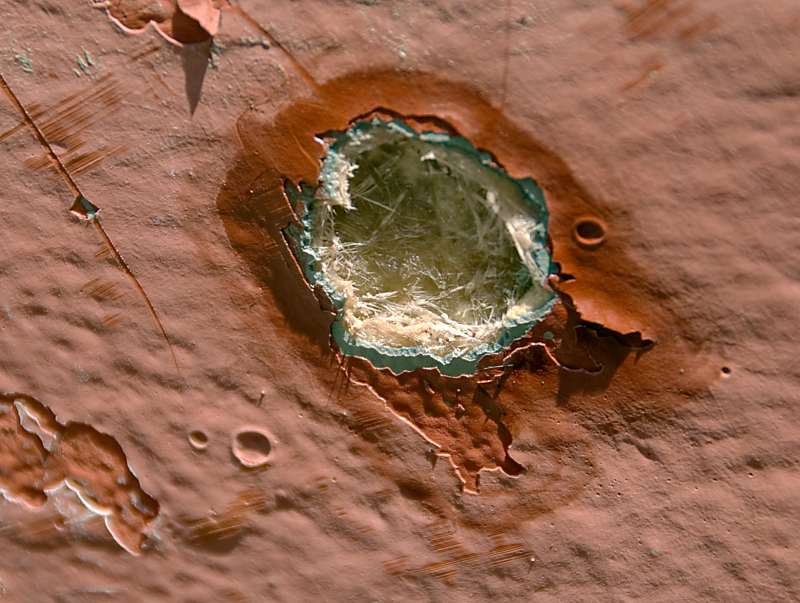
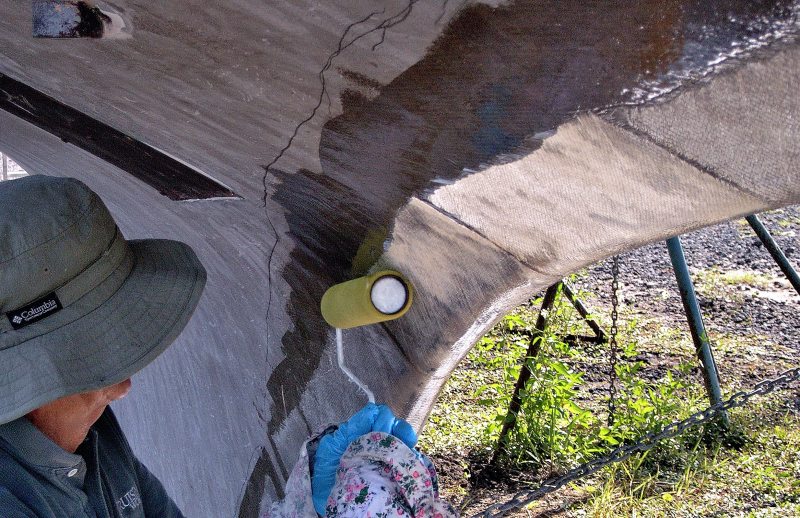
The photos above illustrate how we addressed the blistering issues we discovered on our Mason 44. If you find, after peeling the gelcoat, that a boat has a lot of blisters oozing smelly liquid, these should be washed repeatedly with high-pressure water. All blisters should be ground down to the solid glass layers. Once the hull dries, fill the small blisters with epoxy resin thickened with colloidal silica. Blisters measuring more than 2 inches in diameter should be rebuilt with fresh fiberglass.
The Mason’s hull, either by luck or due to sitting on the hard for several months, was dry. Before we rolled on multiple layers of epoxy barrier coating—which should protect the laminate from water for years—it was a good time to remove the gelcoat and find out what we really had on our hands. A guy with a peeling machine shaved the old gelcoat from the keel to the waterline. Now completely “bare,” the hull showed extensive areas of dry, unsaturated mat strands, and the peeling operation left slight furrows. The boat’s hull under the waterline needed some fairing.
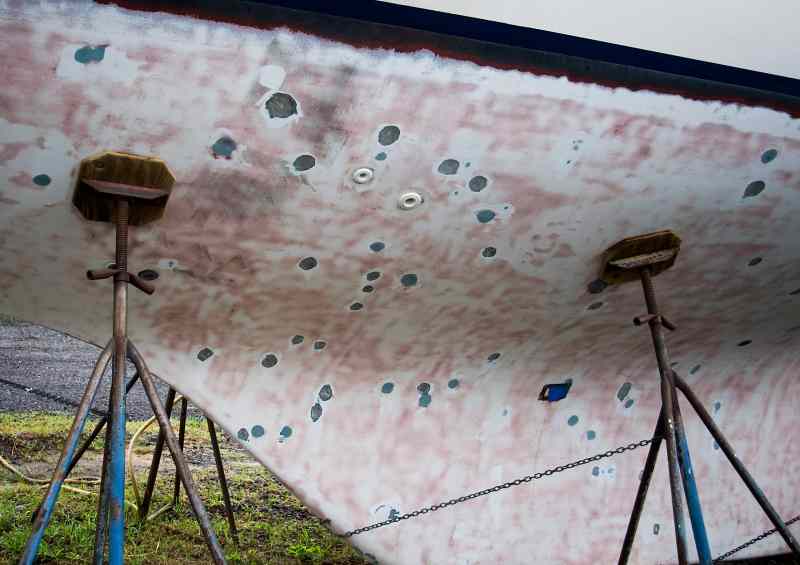
To protect myself from fiberglass particles, I zipped on a white Tyvek suit, put on a respirator and ear protectors, and went at it. Here I made the mistake of grinding with 5-inch discs of 36-grit sandpaper. I should’ve used a grinder capable of carrying 8-inch discs sitting on a soft pad. Better yet, I should’ve hired someone to do it. I did remove all the dry fibers but, due to the small disc, the surface still needed fairing. I troweled on epoxy resin thickened with colloidal silica, both WEST System products. This had to be sanded before rolling on coats of Interlux’s InterProtect 2000, an epoxy-based barrier product. First, I washed the surface with water and light detergent in order to remove the amine blush, a waxy film produced by curing epoxy. A 44-foot boat with a long keel, a 32-foot waterline, and a nearly 7-foot draft towered over Nancy and me like a cliff of cured epoxy as hard as granite. The task of fairing it all with orbital high-speed sanders, followed by wet sanding, took us three long days.
Rolling on the InterProtect 2000 doesn’t require sanding in between; we easily put two coats on in a day. However, the stuff contains some strong, nasty solvents, so we wore respirators and gloves. I followed the sixth coat with two rounds of antifouling paint. All that was left to do was to move the jack stands and block the boat higher to address the untreated spots.
The project, carried out in the Florida summer heat, took some stamina. I also added a bit of extra work for my own piece of mind and satisfaction. Many fiberglass boats, including ours, were built in split molds. After the hull was laminated, the mold had been opened sideways, leaving a visible seam that ran from the stem along the bottom of the keel and up to the sternpost. The builders had filled it with cheap polyester putty and sprayed it with gelcoat. Though it shouldn’t affect the strength of the hull, in our case the peeling process opened up this seam; with all the crumbling putty, it looked awful.
To rectify it, I removed the loose putty first and filled the gaps with thickened epoxy resin. Next, I covered the seam with a layer of biaxial cloth and epoxy resin right along the boat’s backbone, from the stem over the keel to the stern. It took a few more days of extra fairing and sanding, but it made me much happier, especially when I recalled past collisions with tree trunks at sea.
Removing a certain amount of the deteriorated laminate may seem worrisome. However, remember that the gelcoat and the resin-starved mat didn’t contribute anything to the strength of the hull. Early glass boats often had extremely thick hulls, and stripping the outer layers won’t affect the strength. Just because it was built a long time ago by a reputable builder doesn’t guarantee a good laminate job. It basically comes down to this: Who was the foreman of the glass shop? Should you need to dig deeper than the gelcoat and mat to reach the solid laminate, seek professional advice from a truly experienced surveyor or a respected boatyard foreman. Some beautiful yachts with great sailing qualities have had to be reglassed totally within 10 years of launching by owners dedicated to the design. On the other hand, many hulls never contract blisters after decades afloat. If yours isn’t one of those, this project to eradicate hull blisters should keep a yacht going strong for many decades.
Longtime Cruising World contributors Tom and Nancy Zydler have refit their Mason 44, Frances B, for extensive high-latitude voyaging. This article first appeared in the “Projects” section of Cruising World‘s April 2012 issue.
Sailboat Blister
Boat Blister 2
Boat Blister 3
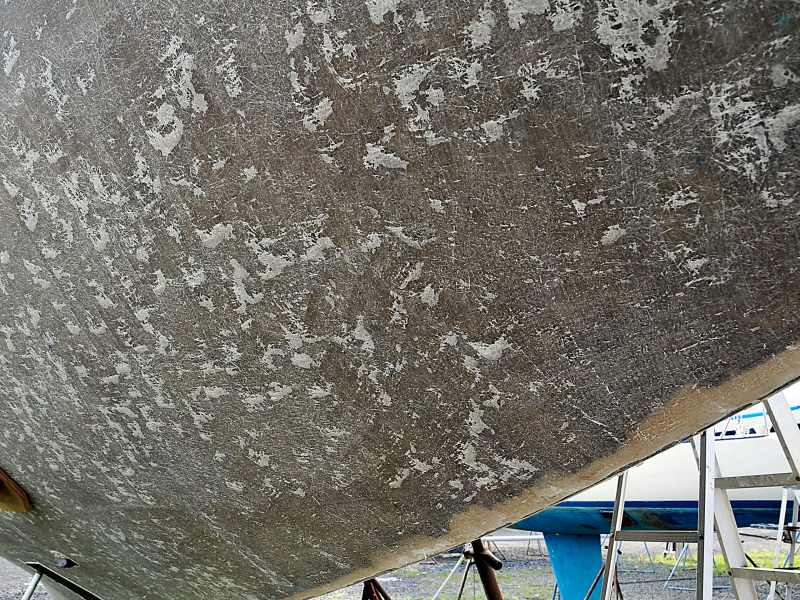
photo4.jpg

photo5.jpg
Sailboat Blister 6
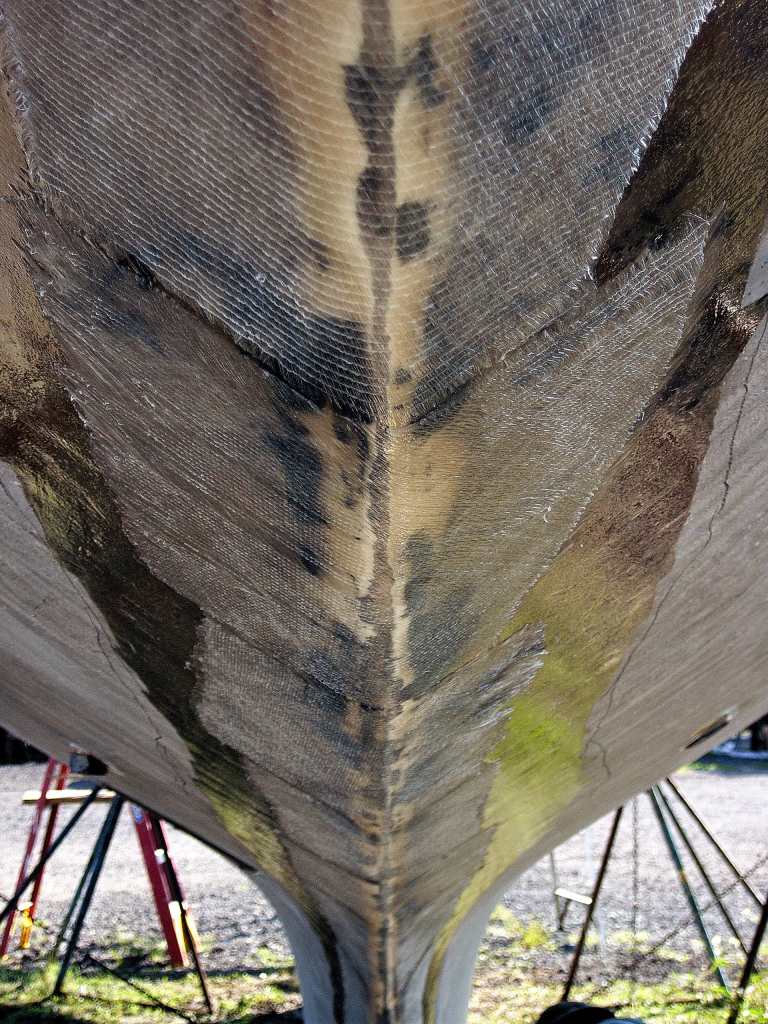
photo7.jpg
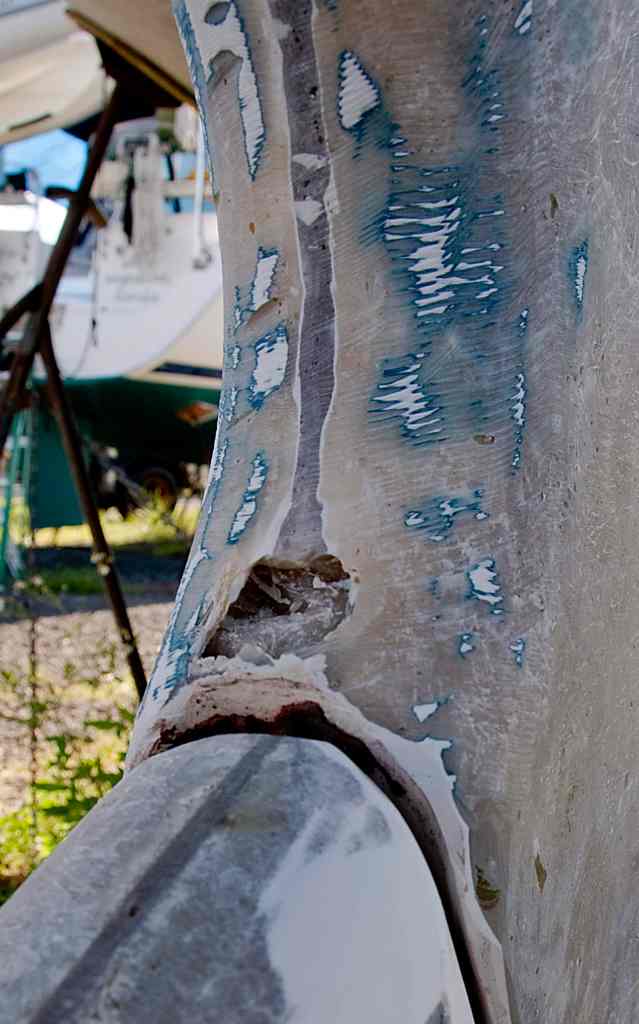
photo8.jpg
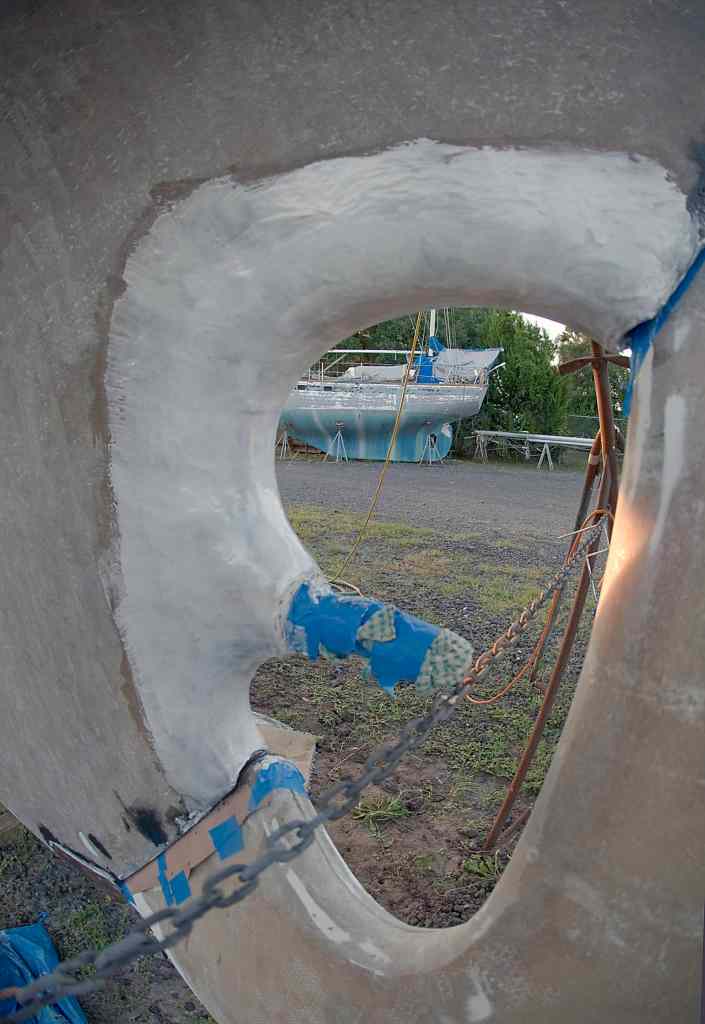
photo9.jpg
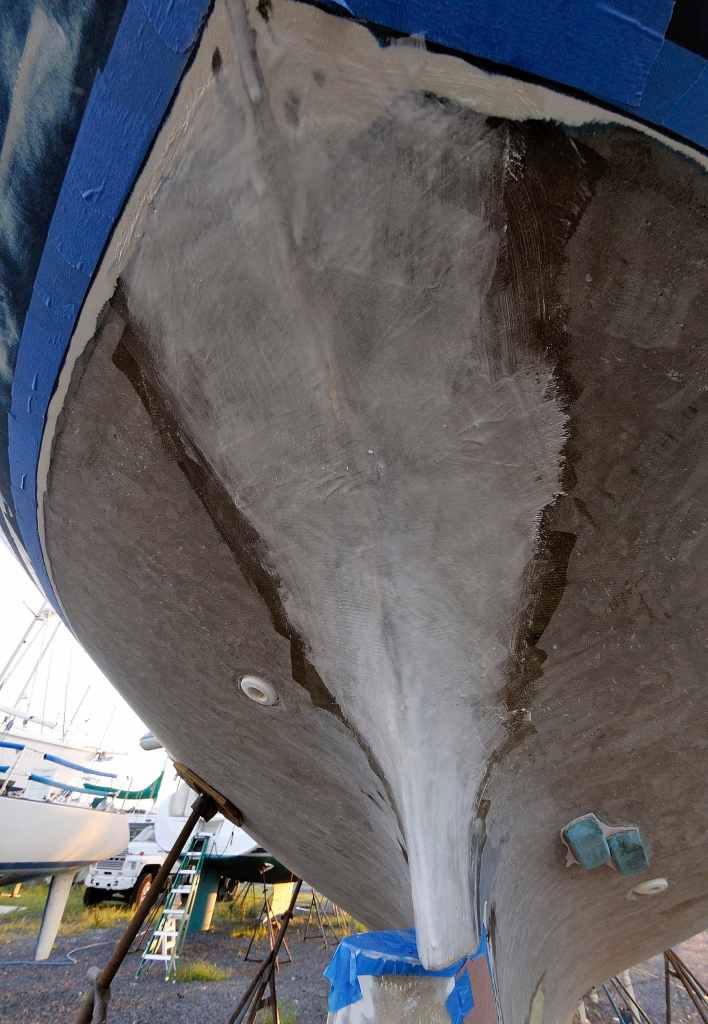
photo10.jpg

photo11.jpg
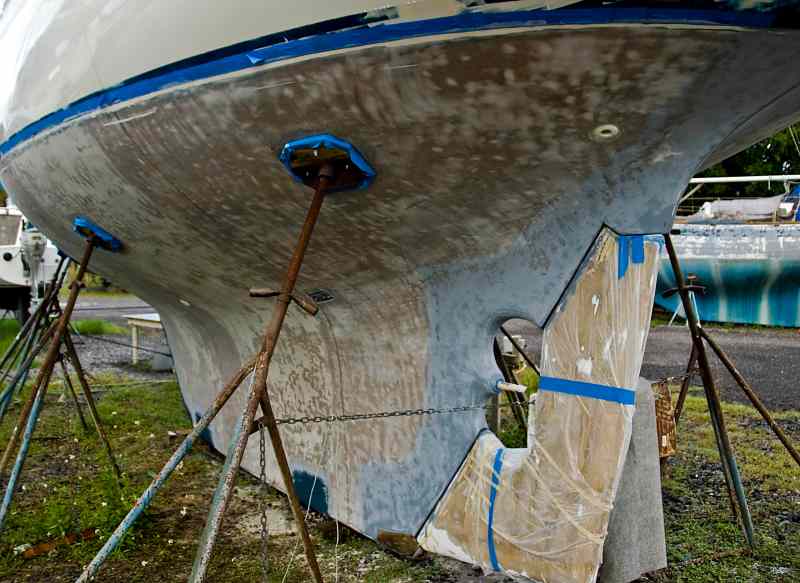
photo12.jpg
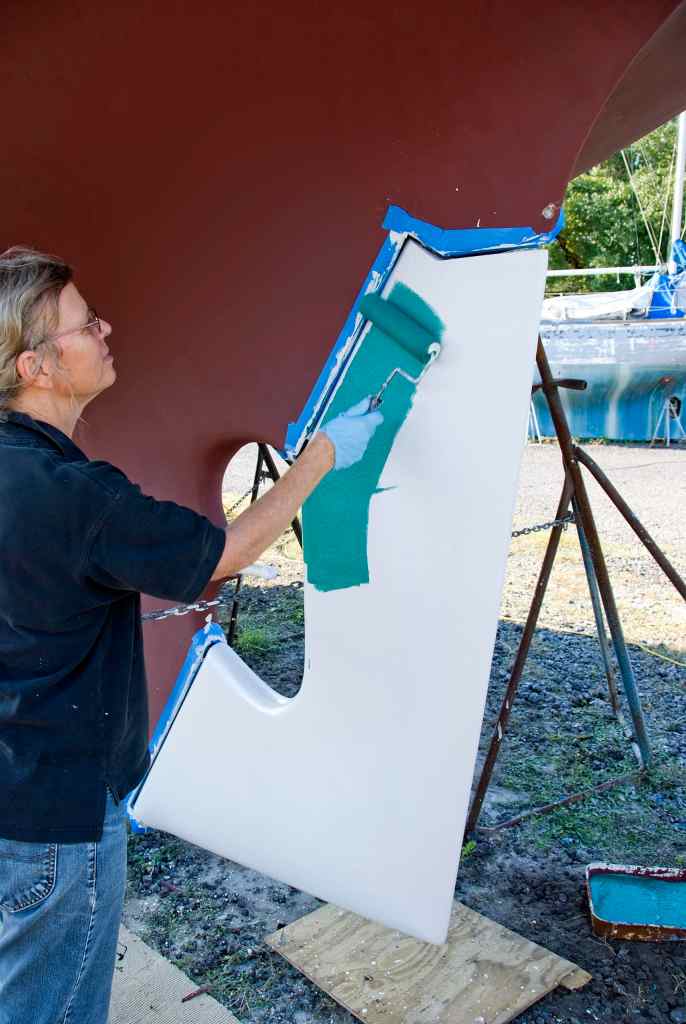
photo13.jpg
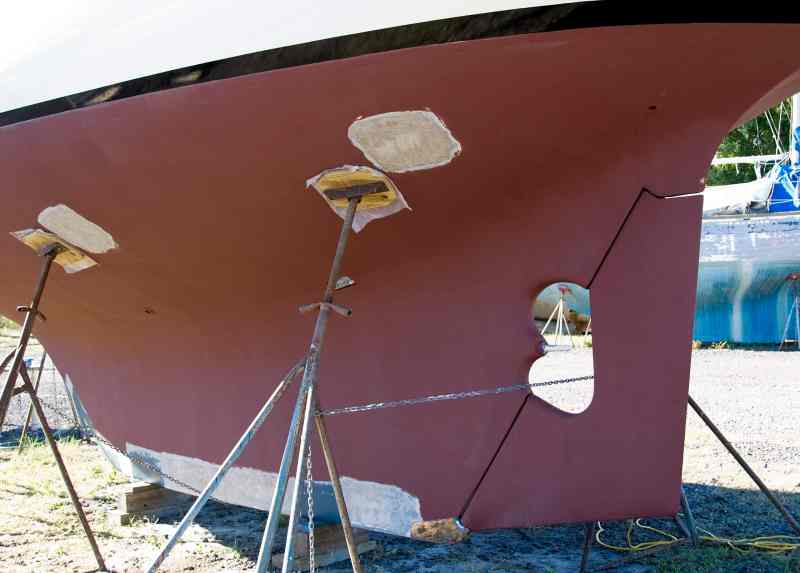
photo14.jpg
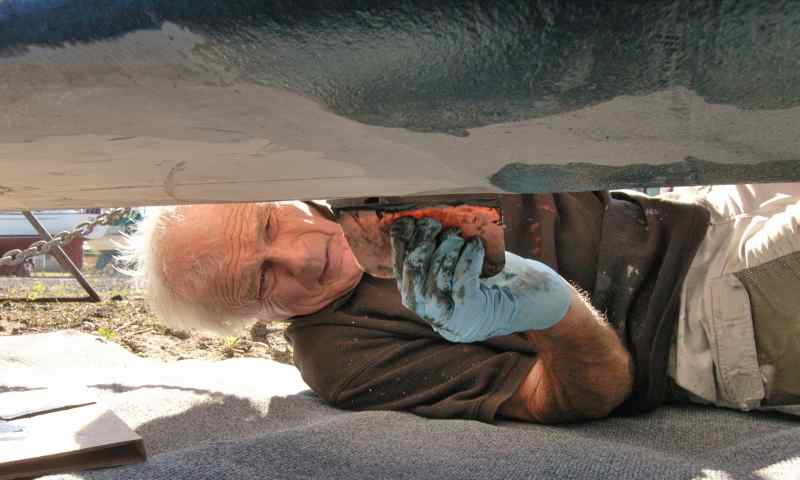
photo15.jpg