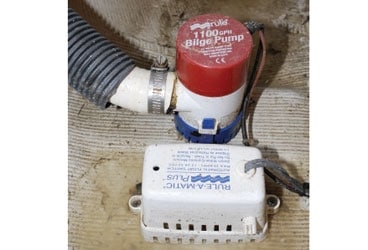
bilge pump 368
A hole with a diameter of 2.5 inches and located 2 feet below the waterline will admit nearly 200 gallons of water in a minute, more than 10,000 gallons per hour. This is a rate that no commonly used submersible bilge pump could counter. You may ask, “Then why bother with anything but a bilge-drying pump, a pump that’s used merely to remove small, nuisance quantities of water?” The answer to this question is simple: time.
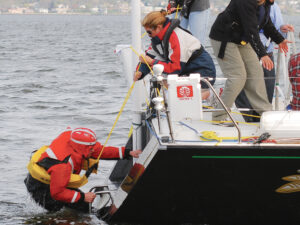
A capable bilge pump or pumps can be used to buy time while a leak is fixed or at least slowed. In an emergency, minutes, and even seconds, may mean the difference between staying afloat and heading for your dinghy or life raft.
Most bilge-pump installations are challenged on three fronts: wiring, plumbing, and capacity. In the first instance, the wires leading to electric pumps should be large enough so the voltage drop between battery and pump is no more than 3 percent. This means that if the batteries are fully charged, at 12.6 volts, the voltage available to the pump will be at least 12.2 volts. In practice, a 1,000-gph pump that draws 5 amps and is located 25 feet from the battery requires Number 10 duplex wiring. In my experience, the wiring used for most bilge pumps is undersized. The power supply for bilge pumps should, by the way, be independent of the battery switch so power is always available, regardless of its position.
The pump’s plumbing also affects its maximum capacity. Hose runs should be as short and straight as possible; minimize 90-degree bends in favor of gentle sweeps. If the outlet on the pump is 1 inch, the hose should be of similar diameter. Never reduce or restrict the size of a bilge pump’s hose. Many pumps use a 1.125-inch hose outlet. If you don’t want to match this proprietary size, move up to 1.25-inch hose. If the discharge will exit the hull below the waterline-for a sailing vessel, this is any location that’s submerged when heeled to the rail-then an anti-siphon loop must be used. (I’ll write more on anti-siphon valves next month.) Take note: Check valves are prohibited by the American Boat & Yacht Council for use as an anti-siphon device-and with good reason: They’re notorious for failing in both the open and the closed position, which respectively leads to flooding or failure to pump. Check valves may be used, though, to prevent water from a long hose from flowing back to the bilge. However, be warned: If the valve is close to the pump, the pump may not be able to overcome the weight of the water on the other side of the valve, rendering the pump ineffective.
Finally, is your pump big enough, and do you have enough of them? My boatyard rule of thumb is that a boat must have 1,000 gallons of pumping capacity per hour for every 10 feet of overall vessel length. Thus, a 40-foot sailboat may be equipped with two 2,000-gph pumps or one 2,000-gph pump and a pair of 1,000-gph pumps. No one ever complains about too much bilge-pump capacity. Moreover, multiple pumps afford redundancy, and seasoned sailors know it’s best not to put all your eggs-or pumps-in one basket.
Pump Tips
➤ Keep wiring connections high, dry, and sealed.
➤ The discharge hose should be the same size or larger than the pump’s discharge port.
Steve D’Antonio is a regular Cruising World contributor who offers services for vessel owners, boatbuilders, and others in the marine industry through Steve D’Antonio Marine Consulting (www.steved
marineconsulting.com).