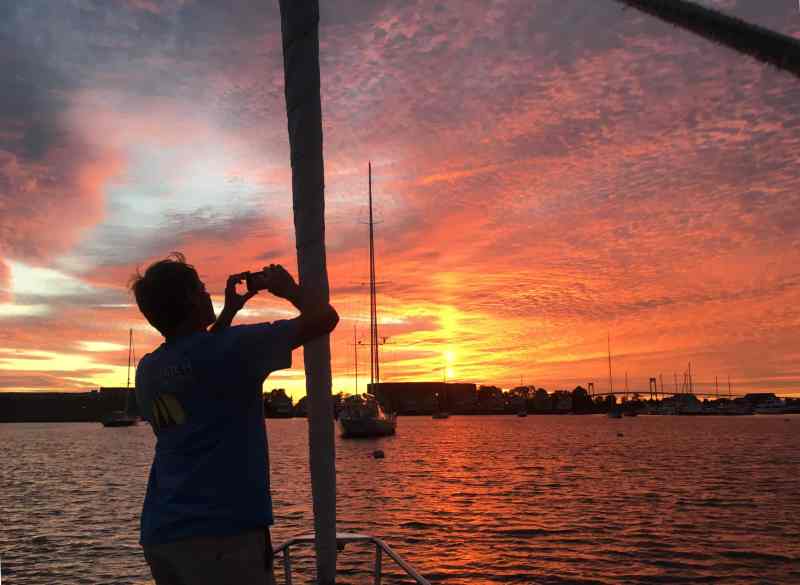
I use my iPhone 6 Plus for much more than making calls, texting, emailing and tracking the latest social media trends. As a sailor, I use my iPhone 6 Plus to navigate, check destinations and weather, plan routes, book slips or moorings, and even to make dinner reservations prior to arriving in port. As a professional photographer, I have also been using my iPhone 6 Plus not only to supplement my expensive, large and heavy equipment, but in many instances to replace a full-sensor DSLR as my camera of choice. Here are some features and tricks that have helped me get the most out of my smartphone’s camera.
Instant Photos
In many cases, you need to act quickly to get the shot — there’s no time to put in lock codes or fingerprint scans. To access the iPhone camera instantly, without having to unlock the phone, just swipe left on your home screen, and you have the full camera application ready to use. Android phones use a quick app-launching tool that accomplishes the same immediate camera activation.
Flash Options: Auto, On, Off
In the camera app of an iPhone, at the top left you will see a lightning-shaped icon. Tap it to bring up the flash submenu choices: auto, on and off. I recommend that you leave the flash set to auto. In this setting, the flash will activate when the software determines the need for additional light, which, for a sailor, may not be often. Most sailing images are shot in bright, seemingly overpowering light, so why use the flash at all? Here are some reasons: Photos taken in the cabin at sunrise or sunset, or portraits taken with the sun or lighting behind the subject, could need flash “fill.” Or with the subject looking directly into the sun, you might need the flash to avoid what is known as “raccoon eyes.” Keeping the flash on or set to auto can eliminate deep, often unattractive shadows.
High Dynamic Range (HDR) Options: Auto, On, Off
HDR stands for “high dynamic range,” a tool that exposes a series of images with each image exposed differently. In short, the exposures run from darkest to lightest. HDR provides greater detail, a more realistic image, and a better-defined separation between shadows, midtones and highlights. For best results, use HDR when photographing landscapes or seascapes. Don’t use HDR under very bright sun, if you are sailing fast, or if you need a series of quick, successive images. Also note that the flash is automatically turned off when using HDR.

Selfie View
Tapping the camera icon with the circular arrows will switch the lens view from forward-looking toward the screen of the smartphone, facing whoever or whatever is holding the phone. In other words, it will turn your camera into a selfie-maker. But beware: Most “accidental” photos are taken when the operator mistakenly thinks the camera is pointed outward.
Self-Timer
Need to take a selfie but don’t have a selfie stick, or want to capture a perfect group shot? No problem. Touch the circular, clocklike icon and select either a three- or 10-second delay. Set the device on a surface that will hold it in place (not near the toerail), compose the image, and press the shutter. You will see the flash count down each second and, just prior to exposing the flash, rapidly click on and off until the shutter clicks — done!
Additional Functions
Smartphones and tablets offer a variety of functions that allow you to expand the use of your camera. The iPhone lists several along the bottom of the screen within the camera app: time-lapse, slo-mo, video, photo, square and pano. Tablets may not include all these functions. On some Android models, you will find these options located within your photography submenu.
Time-Lapse: With this option, the frame rate consists of a series of single pictures shot at a speed that’s slower than normal video. When the video is played back, time seems to be moving faster, or lapsing. Use time-lapse to shorten a long sequence or capture an event such as docking a sailboat.
Slo-Mo: This tool essentially slows down the motion of the subject. When I teach sailing, I use slow motion to visually explain wrapping a winch, tacking or jibing, or other complex functions where errors can be seen more clearly when the view is slowed down.
Video: Lights, camera, action! You use video to document your best and worst sailing experiences: dolphins swimming along the bow, whales breaching, or crewmembers swimming, sailing or enjoying a destination.
Photo: This is the standard of photography. The 4-to-3 aspect ratio allows photos taken in this mode to be copied, edited, posted and emailed. Square: The square mode works the same way as the photo mode except that the aspect ratio (normally 4-to-3) and shape of the image are no longer rectangular, but square (1-to-1).
Pano: The panoramic function is a bit tricky to use on a moving boat or dock, as it requires you to rotate the phone while holding it level. In this mode, the camera takes a series of sequential images that are stitched together via a software function. Once saved, a panoramic photo can be shared the same way as any other image. This image size works great for landscapes, photographing your boat while on a dock or mooring, or for nearly any other “long” item or subject. When taking the photo, you need to be aware of your tracking speed, the movement to the left or right, and the movement of the camera up or down — all tough on a moving sailboat.
Focus, Exposure, Zoom and More
Most smartphones have an auto-focus/auto-exposure (AF/AE) lock. Just touch the screen with your finger (for about three seconds) on the area where you wish to focus, and you will see the AF/AE icon, which means you are now fixed on the area you touched. You can remove the AF/AE by quickly tapping the screen.
When you activate your camera, you will note that a yellow or blue square appears on the screen. Next to the square, you will see a sun-shaped icon and a vertical line. Dragging the sun icon up or down along the line will change the overall exposure.
Along the bottom of the camera frame, you have the ability to zoom in or out when using most of the camera options. Pinch the screen outward to zoom in; pinch the screen inward to zoom out. Or, on the screen, use your index finger to drag the zoom circle along the zoom line. On an Android phone, the volume controls can activate the zoom function.
Editing
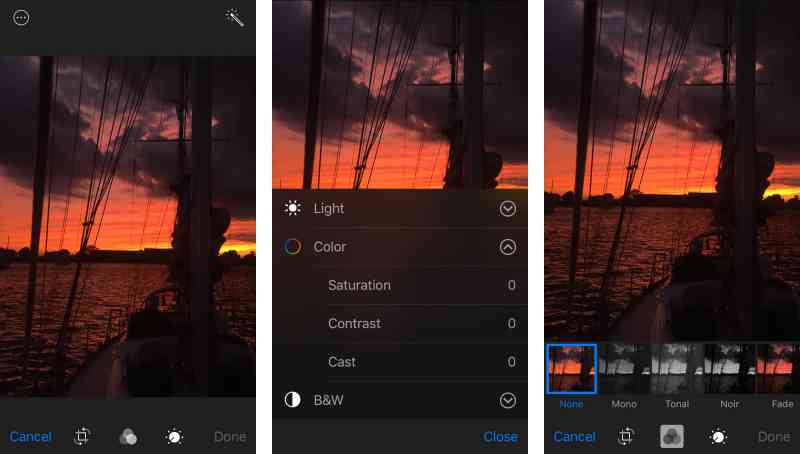
OK, you have the shot and have placed it in the camera’s memory, but it needs a bit of work. No problem. Most smartphones have a wide range of retouching tools. Go to your gallery (the Photos app on an iPhone), select an image, and tap the icon that looks like three horizontal lines with dots on them (on Android platforms, tap the editing icon). Along the very bottom of the frame, you will see three icons. The first (arrows and a frame) allows you to scale, crop or adjust the angle of any image. The next icon (three circles) allows you to select filters including monochrome, noir, fade, black-and-white and others. If you don’t like the change, just touch “revert,” and you are back at the starting point. The last option (a circle with a dial and dots) provides you with editing capability, enabling you to change the overall lighting, modify the color, remove the color, and convert the image to gray-scale. The last function has submenus that provide advanced editing tools and more sophisticated editing functions.
Posting and Sharing
Select your video or still image from your gallery, click on the rectangle with the upward-facing arrow (a sideways V on Android phones), select the type of media you plan to share with, and off you go.
One last note: You can send your photo or video as a small, medium, large or actual-size image. The size of the image will determine how much time the transfer will take, so be advised that you may need a Wi-Fi connection, rather than a 3G or 4G cellular network, to send large files. Most smartphones and tablets allow you to choose the size of the image you plan to email or post. My iPhone offers the following file size choices (sizes will vary depending on the phone model you have): small (39.5 KB), medium (102 KB), large (455 KB) and actual size (1.2 MB). The small option will upload faster than the actual-size option, but smaller files will not reproduce as well as larger files for printing hard copies of a photo.
Smartphone-Use Warnings
Sailors live in the wet, and for your phone, this is not a good environment. Prior to sailing, you should consider one of the many waterproof cases available today. Most smartphones, tablets and other mobile devices will easily overheat when left in direct sun. Once overheated, the device will shut down, and you will need to allow the device to cool before you can turn it back on.
Summary
Today, the latest smartphones are more like cameras than ever before. You can purchase hand-held grips, monopods, full tripods, selfie sticks, external lenses, underwater cases and much more. You can download hundreds of apps that can magically convert your basic images into sepia-toned or black-and-white, add effects, smooth imperfections, and even publish photo books over the Internet. So before you head out on your next sailing adventure, try practicing with your smartphone’s photo features. You just might be surprised at the high-quality images you can produce.
Thaddeus Kubis is an editorial, documentary and fine art photographer and instructor. He is also a U.S. Coast Guard-licensed captain and an ASA-certified sailing instructor.


