Like your engine and other onboard systems that get special attention in spring, your sails — along with all the gear that lets you raise and trim them — will benefit from a thorough pre-launch inspection and maintenance routine. If you didn’t already do it when the boat was hauled, the first step as you prepare for commissioning is to pull your sails out of the bag and examine the stitching on the genoa’s UV cover or leech areas (also check any other headsails set and stored on furlers during the season). It’s these areas that are exposed to sunlight and weather, and it’s where the stitching is most likely to slowly break down over time. If caught early enough, your sailmaker can make a corrective repair before the damage and repair costs spread.
Also on the genoa, it is a good idea to look at the spreader patch and the area where the sail rubs against the bow pulpit to see if there is any heavy wear and tear that needs addressing.
On the mainsail, look for chafing on batten pockets, and if battens are held in place with Velcro, make sure the hooks and loops seal firmly. Also check where the sail comes in contact with shrouds for any marks to determine if the cloth or stitching there is wearing through.
Storage Tip: Unless you plan to sail over the winter, take the sails off the boat and store them inside rather than leaving the main bent on under a sail cover and the genoa rolled on a furler. Winter weather can lead to a lot of mildew growth, green slime and general pollution finding its way into the sailcloth. After five months, sails can turn an ugly color. Worse, our loft see a lot of jibs shredded by winter storms.
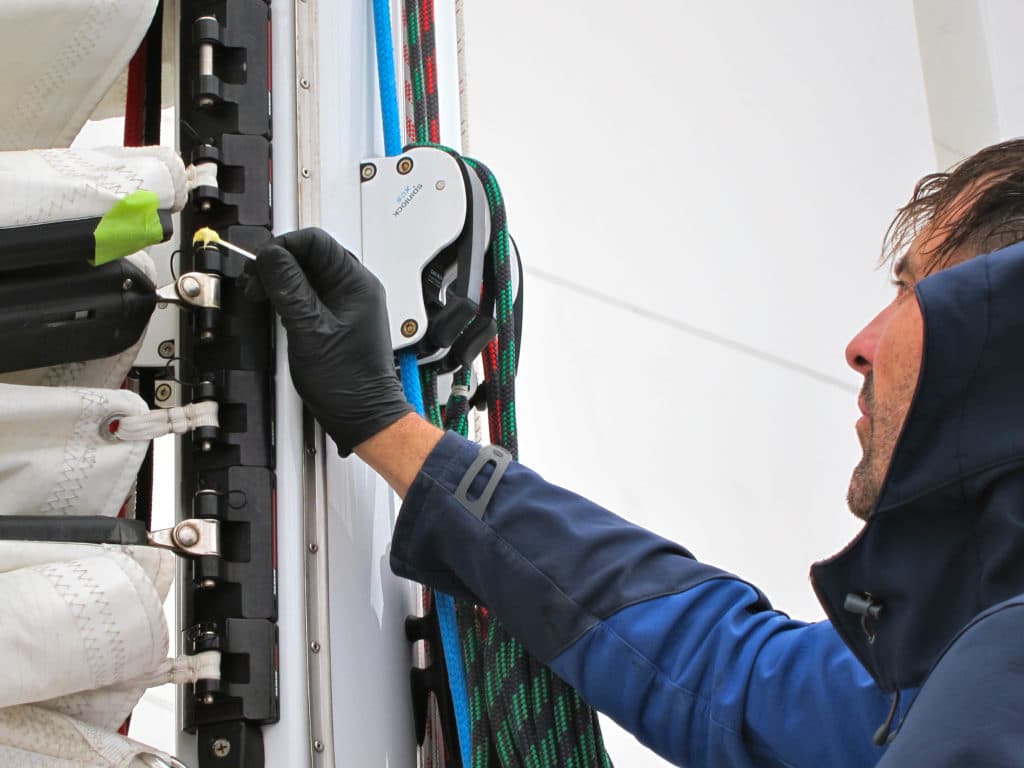
Next move your attention to the leech lines. Look to see if they are working correctly (can be pulled tight) and if the line is holding well in the end fitting, often a jam cleat of some sort. Check the Velcro that holds the cover over the cleat and keeps the excess leech line from flying about because this can weaken over time.
Once you’ve completed your sail inspection, it’s time to move on to sail-control systems. Go over the sheets, looking for any chafe. If you didn’t do it in fall, now is the time to give them a good rinse in the sink or a backyard kiddie pool, and wash them using a mild detergent such as Woolite.
Use fresh water to rinse out all the turning blocks and bearing races in the furler that you can reach. This will remove old salt and any grime that’s collected over the winter. Then relubricate as recommended by the gear manufacturers. Service your halyard and sheet winches to make sure they are fully lubricated and running well before the season starts.
Rerigging
When you’re ready to put the sails back on the boat, wait for a calm day and do it with the help of a friend. When hoisting any sail with a luff tape, like a furling genoa, it works best to have one person guiding the sail into the groove as the other mans the halyard, because it is easy to accidentally catch the tape, tearing or jamming it as the sail goes up.
When bending the main back on, acetone can be used to clean the track or groove in the mast. Rinse off any rollers or slides with bearings to remove as much salt and dirt as possible, but be careful that the ball bearings don’t get dislodged. To make the job go more smoothly, you can coat the track and slides with a product such as McLube Sailkote Dry as they go in. Avoid oil-based lubricants because they tend to collect dirt and turn it into a gooey mess.
If the mainsail is still tough to hoist and you have regular slides, it might be time to look into upgrades such as slides with rollers or even a new track-and-slide system, if your budget allows. There are lots of different options from which to choose. Lastly, just to make sure your sails provide a season’s worth of good service, have your local sailmaker put together a simple repair kit to suit your boat and the material your sails are made from so you have something on hand if you need to do minor repairs on the fly.
On The Water
Once the boat’s launched and you’re out sailing, it’s a great idea to take pictures of your sails at work. This really helps your loft understand the sails’ shape underway and identify where improvements could be made over the following winter. Many cruising sails are made from Dacron, and can lose their shape as they age. As this happens, sailing performance decreases, and eventually the boat heels more. Short of buying a new suit of sails, a sailmaker might be able to make repairs or suggest an upgrade such as fitting full battens in a main to extend its life.
Dennis LeFeaux is a sailmaker at North Sails Canada.