It’s easy to assume that a sailboat’s rig will perpetually point skyward. It has a lot to do with advances in engineering, material science and design priorities adopted by today’s boatbuilders. But with this uptick in reliability comes the downside of complacency. Time, metal fatigue and corrosion are co-conspirators, and they’re why every skipper needs to know where they sail on the rigging-failure timeline.
Most riggers generalize that the lifespan of a sailboat’s standing rigging is about a decade. This doesn’t mean that in the 11th season the mast is destined to go over the side. But it does mean that the trouble-free decade is astern and the likelihood of problems are on the rise. In terms of miles at sea, rigging lifespan is often defined as one circumnavigation’s worth of torment. But there’s much more to understand about standing rigging and when it’s time for replacement.
Whether your boat is gently rolling in a quiet mooring field or bashing to windward in a gale, cycle loading wears away on the components. Yes, the higher strain cycles take a greater toll, but all of the on-off energy transfers add up. There’s also a chemical war being waged between dissimilar metal alloys. It’s no surprise that rigging hardware on freshwater-sailed boats holds up better than aboard their saltwater sisterships. As time goes by, the structural safety factor built into a rig’s design starts to erode. At some point, the designer’s safety factor heads toward the negative part of the curve – a result of too many days at sea, an excess of spar-bashing tacks and jibes, and too much salt-laden spray. Fortunately, careful rig inspection and timely hardware replacement can help defeat the inevitable.
Sailboat rigs are perpetually in a compression/tension tug of war. On one side is the righting moment of the vessel, a force created by the buoyancy induced by hull shape and the location of the vessel’s center of gravity. At the other end of this tussle is the heeling moment, a force created by wind pressure on the sail plan.
The rig and rigging of most monohull sailboats are designed to handle a wind-induced, 90-degree knockdown. The load this imposes on the windward side’s rigging, spreaders, fittings and chainplates can be computer modeled. Engineers use this data to help select hardware according to the specific loads each piece must handle. The rig designer determines the max loads each piece of standing rigging is to carry, and adds a specific safety factor to the equation. If, for example, an upper shroud will be tensioned to 5,000 pounds during a knockdown, a 2-to-1 safety factor would result in wire with a 10,000-pound breaking strength. A greater safety factor would usually extend the lifespan of the wire, but it also adds undesirable weight aloft and additional expense to the bottom line. Doing so might make sense for a crew sailing the Roaring Forties, but it’s counterproductive for coastal cruisers planning a voyage to the Bahamas.
The Rig Inspection
In recent decades, winter storage and year-round, in-water berthing have lessened the opportunity for a full mast and rigging inspection. Add to this complications like a headstay hidden inside a roller-furling foil, and one can see why too many years go by between a thorough rig inspection. Ideally, this will happen with the spar unstepped in the boatyard on sawhorses. It’s true that, if the standing rigging has been designed with a higher safety factor, the boat has not been vigorously sailed, and home port is in the middle of a large freshwater lake, the aging process elongates and the rigging is likely to outlast an oceangoing production boat. That said, the more complex the rig and older the vessel, the more scrutiny is necessary.

With the rig removed, I begin in the boat looking over the mast step and determining how all the compression loads have been handled. In cases in which the mast step is in or just forward of the keel sump, it’s important to note how the compression load is spread transversely and longitudinally. Look for signs of crushed or cracked grids, floor frames or other support structure. Closely inspect the mast step. It should be free of corrosion and provide a means to pin the mast heel in place once the spar is stepped. Deck-stepped masts deserve the same detective work. With these rigs, the compression loads are usually shared between a compression post or bulkhead and the deck or coach roof itself. There are considerable side loads generated during beats to windward. Look for signs of fiberglass crazing or microcracking, or a change in the contour around the step. Deck-stepped masts are fine, as long as they do not overly flex and distort the structure that supports them.
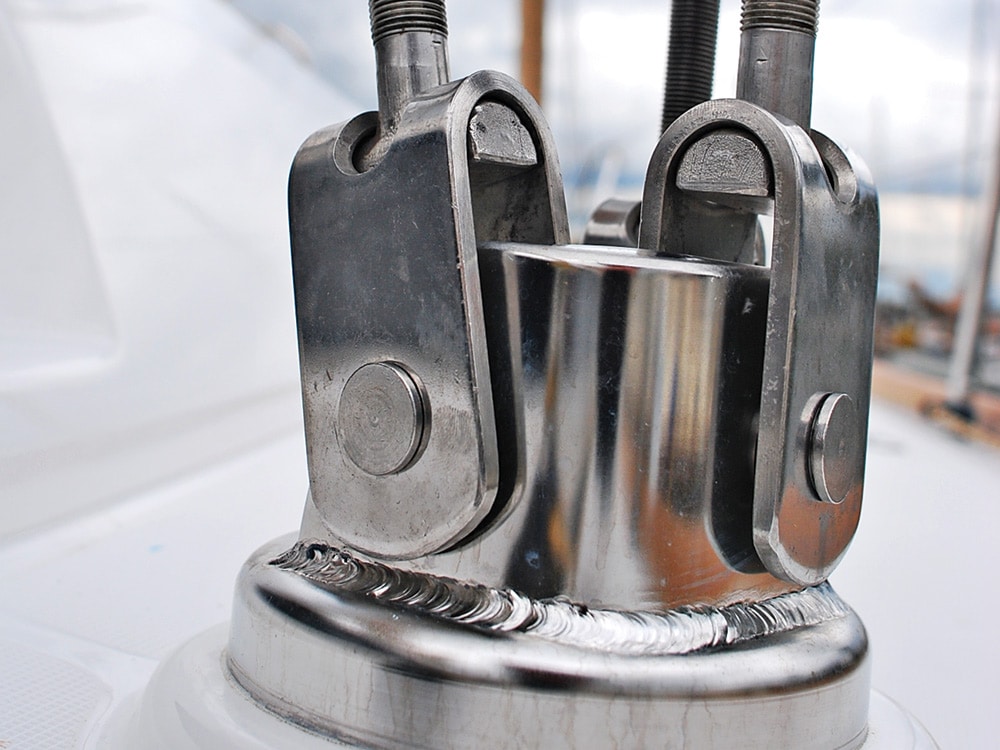
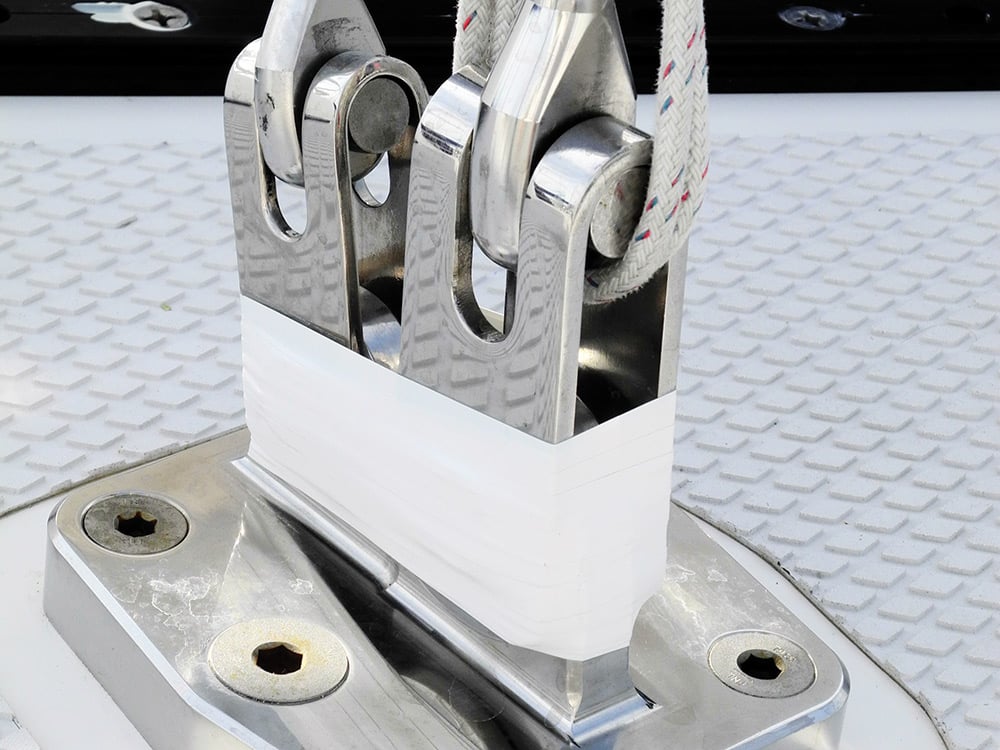
The chainplates anchor the standing rigging and represent the other end of a load-bearing couplet. As with the mast step, the big concern is whether the structure remains intact or the tension has caused the laminate, wood bulkhead or metal webbing to deform. No matter how good the standing rigging happens to be, a chainplate or mast-step failure usually leads to a dismasting and major vessel damage.
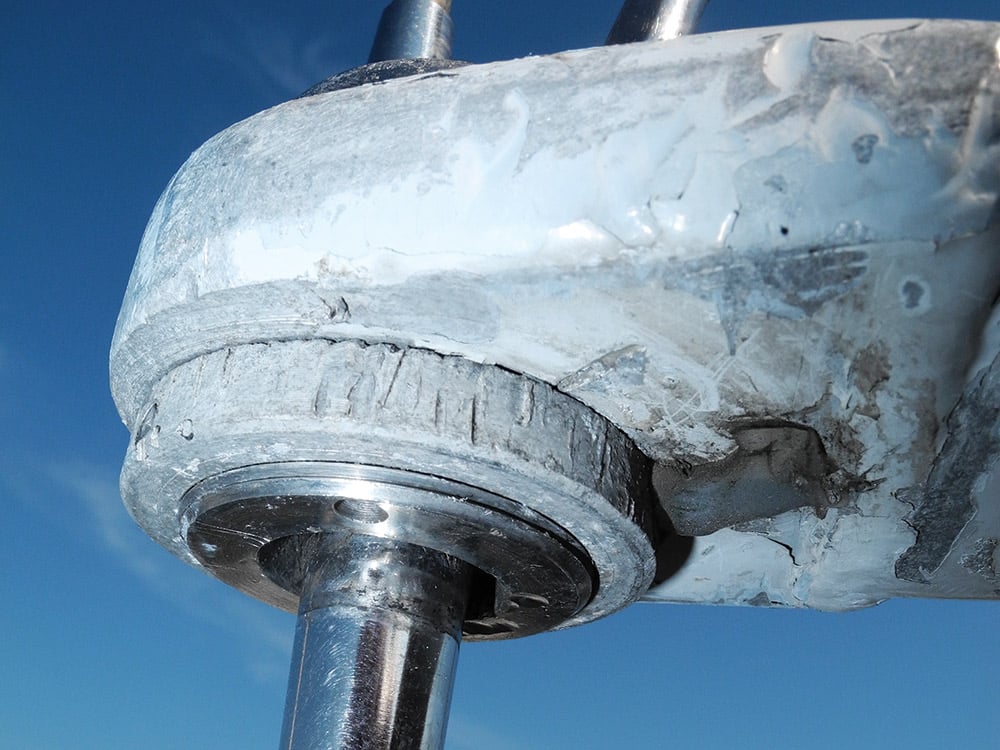
Next comes a close look at the spar itself. I prefer a bottom-up approach, starting at the base, or the heel of the mast, and working toward the masthead. During the design and engineering of a mast and rigging, many spar builders use finite element analysis to model the loads that migrate through a rig. A computer graphic reveals a range of colors overlaid on the spar section, with red or magenta indicating where high-stress areas are located. These energy focal points are found at spreader roots, rigging attachment points, the mast-heel fitting, and other areas where tension, compression and bending moments stress the spar. These are the spots where potential problems lurk and indicators include stress cracks, surface deformation, pitting and corrosion. If you notice this type of deterioration, it’s time to have an experienced rigger or marine surveyor take a closer look.

A Look Aloft
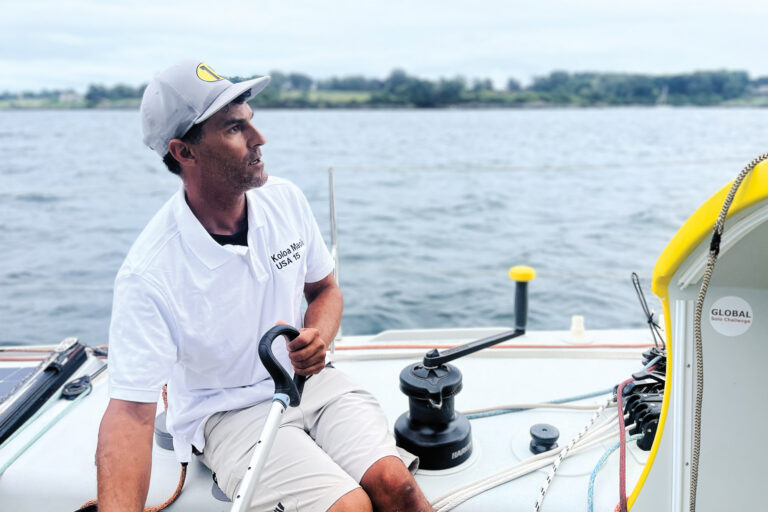
Of course, not everybody pulls their rig on a regular basis and has the opportunity to inspect the mast when nestled on stands. But there’s plenty you can observe when sailing. During a race to Bermuda with the late Rod Stephens, the brother of Olin and one of the driving forces of Sparkman & Stephens, I learned why a cruiser at sea should do a daily “rigging walk around.” Rod’s morning rig check involved a slow amble forward on the windward deck glancing up and down to make sure toggles, clevis pins, and other bits and pieces were all in place, and none of the running rigging had been led incorrectly in the dark. Returning aft on the leeward side, he looked over the gooseneck fitting and glanced aloft at the spreaders, noting mast bend and the fall off to leeward that the spar had to endure.

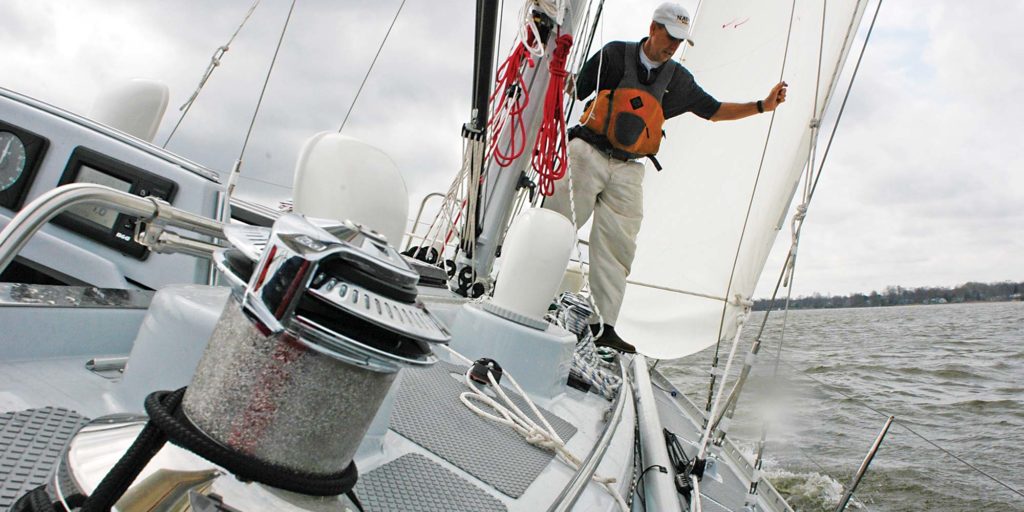
Back in the cockpit, Rod would focus a pair of 7×50 binoculars on the masthead and work his way down to the lower spreader tips, looking for telltale signs of trouble. This is a good way for cruisers to make sure that the halyard lead to the headstay furler’s top swivel remains fairly led. If there’s a wrap or two around the foil, roller furling becomes difficult and foil damage will soon follow. Rod always insisted that this magnification-aided checkup was not a substitute for going aloft in a bosun’s chair. The latter should be done prior to heading offshore or embarking on a lengthy coastal cruise. Going aloft in a seaway, to cope with a problem that should have been sorted out prior to departure, raises the risk factor and complicates a repair. But at times it must be done. Keep in mind that the further aloft you go, the more violent the effect of the vessel’s pitch and roll. Make sure your mast-working equipment kit includes a harness tether that holds you to the spar, as well as safe hoisting tackle.

It’s important to identify what riggers call “critical components.” In this case, it’s the rigging hardware and wire, rod or rope that plays an essential role in keeping the rig in place. Rig loss can be attributed to something as simple as a missing cotter pin or loose Nylock nut holding a tension rod to a chainplate. Critical rigging components include a ring pin keeping a headstay turnbuckle in place. If it gets snagged and pulled out by a genoa sheet, the domino effect can lead to a dismasting. On the other hand, if the same thing happens to the clevis pin on the rear lower shroud or an intermediate shroud, the rig is likely to remain standing. Double checking critical rigging, like the headstay, upper shrouds and backstay, is a top priority.
Many old-school cruisers favored a cutter rig for more than headsail versatility. They knew that with an inner forestay and a running backstay set, they had hedged their bet if it came to the loss of a headstay or backstay. It also lessened mast pumping and its metal fatigue implications. During long distance passagemaking, tacks and jibes become less frequent and complaints about runners and a forestay disappear.
Contemporary cruisers have a new ally in high modulus (HMPE) line, not only as an optimum choice for running rigging, but also as a stand-in when and if a wire-rigging problem arises. The norm aboard most race boats, it has the crew attaching unused headsail and spinnaker halyards to a fitting or mini-rail just ahead of the mast. But aboard a cruising boat that’s headed offshore, it makes sense to keep a HMPE spinnaker/drifter halyard tacked forward, attached to a well-secured, anchor-roller strut or a mini bowsprit. This adds a backup safety margin, just in case the headstay gives way. The same halyard can also be moved to an amidships rail to help keep the mast up, if a spreader fails or there’s the loss of a shroud. In fact, high modulus line is a strong, lightweight standing-rigging alternative that’s proven its validity aboard multihulls and many high-performance monohulls. Chafe can be an issue, so those who settle on fiber rigging need to make sure their sheet and guys are fair led when going through a sail change, especially at night.
Keeping the rig where it belongs requires regular inspections and maintenance, and the recognition that, like anchor chain, one weak link can spell disaster.
Technical expert Ralph Naranjo is a veteran circumnavigator and ocean racer, and the author of the The Art of Seamanship.
DIY Spar Inspection Checklist
Every few years, the rig should come out and a detailed inspection ensue. One of the reasons for such scrutiny is the chain-linklike behavior of standing rigging.
- Check mast for corrosion especially at heel, gooseneck, spreader tips and wherever stainless steel contacts aluminum.
- Inspect rigging hardware and note corrosion, pitting and elongation of clevis pin holes.
- Check swage fittings, clean with plastic scrub pad, and use magnifying glass to search for swage barrel cracks, pitting and wire cracks.
- If mechanical compression terminals have been used, look for signs of wire slippage or cracks in wire strands and terminal barrel.
- Rub down all 1×19 wire rigging with a nylon stocking that will snag on any cracks in wire strands.
- Check all clevis pins for wear and make sure that toggles connecting to stainless-steel chainplates have stainless-steel clevis pins, not bronze or chrome-plated pins.
- Wire brush away corrosion on alloy spars and inspect for cracks (if corrosion is minor, acid etch, epoxy prime and paint).
- Closely inspect top and bottom headstay fittings and roller furling system; service furler as per manufacture’s recommendations; and consider disassembly and replacing the headstay if over 10 years old.
- Those with an in-mast furling system should follow manufacturer’s recommendation for maintenance and lubrication/replacement of bearings.
- Visually inspect and heck mast electrical wiring for continuity; improve chafe protection.