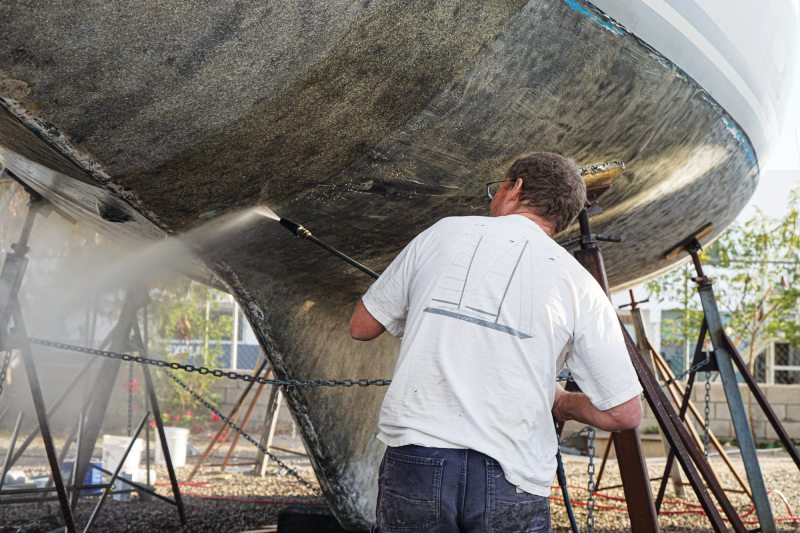
Almost finished,” Jamie calls up from the water, short of breath and waving a scraper. I try not to giggle at the Papa Smurf look he’s sporting. Totem’s blue ablative bottom paint is smeared on his rash guard and tinting his face and hair. It’s amusing, and it’s not. Toxic blue clouds surround him as the fouled rudder becomes slippery once again. Fish dart past, scooping up tinted and tainted detritus for an easy meal. We live the sailor’s conundrum: wanting to respect the health of the water we float in while using highly toxic paint to repel marine growth below the waterline. There has to be a better way.
In 2018, an extended haulout to dry Totem’s saturated fiberglass hull, coupled with bare fiberglass to speed up the drying process, offered us the time and opportunity to consider an antifouling treatment without the blues.
At the time, we had been cruising for a decade. The hard paint applied in Port Townsend, Washington, in 2008 carried us through to Southeast Asia. In Thailand, the options for antifouling paint were more limited; our options were ablative or ablative. And it was that soft-style paint that we relied on until we arrived in Mexico, at Cabrales Boatyard in the Sonora desert. With Totem’s hull stripped and dried, we were presented with an opportunity to start from scratch.
We intend to continue cruising Totem for many years, and we took a long view when deciding on our future antifouling treatment. Our goals: We hoped to stretch out time between haulouts. Often floating above vibrant reefs, we hoped to lower our environmental impact. And after scraping barnacles in unpleasant conditions (current, muck, cold, etc.), we hoped to reduce our in-water maintenance needs.
In researching alternatives, the resin-based product called Coppercoat bubbled up as a way to meet all three of these criteria: It should last for many years, it earned awards for eco-friendliness, and it claimed excellent results.
That research also surfaced a lot of contradictory information—and a startling range of experiences with Coppercoat’s effectiveness. Before investing in Coppercoat on Totem, we needed to gain a better understanding of these inconsistencies.
Myth No. 1: Coppercoat is paint. (In fact, it’s a two-part hard epoxy.)
The British navy first used copper sheathing in the 18th century to significantly reduce the bottom growth that plagued a ship’s speed. It was a miracle! Skipping ahead centuries from bathtub-shaped wooden warships to recreational fiberglass boats, copper is still an effective method of deterring marine growth. Copper sheets nailed to the bottom are problematic, though, so clever people mixed copper powder into paint. Unfortunately, that’s still problematic. The paint, particularly ablative coating, sheds, making it less effective and more pollutive.
Coppercoat, on the other hand, is a water-based epoxy with super-fine copper powder suspended in the cured resin. After application, copper is exposed through light sanding, known as burnishing, and it deters growth just at it did for the British navy—to a point. As the copper degrades, according to Coppercoat’s literature, it becomes unstable and washes away with the boat’s movement. Newly exposed copper within the resin restarts the cycle. Marine growth is discouraged first by the copper’s natural-deterrent properties, then by the microscopic shedding. The company estimates this material loss rate at 5 microns per year. For context, the average human hair is 70 microns thick.
That’s very different from how antifouling paints work, although they also might refer to copper on the label as a biocide ingredient. Antifouling paints are either “hard” or “soft,” and act by leaching copper or other biocides. Hard paint holds that biocide in pores; soft ablative paints slough off, leaving a fresh layer of biocide as the boat moves through the water, hence the blue cloud Papa Smurf swam in while cleaning Totem’s bottom. Repainting is necessary every one to two years for ablative paint, in our experience; hard paint may be stretched additional years. However, it must be repainted if the boat is out of the water more than a short time, if the paint has thinned, or if it has leached all biotoxicity.
Myth No. 2: Coppercoat is expensive. (Any boat project can be, but it doesn’t have to.)
When comparing the cost of the product with conventional antifouling paints, the difference was insignificant. Lining it up against our choice of hard paint—one that had performed well at the outset of our cruising adventures—the gap was a rounding error.
Changing to a Coppercoat bottom can get costly, though, because of the work required to prepare a boat’s bottom, particularly when hired out. Coppercoat must be applied to either bare gelcoat or a properly applied barrier coat. This can be done at much lower cost with a lot of your own labor, by sanding or using chemical stripper. It can also be done at meaningful cost with a hired crew or sand blasting. Where a person lands in their boat’s bottom prep needs—and their inclination to tackle the work themselves—determines the degree of expense involved.
Read More from the Gifford Family: Sailing Totem
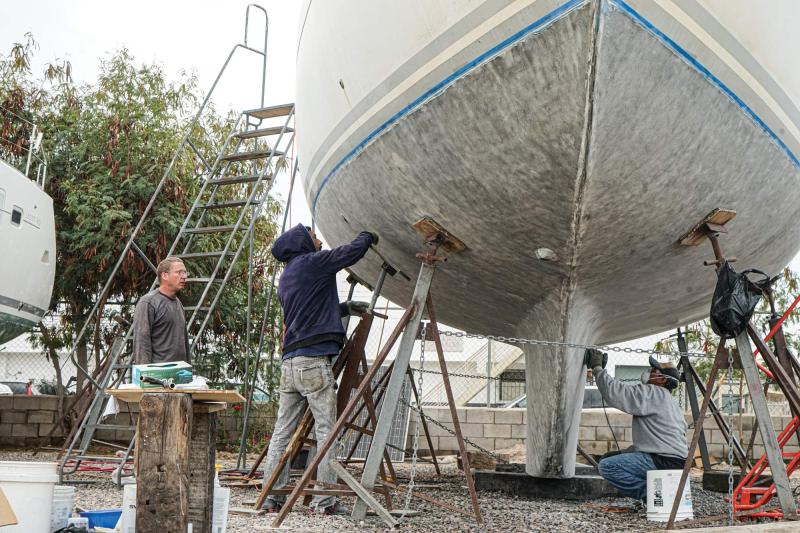
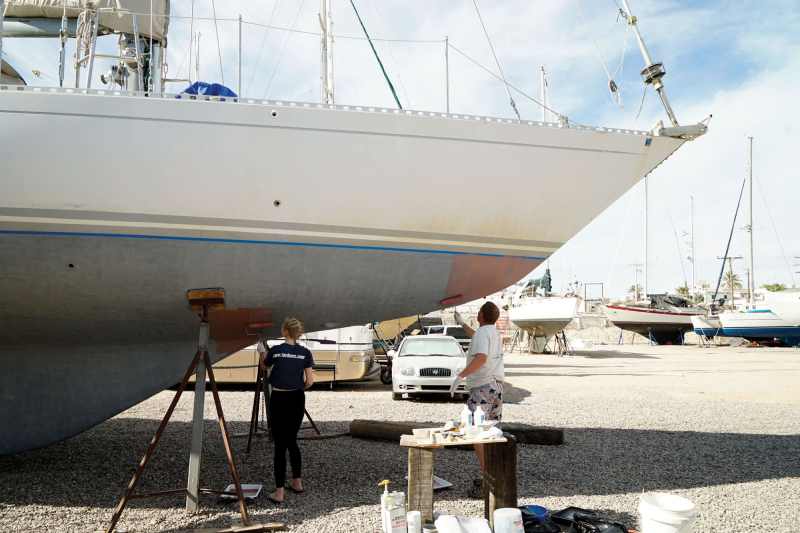
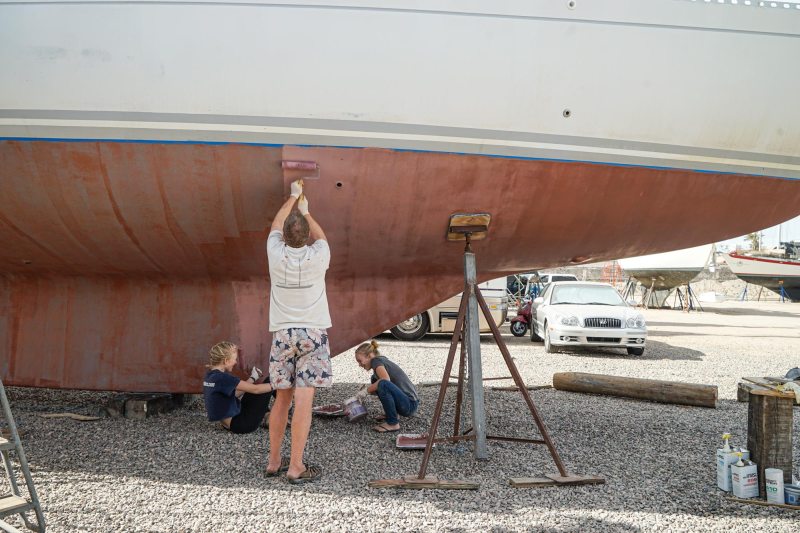
It helped that we were starting with a bare bottom: After dirty, laborious effort, Totem’s stripped hull was a sunk cost. It was a step we expected to take ever since a moisture meter in Grenada displayed the bad news: very wet hull. Some work we hired out, some we did ourselves. It was a balance between saving our aching bodies (OK, mostly Jamie’s aching body) and saving money. Whether the final result is expensive has more to do with choices and is not an absolute.
Jamie recalls growing up in New England when cayenne pepper or fine sand might be added to boost the cheapest bottom paint on the shelf. Antifouling is expensive! Because the Coppercoat reportedly provides years of service (an accepted estimate is around 10 years), it saves the substantial cost of gallons of pricey bottom paint and necessary haulouts. A 10-year view—and a DIY approach—adds up to tidy savings, albeit at the cost of sore shoulders. As cruisers on a tight budget, we can’t always manage the upfront costs for long-view investments (otherwise Totem would have a lithium battery bank); in this case, however, the cost/benefit made sense.
Myth No. 3: Coppercoat bottoms are maintenance-free. (It is not magical fairy paint.)
There’s a perception by many that a Coppercoat bottom should be virtually maintenance-free, and when it’s not, that’s cited as a failure of the coating. Expectations are everything, and this one is an unfair setup.
In doing our research, we found good information at both the Coppercoat UK and Coppercoat USA websites, maintained by the distributors in both countries. The headline claims by the manufacturer aren’t overly dramatic. Coppercoat UK contends “a single treatment of this water-based and VOC-free resin commonly provides a high level of fouling protection for a decade or more.” Coppercoat USA says it’s “possibly the most powerful and long-lasting antifouling available today.” Both vendors report some very compelling testimonials (of course), but not one claims that owners never have to touch the bottom.
Marine bio-growth happens. Depending on the water you are in and the coating on the bottom, it will grow sooner or later, faster or slower, harder or softer. But it happens. In the warm tropical waters we typically enjoy, higher growth rates are probable. So going into it, we knew we could expect routine cleaning of a Coppercoat bottom. But we anticipated it would be easier, and it wouldn’t involve swimming in paint plumes.
This expectation comes with one vital assumption: The application needs to be done correctly. It is trickier than conventional paint, and it takes care to do it properly. The critical success factors: getting the application right, getting the application right, and getting the application right.
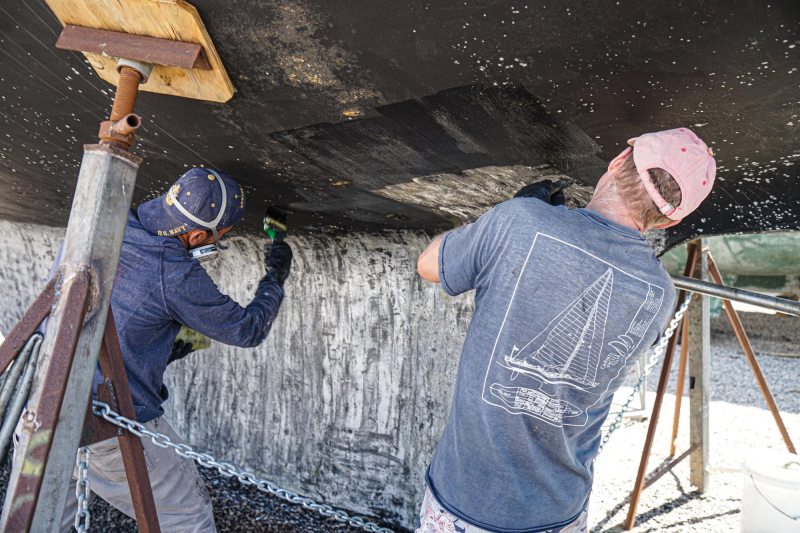
Although applying Coppercoat isn’t complicated, each step needs attention. Temperature and humidity, correct mixing, and application timing all matter. And when the application is finished, the surface still needs treating to expose the copper particles in the resin. Coppercoat UK provides detailed information to help you get it right, and Coppercoat USA provides a six-page list of do’s and don’ts, with additional tips and tricks.
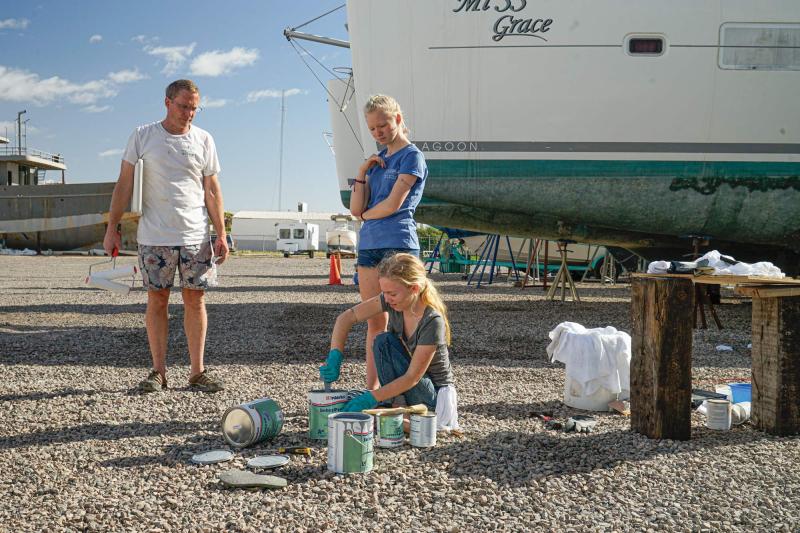
I’ll be honest: We were nervous about getting started. We’d never applied Coppercoat, we’d never seen it done, and we really didn’t want to screw up. But Salvador Cabrales, the manager of Cabrales Boatyard, had experience applying it with his crew. His calm support of our DIY process helped us get it right and kept our nerves from fraying.
One thing we learned during our research was that hiring a professional crew or going to a reputable yard isn’t assurance of a good application. Most of the boat owners who were disappointed with Coppercoat had outsourced the effort.
The crew aboard Britican, after two failed professional applications, recommends hire-it-out cruisers thoroughly understand the process themselves, and then supervise the entire job personally. Nobody cares about the hassle and expense of bad results as much as you do.
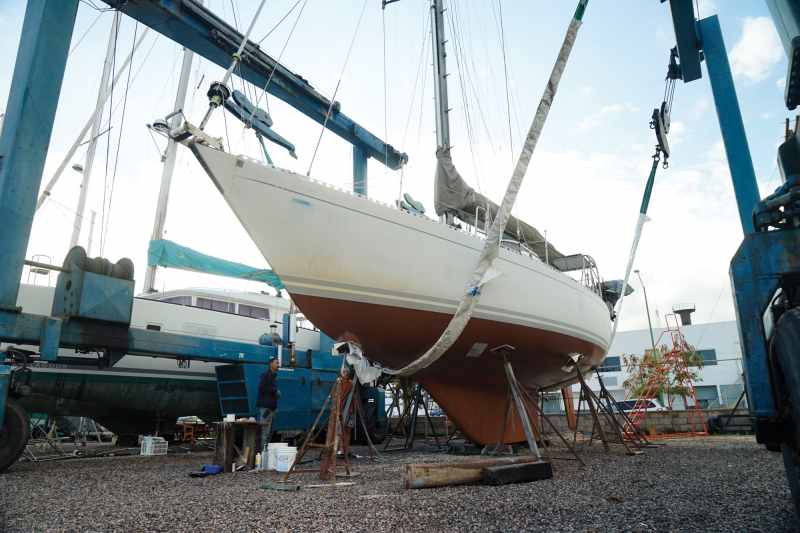

So how has the new antifouling worked out for us? It’s been about two and a half years since we launched with a sparkly copper bottom. Jamie, ever the racer, wondered how much weight Totem had lost between the layers of paint and moisture in the hull. It did feel as though we were slipping more cleanly through the water than ever before as we sailed south from Puerto Peñasco. And the bright copper look of the hull faded to verdigris—pure oxidized copper—after a couple of months.
The Pacific coast of Mexico is teeming with life underwater. As cruising regions go, it is a good test for bottom antifouling, and Totem has spent seasons there with coatings of hard paint, ablative paint and now Coppercoat.
Preparing to sail for the South Pacific in 2010, we were shocked by the rate of bottom growth in Banderas Bay, Mexico. Our hard paint was two years old, but we began considering the time and expense of a fresh coat. Several friends did apply new antifouling, then bemoaned the appearance of soft and hard growth in just a couple of weeks. We chalked it up to tenacious marine growth and stuck with the bottom we had.
Returning to the bay with a Coppercoat bottom was a real test for us, with some indication of how it would work expected within a few weeks. At one month, we had a thin layer of soft growth. At two months without cleaning, a few small barnacles appeared. By three months without a bottom scrub, nature was blooming. The test was done, and we were very pleased with the results. It was time to clean Totem’s underside and maintain on a more regular basis.
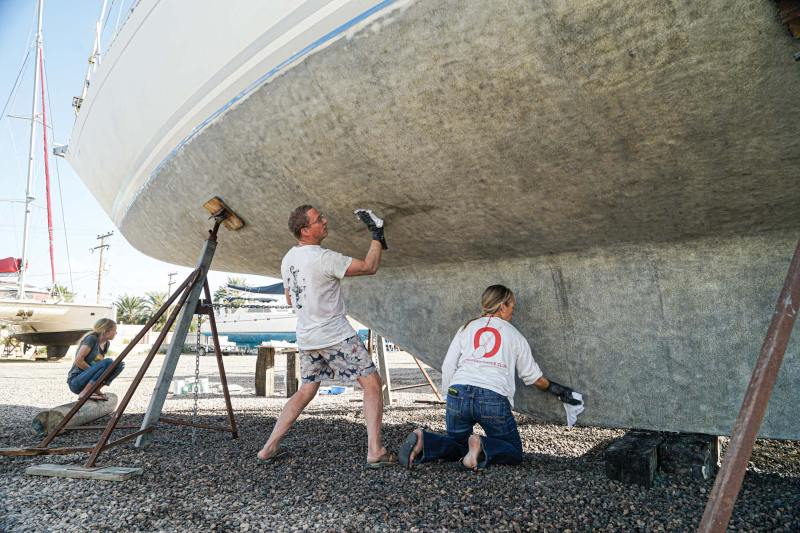
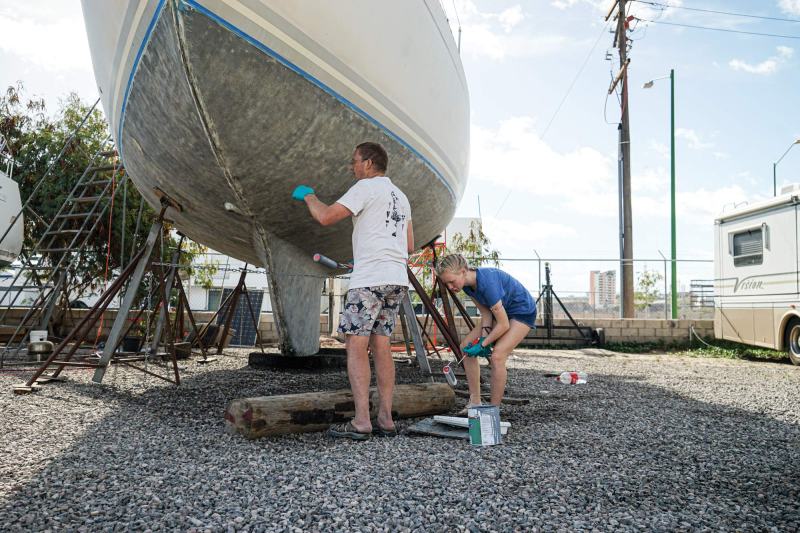
Armed with plastic scrapers, green scouring pads and scrub brushes, we went to work. As expected, no paint clouds sloughed as we scrubbed. Unexpectedly, the grippy barnacles that can leave knuckles bloody despite careful scraping were easily and cleanly separated from the bottom. No barnacle bases dug into the coating. No aggressive scraping was required. The epoxy, it seems, is too hard or tough for them to take root. This was a pleasant, timesaving surprise.
With our wings clipped by engine woes recently, we’ve spent an unexpected season in cool water. The Sea of Cortez might feel like bathwater in the summer, but it’s in the brisk 60-degree range in the winter months. The new antifouling has delivered a delightful benefit: It’s keeping our bones out of the chilly water!
Cruising plans are difficult to make right now, but one we won’t have to worry about anytime soon is doing another bottom job.
Coppercoat Application Tips
The manufacturer’s instructions are very specific—and more complicated than rolling on paint. A few summary tips can help ensure success:
Become intimate with the instructions long before the application begins in order to avoid surprises.
Understand the impact of temperature and humidity in choosing the location, season, and timing of your application. Coppercoat won’t cure properly in temperatures below 50 degrees within 24 hours of application, and temperature also affects the pot life of the resin. Humidity also affects outcome; it’s recommended the coating be applied when relative humidity is less than 65 percent.
Assign roles. We had one person mixing constantly, two people rolling on Coppercoat (Totem is 47 feet long), and a fourth to monitor and fill in as needed.
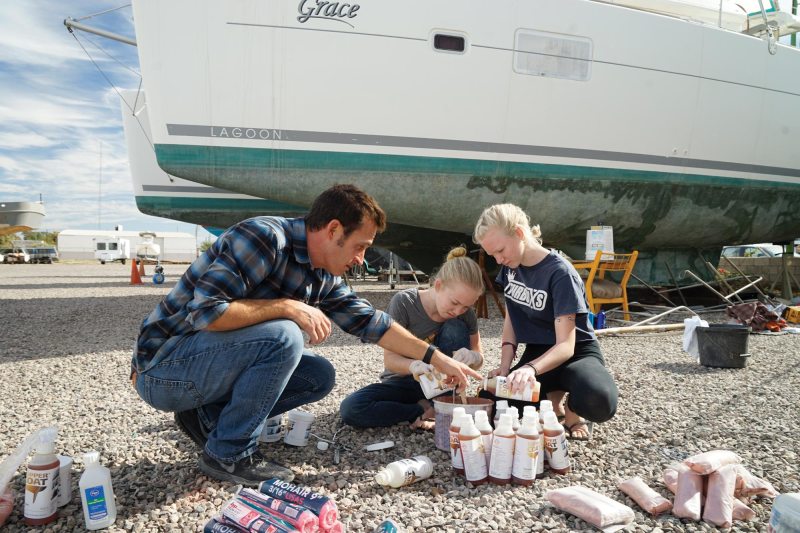
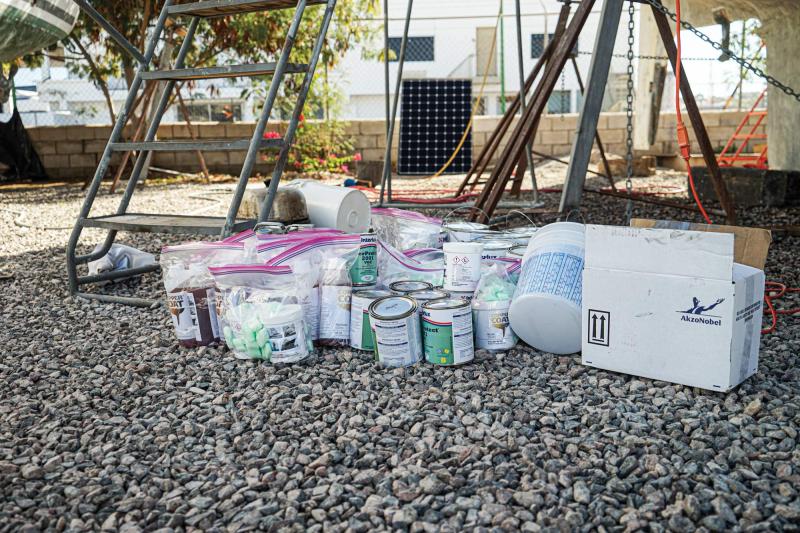
Confirm consumables and be sure you have access to necessary supplies. For example, the isopropyl alcohol used as a thinner needs to be 90 percent or higher, which we sourced from the US because only 70 percent purity was available in Mexico.
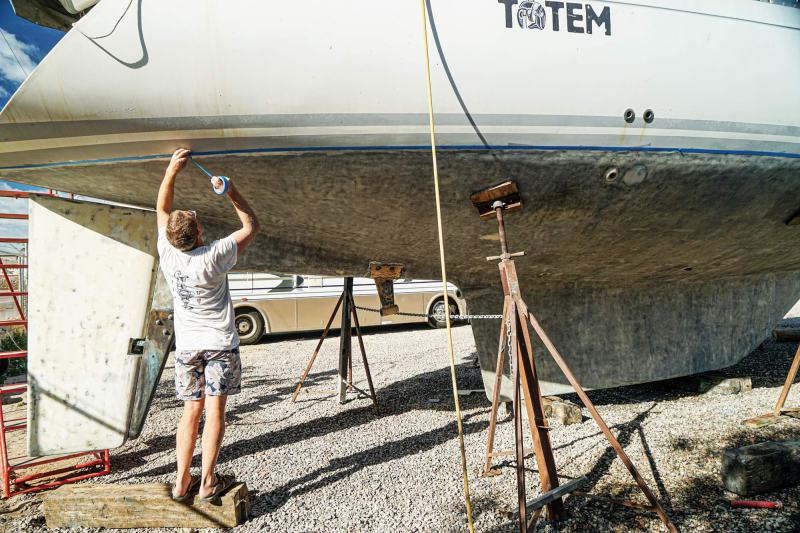
Allow enough time. Our application was done mostly in a single day. But this had to fully cure before we could move the jack stands and keel blocks to coat those areas. Totem’s process took a week in total to apply coats and cure the entire bottom.
Coppercoat is sold in kits, making it less readily comparable to gallons of bottom paint. Both Coppercoat US and UK’s websites include a handy calculator that takes hull shape into account to estimate how many kits you’ll need. The number of kits depends on the hull area. We used 16 kits to reach the recommended minimum of four coats.
Follow the final light-sanding/burnishing instructions to the letter. If the copper is not correctly exposed from the cured epoxy resin, it won’t have antifouling properties.
Behan and Jamie Gifford are weathering the pandemic with their teenage crew aboard Totem in the Sea of Cortez. You can follow their adventures in Behan’s blog, “Sailing Totem,” at cruisingworld.com and sailingtotem.com.


