After cruising aboard our boats for 30 years or so, my wife, Liz, and I figured we’d done just about everything one could do in a small space surrounded by water. That is, until we connected with circumnavigators Caryn and Gary on San Diego-based Windflower. They certainly added to our repertoire of things to do while afloat.
Our education took place in beautiful Chamela Bay on Mexico’s Pacific Coast. I was returning to Feel Free, our Spencer 51, after a successful spearfishing excursion on the reef off the point. So successful, I thought I should share the wealth with our new neighbors on Windflower.
In the dinghy were the usual suspects—triggerfish, parrot- fish, hogfish, and a porgy or two. Immediately after accepting the offer of fish, Caryn exclaimed: “They’re gorgeous! We have to print them before they’re cleaned!”
“Excuse me?” I muttered.
“Have you heard of gyotaku? It’s the Japanese technique of fish printing.”
Not only had I never heard of it, but Liz and I had spent a fair bit of time in Japan aboard our first boat, Hoki Mai, which made me feel even more cerebrally challenged. Caryn insisted I come aboard so they could show me some of their fish prints. They unrolled sheets of mulberry paper and rice paper with beautiful black prints of fish they had caught throughout their travels. I was blown away.
“Why don’t you come back with Liz, and we’ll show you how to do it?”
The remainder of the morning was taken up aboard Windflower printing triggers, parrot- and hogfish—and so began our most recent obsession and our campaign to share this super-cheap, super-easy and super-fun art form that appeals to just about anyone who appreciates the beauty of a fish.
Gyotaku (ghee-yo-TAH-koo) began aboard Japanese fishing boats in the 19th century as a means of logging the fisherman’s catch. Fishing boats were supplied with sumi ink and rice paper to quickly and easily record what they caught. It was then and still is a simple but accurate way to record the type and size of fish. A good fish rubbing is probably the most accurate image, in every detail, of a fish’s external features. A photo won’t show the true size of a fish, but a fish rubbing will. It has since morphed into a popular modern art form. Gyotaku can be seen in galleries, museums and Japanese restaurants around the world.
The basics of gyotaku are simple: Take a newly dead fish and paint it on one side. Then take a piece of fabric, rice paper or even a T-shirt, and place it on the painted side of the fish, and rub the material so that the paint is transferred to the material. Remove the material from the fish and—voilà!—you have your fish print. It can be as basic as that.
Of course, should you wish to get more elaborate, the sky is the limit. Many—Liz and me included—have deviated from the traditional Japanese style of black (sumi ink) on rice paper to use a variety of media, as well as include colors that try to replicate the coloration of the fish or even to color it in a fanciful way.
You can paint the fish with color—or add color after first printing in black—to add definition and jazz it up. You can also print multiple types of fishes on one screen, or use the same fish again and again on the same screen to create the impression of a school of fish.
Here is a description of how Liz and I approach gyotaku. Maybe you will be inspired to let your imagination have a go at it too.
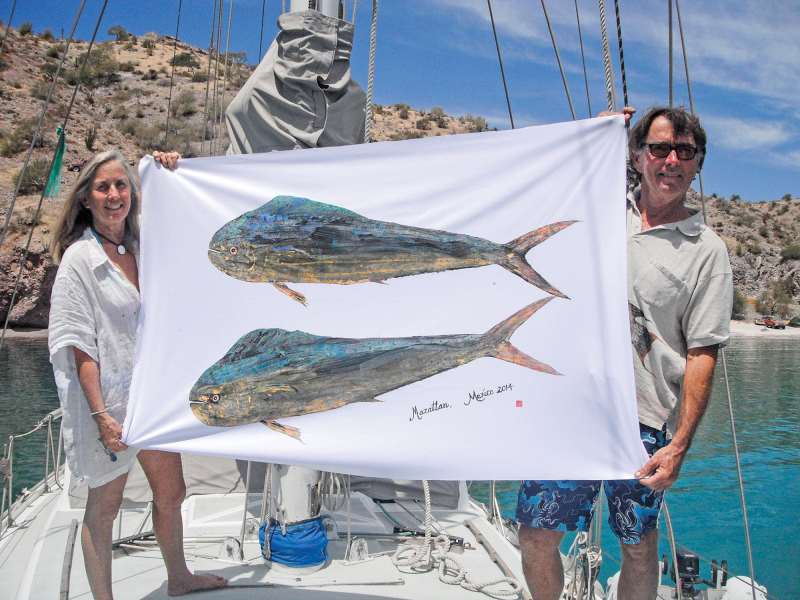
Step 1: Procure fish: Catch, shoot, buy or borrow. Yes, borrow. In Mazatlán, we borrowed a recently caught dorado from a sport-fishing boat. The captain allowed us to print his dorado, and in return we gave him one of two printed screens. He was stoked!
Step 2: Rinse any slime off the fish, then gently wipe one side of the fish dry, including fins. You can use rubbing alcohol and lots of newspaper, dry rags or paper towels.
Step 3: Seal off any orifices, which tend to leak a bit, with tissues to prevent contamination of the print.
Step 4: Lay out the fish in the desired position on a drop sheet. We often fan out the dorsal, pectoral and tail fins, and hold them open by placing bits of newspaper under them.
Step 5: Paint the fish with your paint and color of choice. Currently, we are using a very inexpensive, water-soluble color-fast acrylic paint found in paint stores everywhere. If you choose the traditional route, use Japanese sumi or India ink found in art-supply stores. Rice and mulberry paper can be found there too. Be careful to paint the body of the fish, skipping the eye, and paint in the direction of the scales. The pupil can be painted by hand on the print later. If the fish is small enough, pick it up to paint to ensure that no paint ends up on the drop sheet, which can spoil the print.
Step 6: Carefully place fabric or rice paper on the fish, and massage gently to transfer the paint onto the material. This is the Zen part of the operation.
Step 7: Remove the printed material and, presto, you have your print. Remember the paint will still be a little wet, so treat it accordingly.
Step 8: Wash the paint or ink off the fish with water while the paint is still wet, fillet the fish, cook and enjoy. We ascribe to the policy of you print it, you eat it! You are now a gyotaku artist. Repeat as often as you like with the same fish. You’ll see each print is unique.
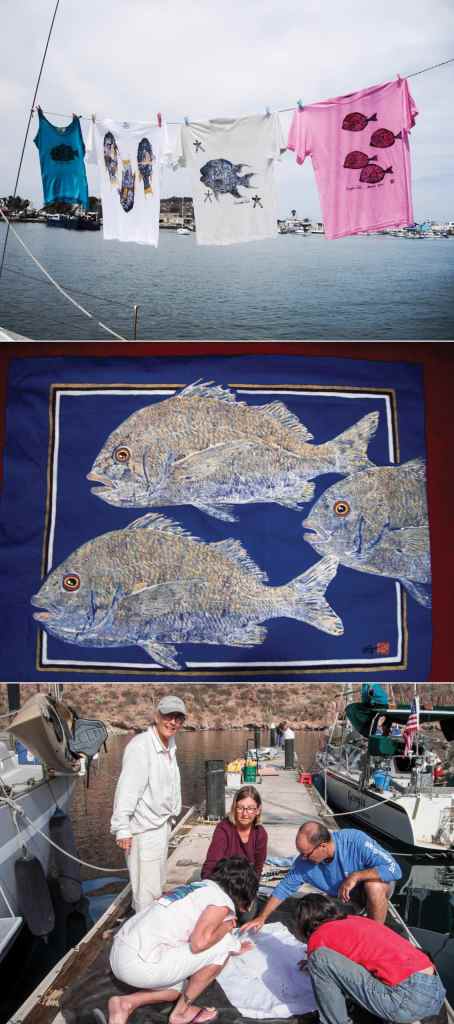
Now that you know how to print fish, what do you want to do with the prints? Let your creativity be your guide. Try wall hangings, aprons, T-shirts, cushion covers, tablecloths, table runners and greeting cards. Liz has made dozens of items, and they make great gifts.
Cruisers are so curious about our fish prints that Liz and I have held workshops on board Feel Free. The looks on our students’ faces when they produce their first print is always fun.
Try it, you’ll like it!
Tom Morkin and his wife, Liz, began cruising in 1985, and since then have sailed to 50 countries aboard two boats, Hoki Mai and Feel Free.


