Major mast failures usually begin as minor hardware problems. At least that’s what scrap-bin forensics seems to confirm. So, instead of dreading a dismasting, prevent it with a sensible approach to rig maintenance.
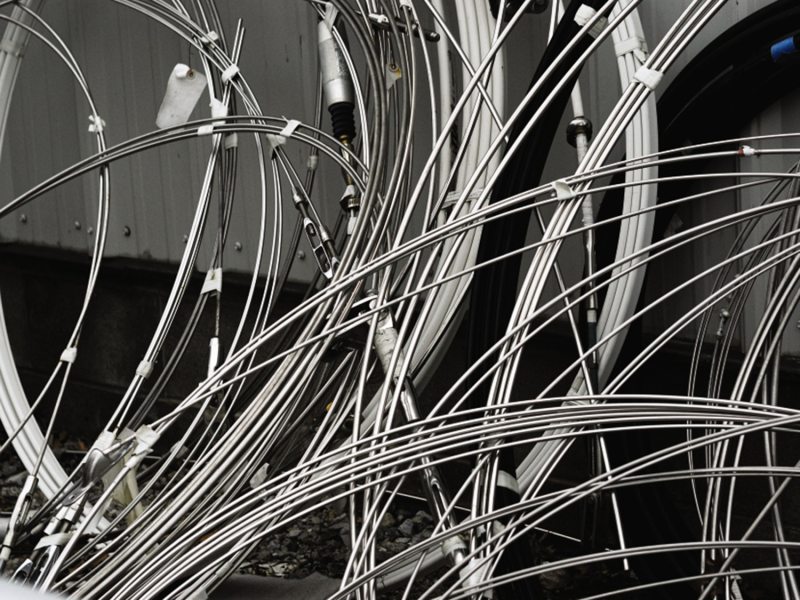
Some sailors inspect their masts and rigging with the spar stepped, but most recognize how much will remain unseen. Riggers recommend that the mast come out every few years and be placed on a pair of sturdy sawhorses ready for close-up scrutiny. My DIY approach focuses on hardware junctions and points where load paths intersect. Packed in my rigger’s bag are the usual hand tools, plus a Scotch pad, a quality magnifying glass and a small digital camera to record the findings. The old rule of thumb is that standing rigging has a decade’s, or one circumnavigation’s, worth of reliability; it’s a benchmark that remains valid today.
Another important issue is the rigging’s designed safety factor, or how much stronger the components are than they need be. The catch here is material deterioration over time, and the fact that there’s a direct correlation between stronger structures and increased reliability. For example, by increasing 1-by-19 shrouds and their attendant hardware from 5/16 inch to 3/8 inch, the higher safe working load translates into a longer life span. It’s a legit assumption, but doing so is both costlier and adds weight aloft, which can rob performance. The same tenets apply for a larger-diameter spar section and greater wall thickness. Engineers and naval architects try to balance these competing factors.
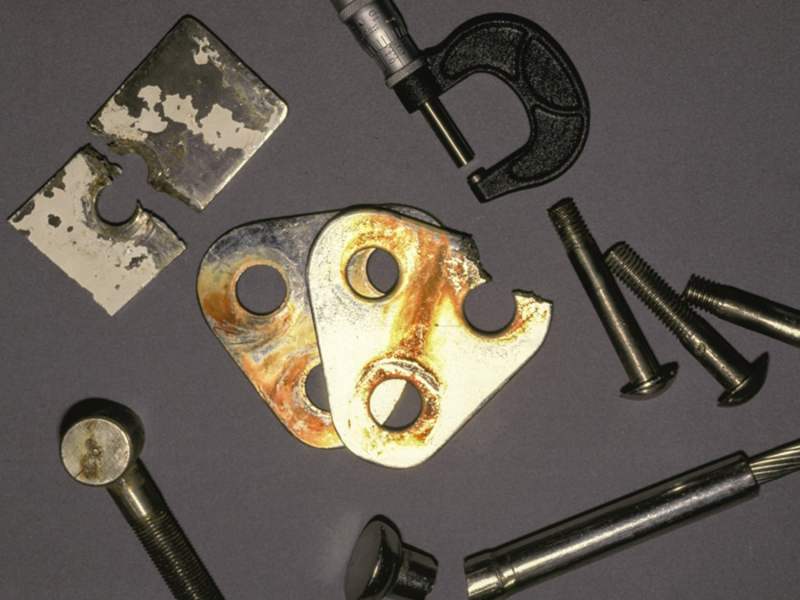
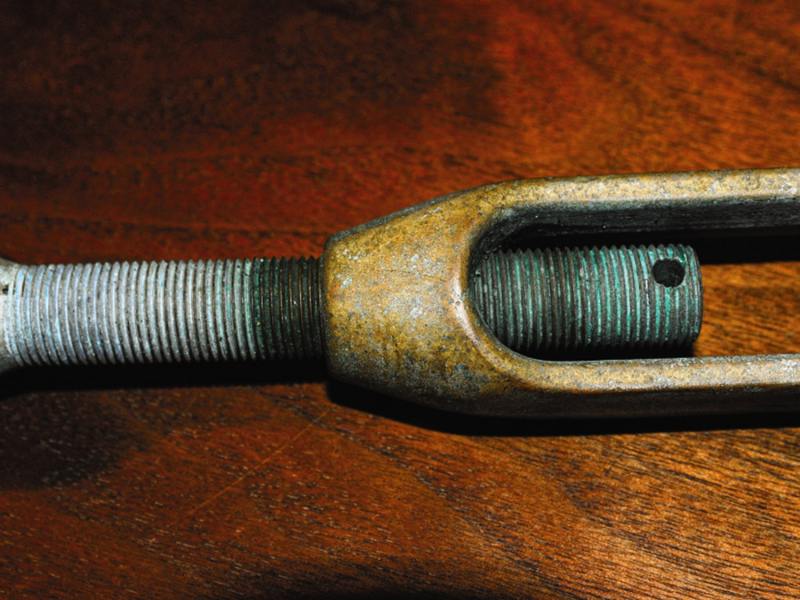
Some decades ago, I watched the deck-stepped spar of my first little cruising sloop drop into the drink. It drove home the fact that it really is the little things that count. In that case, it was a stainless- steel toggle, connected to an upper shroud turnbuckle, which had endured a few too many on-off load cycles. A tiny, nearly invisible crack had opened up, and salt spray had found a new home. The resulting corrosion tipped the scale and led to a dramatic failure. Since then, rig scrutiny has become my obsession.
The old rule of thumb is that standing rigging has a decade’s, or one circumnavigation’s, worth of reliability.
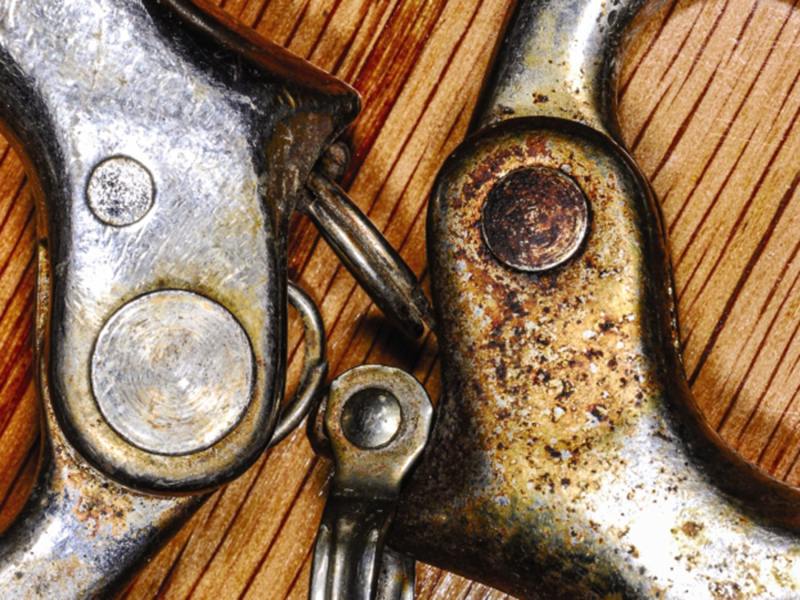
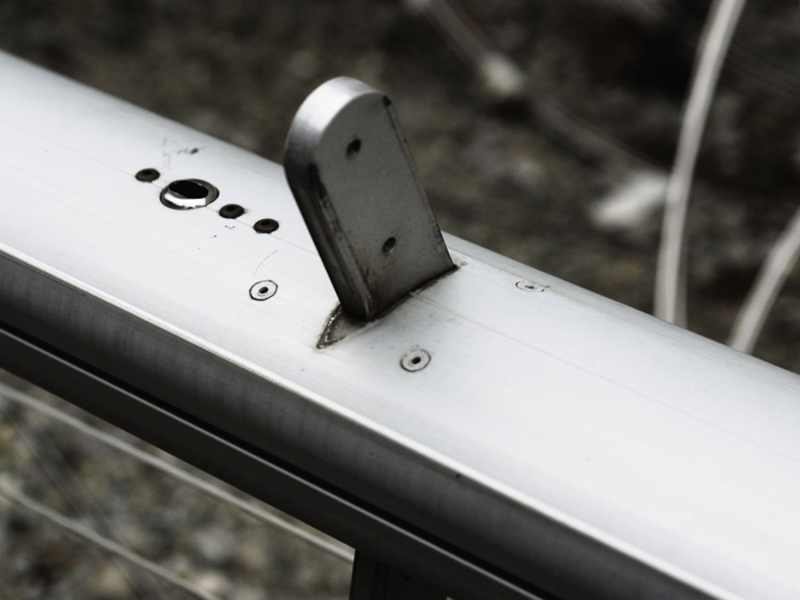
Wire and rod end fittings need a close look, especially in areas where there are brown stains and signs of cracks, pitting or other surface deterioration. This includes an evaluation of clevis-pin holes that should be circular, not elongated. Confer the same level of scrutiny to the clevis pins themselves. Don’t confuse stainless-steel clevis pins with chrome-plated bronze pins. The latter are just fine when used in bronze fittings, but when a bronze clevis pin is placed in a stainless-steel chainplate hole, the bronze pin can be carved away by the much harder stainless-steel chainplate.
My inspection process includes a rigging-wire wipe-down with a rag that easily snags on tiny cracks. It includes careful scrutiny of hardware junctions. I search for signs of chafe, especially where fiber or wire running rigging makes directional changes at sheave boxes, and around where the headsail furler’s top swivel rides. Looking closely at masthead exit points, I check for sheave wobble, excess side play and signs of pulley damage.
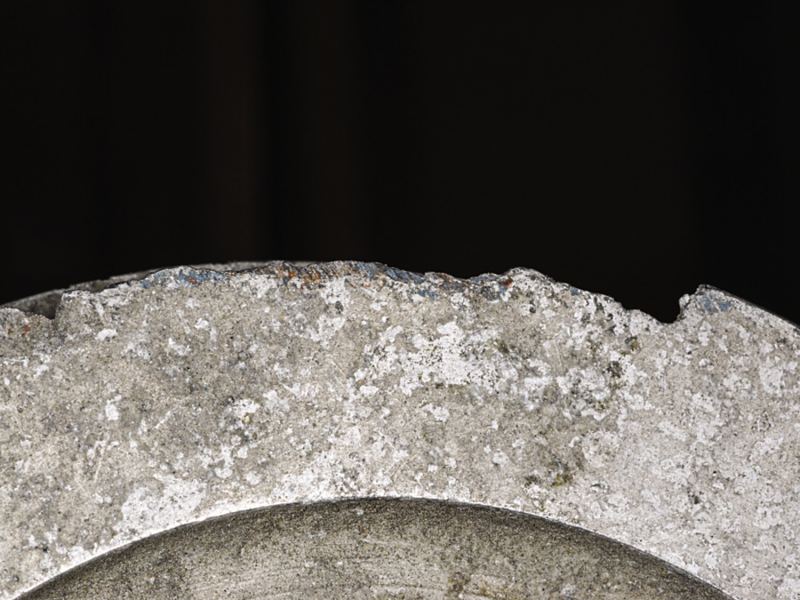
This is also the time to sort out halyards that are rubbing against external or internal obstructions. I use a bright, narrow-beam LED flashlight for a good visual inspection of the internal portion of the mast. Not only will it pinpoint screws and sheave boxes that might be causing chafe, but it also will help you untangle crossed halyards and confirm fairleads. While working at the heel end of the spar, look closely for corrosion and a condition riggers call “elephant foot.” It’s an actual wrinkling of the alloy tube section caused by too much compression and a too-thin wall section. It’s most often seen on raceboats with powerful hydraulic mast-adjusting systems, and on cruising boats that have pounded into too many steep wave faces.
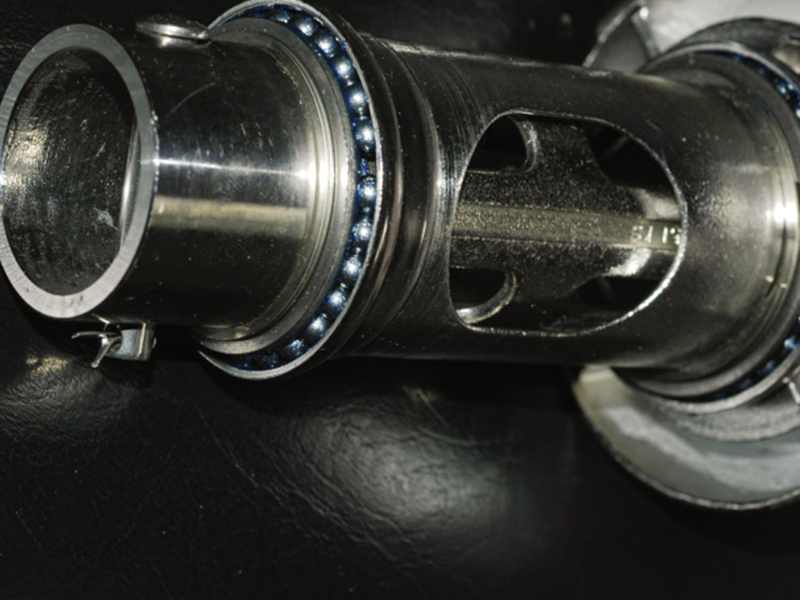
Roller furling foils hide the wire or rod on which they spin. Rigging end fittings and terminals can usually be inspected, but a broken strand of wire inside the foil might initially go unnoticed, at least for a little while. This is another reason why offshore cruisers opt for a cutter or solent rig that adds a second stay for some extra insurance. Following the once-a-decade rule, it makes sense to completely disassemble furling systems, and replace the wire along with any worn bearings, bushings or plastic spacers.
My inspection process includes a wire wipe-down with a rag that easily snags on tiny cracks. I search for signs of chafe everywhere.
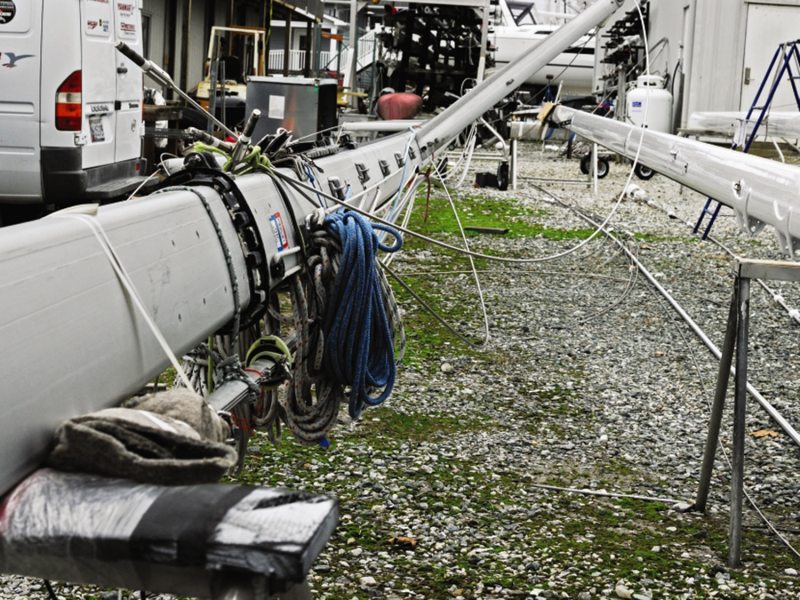
Keep in mind that when the mast is unstepped, many roller furling drums and head foils (especially on boats with deck-stepped rigs) extend beyond the heel of the spar. If the yard doesn’t splint and immobilize the extended foil and drum, do it yourself. All it entails is a couple of 2-by-4’s, or a pair of old oars lashed or duct-taped to the mast just above the heel. This double splint should extend to the base of the roller-furling drum where it too is lashed or taped. It keeps the drum from dangling and bending the foil during transport, and while the rig is stored on a mast rack.
Spreaders also deserve a really close look. All too often, excess anti-chafe protection results in the spreader tips becoming a water trap that turns into a hidden corrosion bath. So, when the rig is down, cut away the spreader-tip padding, and use white vinegar and a plastic scrub pad to get rid of any white powdery oxidation. Remove the spreaders from the spar, and inspect the area where spreader bases make contact with the mast. Look for compression damage to the mast wall and signs of corrosion damage. If all is well, reassemble using one of the tried-and-proven water-resistant lubricants. I’ve settled on Lanocote, McLube Sailkote and Super Lube, using Boeshield T-9 and WD-40 as my go-to spray protectant and penetrant. Throw away the old cotter pins, and use new pins on all of the reassembled rigging.
“She’ll be right, mate,” was the favorite phrase of an old Kiwi friend, but it isn’t good advice when it comes to keeping the rig where it belongs. Don’t shy away from calling in a qualified rigger to handle larger problems.

Most boatyards will restep spars but won’t tune the rig. Their goal is to set up the mast and rigging to approximate how it arrived. Occasionally, they hit the mark and even replace the mast wedges appropriately. Otherwise, I wait for a flat calm to make sure that the boat has no list. This involves using a tape measure to confirm the athwartship trim (waterline to rail-height port equals waterline to rail-height starboard). Then I check the perpendicular and rake of the mast using the main halyard with a makeshift plumb bob (dive weight) attached. The retune requires loosening the turnbuckles and incrementally retensioning the rigging. Small amounts of headstay and backstay adjustment relocates the masthead, causing the makeshift plumb bob to move significantly. I use prior measurements from previous mast-tuning successes to set the rake to a sweet spot that, in the past, delivered a minimal amount of weather helm.
With the rake set, I insert a set of teak or high-density hard-rubber wedges between the mast and the mast partners. These wedge-shaped spacers have a top flange that prevents them from falling into the bilge when the mast compresses on one side of the partners and opens the gap wider on the other. With all the wedges set, I incrementally add tension to the rig, tightening headstay and backstay first, while carefully maintaining the rake angle. Next, I adjust the upper shroud (or V1), working from side to side to keep the mast perpendicular. Finally, I snug up (but not overtension) the lower and intermediate shrouds. This static tuning sets the stage for an underway final tune, during which I check how well the spar remains in column. Leeward bends and S-curves are problematic and must be minimized. Boats with discontinuous rigging have shrouds that are not one continuous wire run. They utilize turnbuckles located above spreaders that must be individually adjusted to eliminate side bend.
During sea trials, make sure the leeward standing rigging is not overly slack and flopping around like loose spaghetti.
Intentional fore and aft mast bending can influence sail shape, and is put to good use aboard raceboats. Adding such complication to most cruising boats, which are normally steered by an autopilot, makes less sense. In-mast furling spars are least happy with powerful hydraulic backstays bowing the mast. So, get sound advice from a rigger/mast builder before adding hydraulic sail-shaping gear.
A sea trial should follow your static mast tune. And as you beat to windward in a modest 10- to 15-knot true breeze, check the leeward standing rigging. Make sure it’s not overly slack and flopping around like loose spaghetti. If so, add more shroud tension to both sides. A tension-testing gauge will work, but many sailors do fine estimating by hand. Cruising-boat rigs shouldn’t have the same amount of rig tension as a raceboat beating to windward. However, if your sailboat’s mast is deck-stepped, make sure the coachroof isn’t deforming due to the compression load. A compression post, ring frame or other rigid structure should be spreading such loads. If you’re unsure of the correct rig tune, arrange a session with a rigger or sailmaker—and start the season in optimized trim.
Technical expert Ralph Naranjo has inspected the rig on his Ericson 41, Wind Shadow, on countless occasions.


