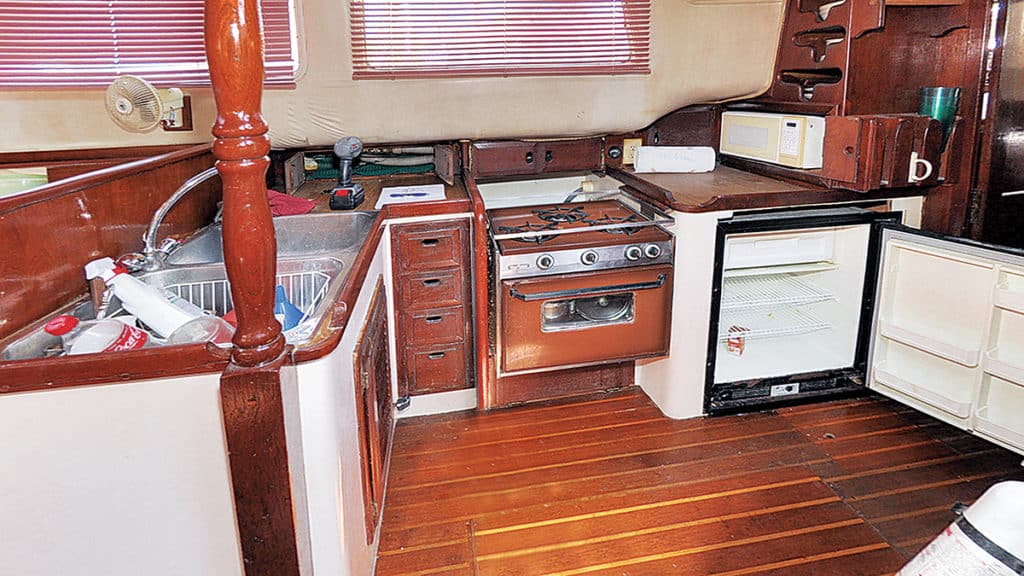
The galley we inherited when we bought our Down East 45 schooner, Britannia, was both old (circa 1977) and old-fashioned. The stove was rusty, and the refrigerator had seen better days. It was impossible to keep the stainless-steel sink “stainless;” it was pitted with more rust marks whenever we came to the boat. It was time for a refit. I started a list with prices of the items to replace, but it grew longer and longer and soon started to look like a major investment. The refrigerator probably heard my wife, Kati, complaining about it, because it suddenly died, so that went to the top of the list.
I decided to remodel the whole galley in one continuous operation. This way, it wouldn’t matter so much if any particular appliance was out of commission for a while, and I would not have to put my tools away and clean up after every day’s work. I could just leave it and continue the next day.
For both the cook and the crew, there are not many more important areas in a boat. Of course, galleys vary enormously in shape and size from one vessel to the next, therefore our remodel reflected our personal ideas and needs. But most of the individual things I altered could be applied to any galley restoration.
We decided to visit the West Marine superstore in Fort Lauderdale, Florida, which had a large selection of lovely modern appliances we could actually inspect, rather than buy online without seeing them. Sailorman, a consignment warehouse, was also only a few blocks away and full of similar goodies, and not just used equipment either. (Financially speaking, letting my wife loose in these places to shop for kitchen appliances was perhaps not a good idea. From there, things started to slip slightly out of control.)
I had made a detailed drawing of the existing layout, with dimensions of the different places where things would be fitted. I could then take measurements of actual equipment and make sure they would fit. It’s a good thing I did because the dimensions listed on some leaflets and websites were not accurate; when you are planning to fit a new appliance into a fixed-size space, that’s important information to have.
Comparing equipment and prices took absolutely ages, and I wasn’t even allowed to look at radars, chart plotters or stereos (you know, gear that’s really important). In any case, we trundled back to our home in Orlando with a vanload of equipment, which I couldn’t possibly install all at once.
From West Marine, we bought a Seaward Princess stainless-steel three-burner stove, an Isotherm Cruise CR130 front-opening stainless refrigerator and a Panasonic stainless convection microwave (plus an assortment of pots and pans I didn’t even know were needed). At Sailorman, we found a used but clean-looking Splendide 2100 washer/dryer at a knockdown price. I had absolutely no idea where I was going to put it, or if it even worked, because it wasn’t even on the list. All this equipment was stacked in my garage until I was ready to install individual items.
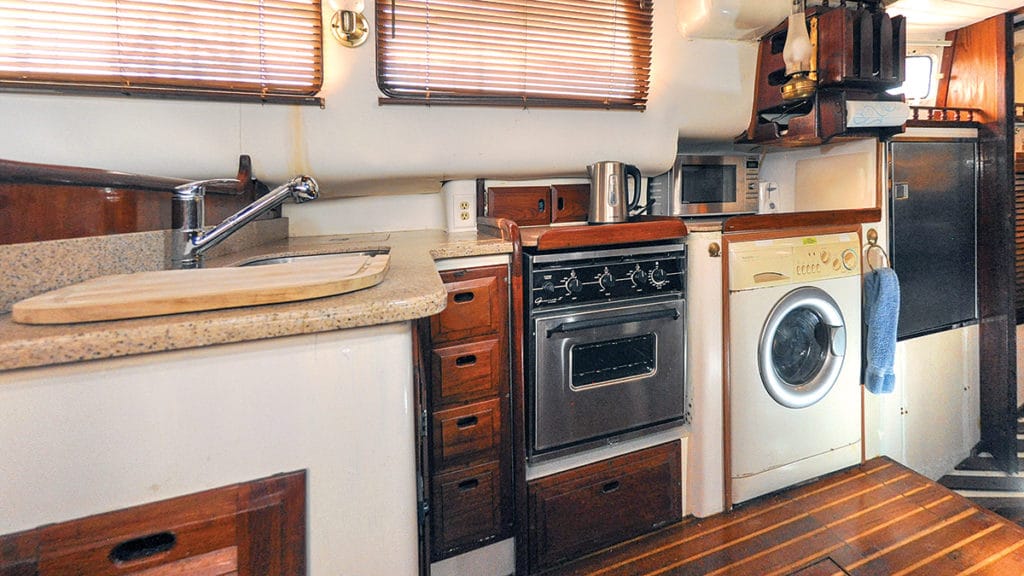
The easiest appliance to install was the three-burner stove, which fit nicely into the same space as the old stove. I just had to change the position of the gimbal plates and locking latch, then connect it to the existing propane gas line, and that was that (except for painting the aperture white beforehand). The old stove went into our marina dumpster.
I managed to test the washer/dryer by connecting it to my home’s hot and cold water system using hoses and an extension cable, and it worked fine. However, the only space large enough to install it was where the old fridge had been. At 148 pounds, this machine is very heavy and also bulky, measuring roughly 2 feet square and 3 feet high. It was a major effort for three men to haul it on board, and it only slid through the companionway with a fraction of an inch to spare. We managed to lever it into this space very neatly, as though it was always meant to be there.
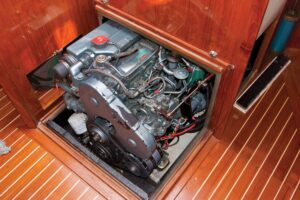
Connecting the washer’s hot and cold water pipes into the boat’s pressure system, then installing a discharge pipe and dryer vent, was another struggle. I didn’t want to damage the Formica countertop, so it took a lot of awkward drilling and jigsawing to get the pipes through bulkheads and floors of plywood and fiberglass of multiple thicknesses. I fitted shut-off valves on the hot and cold supply as a safety measure, in case the washer’s internal shut-off valves failed. I plumbed the water discharge through a new, above-the-waterline seacock with an anti-siphon loop. The dryer exhaust pipe was 4 inches in diameter, which I angled downward through the floor and into the engine room, near the aft blower outlet. When the dryer is in use, we also switch the engine-room blower on, which sucks out all the hot air. The washer also needed a heavy-duty electrical cable connected to a spare breaker on the 120-volt AC board. Installing this single item took three days.
Fitting the washer where the old fridge had been left our new one without a home. However, behind the aft cabin door was a large hanging locker just right for it. The only problem here was that the fridge would then be in the aft cabin with a door in the way, and who wants a refrigerator in an aft cabin anyway, unless it’s full of beer?
It is a well-known truth: On boats, one simple-sounding project usually leads to another, and another. …

I carefully removed the complete aft cabin door frame and bulkhead, which was a project in its own right because it was bonded to the side of the hull. I repositioned the door farther aft, thereby incorporating the locker as a continuation of the galley. However, this was complicated by the fact that the floor in the aft cabin was 8 inches lower than the galley, so I had to make an 8-inch infill for the bottom of the door. It was then only necessary to remove the locker door, build a platform for the fridge and cut a hole in the shelf above it for a vent. I wired the refrigerator through two breakers on the circuit board, one for 120 volts AC and the other 12 volts DC. There was no loss of space in this alteration either because it was all in the passageway to the aft cabin, and there were still plenty of hanging lockers and drawers in that cabin.
The convection microwave fit neatly into a space on the counter and just needed wiring into the 120-volt AC system.
My wife found a very nice twin-basin stainless-steel sink online, complete with a cutting board. But it was not the same shape as the old sink and also an under-mount installation, like modern sinks, so it would not fit in the existing opening. To fit this sink really meant a new countertop, and naturally, Kati didn’t want one section looking different from the other two.
As mentioned, one thing leads to another. …
I had to agree that the countertops, with their faded scratched-teak laminate, were past their prime. So off we went shopping for new ones.
Kati had a notion she would like granite, but the thinnest we could find were 1¼ inches thick, and very heavy. We settled for much lighter Corian material and found a local kitchen-remodeling company that could accurately cut the three separate sections out of ½-inch-thick material. To make it look thicker, they suggested making it double the thickness on the exposed edges, and shaping them with a nice rounded molding.
Before they could do anything, however, I had to make three precise cardboard templates. The sink section was the most critical, because it had to have cutouts for the sink, the top of the freezer and a hole for the faucet. I removed the ornamental teak column at the edge of the sink because I had other plans for that end of the galley. I took great care to make these templates, and along with assurances of accurate cutting by the supplier, it paid off. All the countertops fit perfectly over the top of the old laminate and instantly transformed the galley. I finished by adding varnished teak fiddles on all exposed edges and also installed a couple of extra power outlets.
The new stainless-steel double sink needed to be installed before the new countertop. I enlarged the cutout in the laminate and caulked it in place, then slid the new counter over the top and caulked round the edges. We had also purchased a new single-swivel sink faucet with a pull-out spout that I plumbed into the existing hot and cold pipes. Of course, a new sink also meant new drains underneath, which is always a tight scramble, even in a house. The lid for the freezer fit exactly in the right place.
The four drawers at the side of the range were repositioned flush with the stove, along with the locker below, making them all level. All the teak was stripped of old varnish, and two coats of high gloss were applied. There was no trash bin, so I built one from ½-inch plywood with a louvered front. It pivots outward from the end of the galley and holds a waste bag on simple file clips for easy removal.
It took two months to complete the remodeling, but we now have a fabulous new modern galley, as shipshape and efficient as any small apartment.