During our nearly four-year cruise of Mexico, my husband, Mark, and I lived almost exclusively on 555 watts of solar power charging a 640-amp-hour house battery bank. We anchored out virtually every night aboard our 2008 Hunter 44DS, Groovy, and relied on the sun for power. During one 10-week stretch, while we waited for a replacement engine alternator to arrive, our boat’s solar panels were our sole source of power. We had no backup charging system to turn to, and yet we lived and sailed comfortably the entire time. Mounting solar panels on a sailboat was not difficult, but a few key decisions made a huge difference in how effective our panels were.
A solar-power installation on a sailboat is made up of two independent systems: one system to charge the batteries, and another system to provide 120-volt AC power for household appliances. In the charging system, the solar panels convert sunlight into electrical current and deliver it to the batteries via a solar charge controller. Similar to a voltage regulator, the charge controller acts as a gatekeeper to protect the batteries from receiving more current than they need as they are being charged. In the AC power system, an inverter or inverter/charger converts the 12-volt DC power in the battery into 120 volts AC whenever it is turned on.
Panel Positioning and Wiring Considerations
One of the biggest challenges for sailors installing solar power on a sailboat is finding a place on the boat where the panels will be shaded as little as possible. Just a few square inches of shade on one panel can render that panel all but inoperable. Unfortunately, between the mast, radome, spreaders and boom, shadows cross the deck all day long, especially as the boat swings back and forth at anchor.
What’s worse, if the panels are wired in series rather than in parallel, this little bit of shade can shut down the entire solar-panel array. When we installed solar power on Groovy, we had already lived exclusively on solar power in an RV for over two years. Our RV solar panels had been wired in series, and we had witnessed the array shutting down current production when just half of one panel was shaded.
Choosing whether to wire the panels in series or parallel on a boat affects the wire gauge required, which is why many solar-power installers lean toward wiring the panels in series. Panels wired in series can be wired all the way to the solar charge controller with a thinner-gauge wire than those wired in parallel. This is because the voltage of panels wired in series is additive, while the current remains constant, so the current flowing is just that of a single panel. In contrast, the current flowing from panels that are wired in parallel is additive, while the voltage across them is not. This means that in a parallel installation, the current going to the charge controller is several times higher and requires much thicker cable to avoid any voltage loss over the length of the wire.
Not only is thinner-gauge wire less expensive, but it is also more supple and easier to work with, making the job of snaking it in and around various crevices in the boat and connecting it to the solar charge controller much less of a struggle. Thus the choice between series and parallel wiring boils down to a trade-off between system performance, expense and ease of solar system installation.
Luckily, the size of the wire can be reduced if higher-voltage solar panels are chosen. Since watts are determined by multiplying volts by amps, a higher-voltage panel that generates the same watts as a lower-voltage panel will produce less current. Therefore, selecting nominal 24-volt panels instead of 12-volt panels allows for the use of thinner wire sizes no matter how they are wired.
Our Marine Solar Panel Design Choices
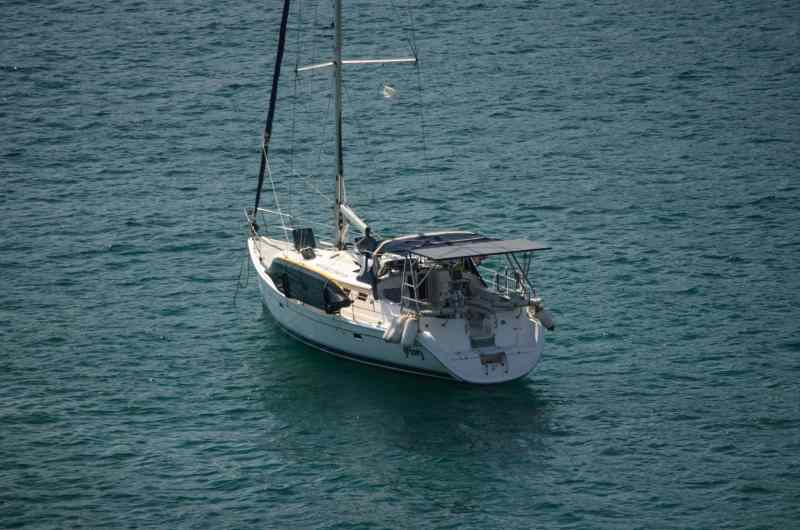
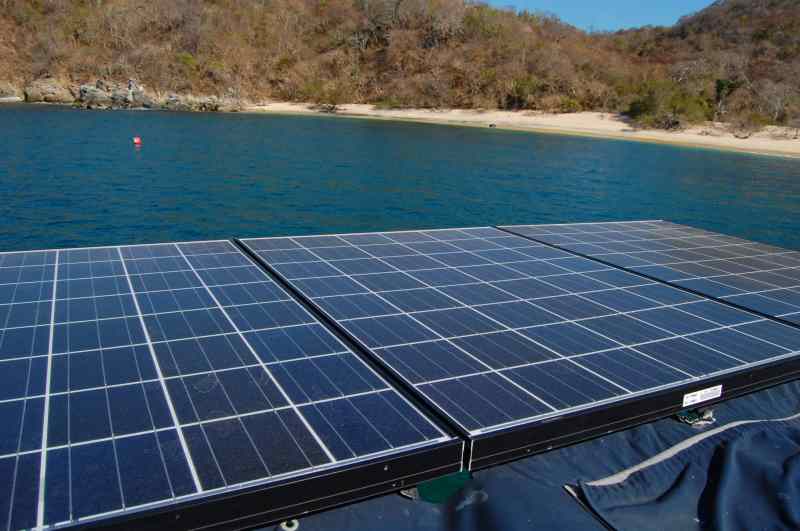
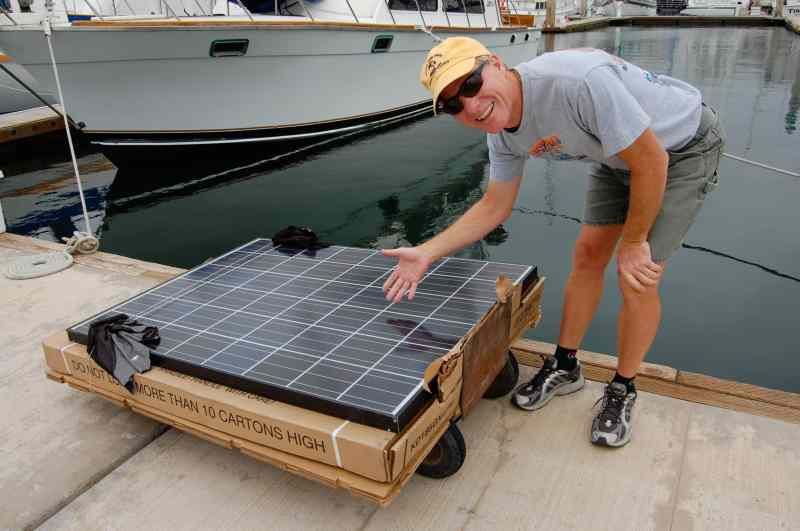
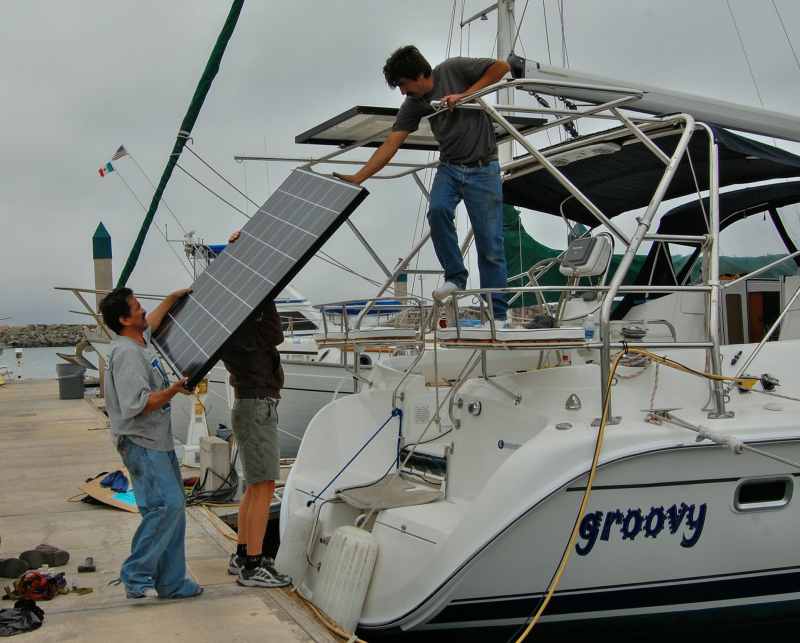
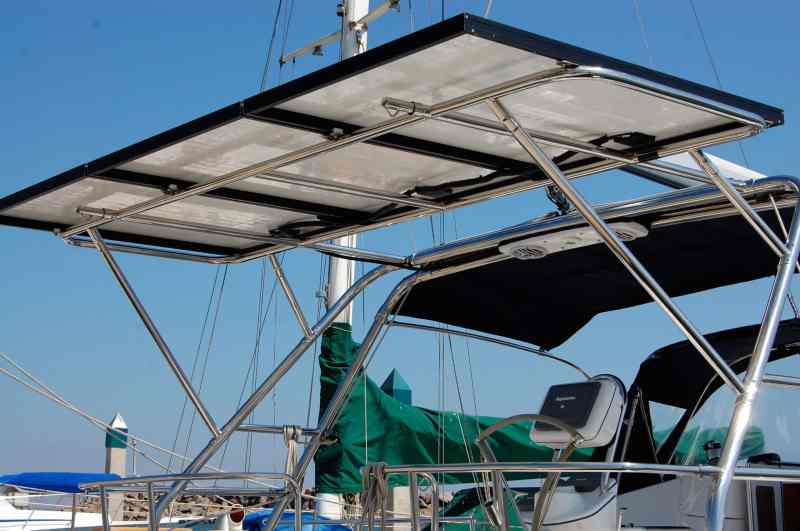
In our installation, we decided to mount three 185-watt, 24-volt (nominal) Kyocera solar panels high above the cockpit, well aft of the boom, as far away as possible from potential shade. Our Hunter came with a big, solid stainless-steel arch, and we turned to Alejandro Ulloa, a brilliant metal fabricator at Baja Naval Boatyard in Ensenada, Mexico, to build a polished stainless-steel solar-panel arch extension onto the existing structure. He designed the arch extension with integrated telescoping davits to hoist our dinghy as well as support the solar panels. These davits were strong enough — and the lines and blocks had enough purchase — that either of us could lift our light Porta-Bote dinghy with its 6-horsepower outboard without a winch.
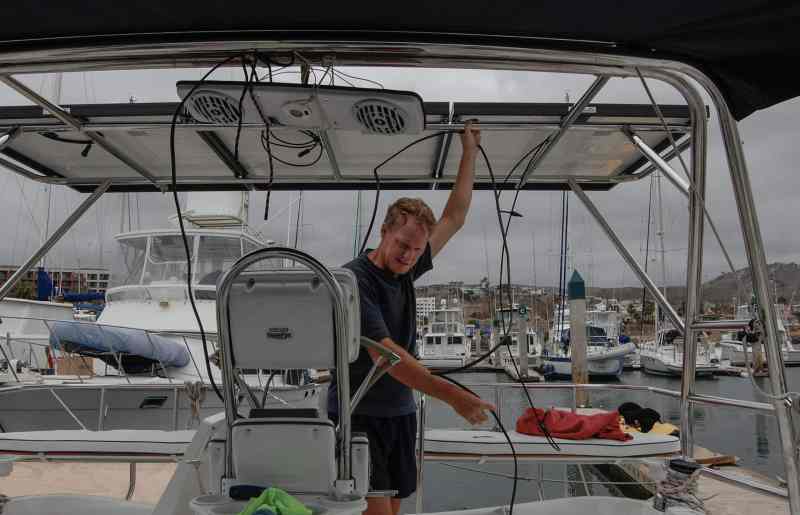
We spaced the panels about a half-inch apart and wired them in parallel. Using two twin-lead wires, we snaked the three positive leads and one common ground down through the inside of the arch tubes so they wouldn’t be visible, and placed wire loom over the exposed wires under the panels.
The junction points for the three parallel panels were on positive and negative bus bars inside a combiner box, all mounted in a cockpit lazarette. Inside the combiner box, we installed three breakers, one for each panel. This gave us the ability to shut off any or all of the panels if we needed to (we never did).
We mounted a Xantrex solar charge controller (model XW MPPT 60-150) in a hanging locker, as close to the batteries as possible, in a spot where it was easy to monitor and program. We ran twin-lead wire from the combiner box to the charge controller and from there to the batteries.
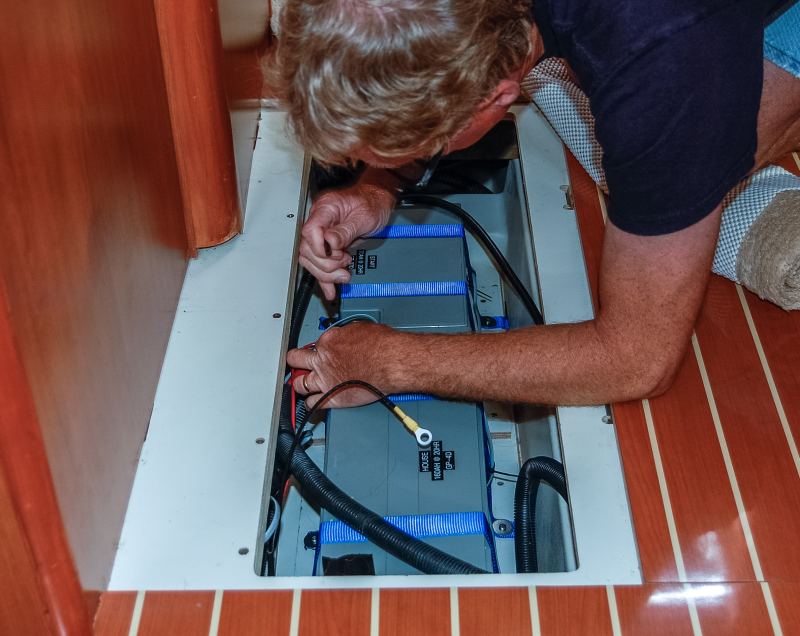
Our boat came with three new 12-volt Mastervolt 4D AGM house batteries, all wired in parallel, for a total of 480 amp-hours of capacity. We wanted a bigger house battery bank, and because it is best for the age, type and size of the batteries to be matched, we added a fourth new Mastervolt 4D AGM house battery, which brought our total to 640 amp-hours. Our batteries were installed at the lowest point in the hull, below the floorboards, and they ran the length of the saloon, from just forward of the companionway stairs to just aft of the V-berth stateroom door.
The best way to charge a bank of batteries that are wired in parallel is to span the entire battery bank with the leads coming from the charge controller. We did this by connecting the positive lead from the charge controller to the positive terminal of the first battery in the bank, and the negative lead from the charge controller to the negative terminal of the last battery. By spanning the entire bank, the batteries were charged equally rather than having the charging current focused on just the first battery in the bank.
We feel that AGM batteries are superior to wet cell (flooded) batteries because they can be installed in any orientation, don’t require maintenance, can’t spill (even in a capsize), and charge more quickly. Our Mastervolt batteries, like almost all AGM batteries on the market, are dual-purpose, combining the very different characteristics of both deep-cycle and start batteries. Our batteries work well, but if we were doing an installation from scratch today, we would consider the new Trojan Reliant AGM batteries. These batteries are engineered strictly for deep-cycle use and have been optimized to provide consistent current and maximize battery life.
Our boat came with a Xantrex Freedom 2,500-watt inverter/charger wired into the boat’s AC wiring system with a transfer switch. The inverter/charger performed two functions. While the boat was disconnected from shore power, it converted the batteries’ 12-volt DC power into 120-volt AC power, allowing us to operate 120-volt appliances, like our microwave. When the boat was connected to shore power, it charged the batteries.
Because this inverter/charger was a modified-sine-wave inverter, mimicking AC current with a stair-stepped square wave, we also had a 600-watt pure-sine-wave inverter to power our potentially more sensitive electronic devices. We chose Exeltech because its inverters produce an electrical signal that is clean enough to power medical equipment, and they are NASA’s choice for both the Russian and American sides of the International Space Station. For simplicity, rather than wiring the inverter into the cabin’s AC wiring, we plugged ordinary household power strips into the AC outlets on the inverter and plugged our appliances into the power strips. Like the charge controller, the inverter must be located as close to the batteries as possible. Ours was under a settee.
Shade’s Impact on Sailboat Solar Panels
Once our solar installation was completed on our sailboat, we closely observed the effects of shade on our solar-panel array. We were often anchored in an orientation that put the panels in full sun. Just as often, however, we were angled in such a way that shade from the mast and boom covered portions of our panels. It was fascinating to monitor the solar charge controller’s LCD display whenever the sun was forward of the beam — the current from the panels to the batteries fluctuated up and down as we swung at anchor.
Taking notes one morning, we noticed that the charging current was repeatedly creeping up and down between 9.5 and 24.5 amps as the boat moved to and fro. When the entire solar-panel array was in full sun, it generated 24.5 amps of current. When we moved so the mast shaded a portion of one panel, the array generated 15 amps. When it shaded portions of two panels and only one was in full sun, the array produced just 9.5 amps. Of course, it would have been preferable to see a steady 24.5 amps all morning, but this sure beat watching the current drop to zero whenever a shadow crossed a panel.
We discovered that shade makes a huge impact while sailing, too. Surprisingly, it is far worse to have the panels shaded by the sails than to have the panels in full sun but tilted away from its direct rays. One afternoon, we noticed that while we were on a tack that tilted the panels away from the sun, they generated 24.5 amps of current, whereas on a tack where the panels were tilted toward the sun but two of the three were partially shaded by the sails, the current dropped to a mere 10 amps.
Reflections On Our Solar Panel Installation
A wonderful and surprising side benefit of our large solar panels and arch system was that the setup created fabulous shade over the jumpseats at the stern end of the cockpit. Our metal fabricator, Alejandro, placed a support strut at hand-holding height, and sitting in those seats feels secure and comfortable while sailing, no matter the conditions.
After living on solar power for eight years of cruising and land-yacht travel, we’ve learned that you can never have too much solar power. Groovy’s 555 watts was enough to run all our household appliances as needed, including our nearly 4-cubic-foot DC refrigerator, two laptops, a TV/DVD player, and lights at night. However, it was not quite enough power to run all that plus our stand-alone 2.5-cubic-foot DC freezer during the short days and low sun angles of the winter months without supplemental charging from the engine alternator every few days. For the 10 weeks that we did not have a functioning alternator, our solution was to turn off the freezer, which enabled our batteries to reach full charge every afternoon.
Solar power made a world of difference in our cruise. Not only did it allow us to live comfortably and with ample electricity for weeks on end when our engine alternator went on the blink, but as a “set-it-and-forget-it” system, it also gave us the freedom to anchor out for as long as we wished without worrying about the batteries. In our eyes, the solar-panel arch enhanced the beauty and lines of our boat, giving her a sleek and clean appearance. It was true icing on the cake to discover that the panels and arch system also provided much-needed shade over the cockpit and helm from the hot tropical sunshine. If you are preparing for a cruise, consider turning to the sun for electricity and outfitting your sailboat with solar power.
The Installation:


Emily and Mark Fagan offer cruising tips and share their stories and photos on their website, roadslesstraveled.us. They are currently enjoying a land cruise across America aboard an RV.


