This story originally appeared on Sailing Totem.
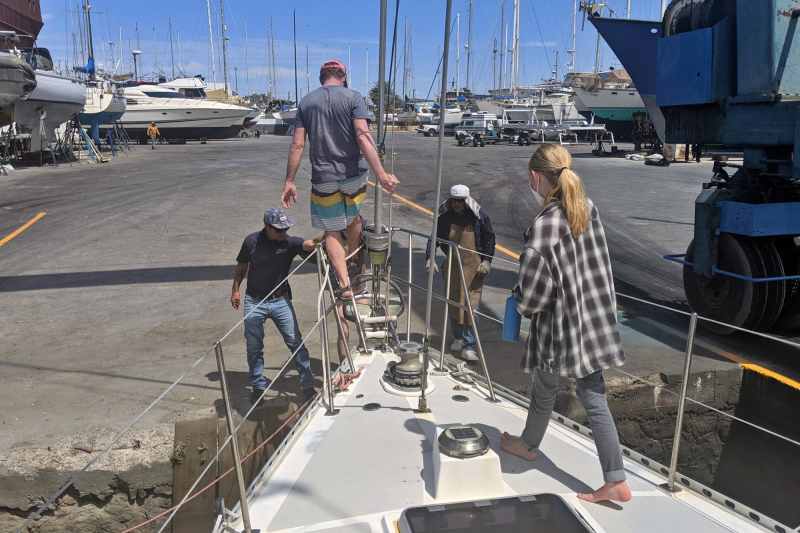
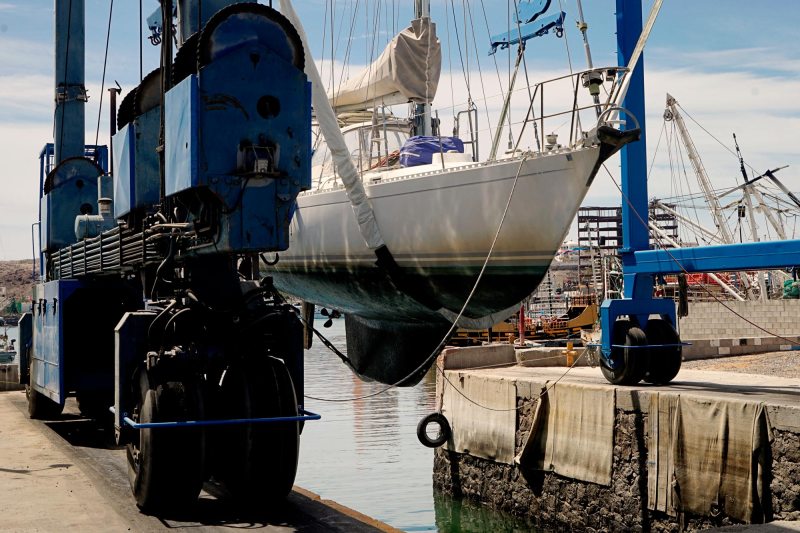
Stepping off the bow while Totem hung in the Travelift at Cabrales Boatyard’s slipway, Jamie and I wondered to each other how Totem’s bottom would look once we could step back and look. We’re three years into our Coppercoat application. It’s worked for us, but we had just spent more than three months sitting in a high-growth area. Parked in Santa Rosalia, the dirty harbor and cold water left us uninterested in jumping in to clean.
Coppercoat myths or misconceptions
Stepping back: our article in the recent issue of Cruising World – now online! – breaks down a number of the myths that exist around using this particular type of antifouling (don’t call it paint. It’s epoxy). We’ve been happy with it, but for some reason it’s…controversial? Misunderstood? It seems to spark opinions, at any rate. To understand the range of experiences, I spoke at length to a number of cruisers to try and get a handle on the critical success factors, and why it worked for some but not others.
The details are in that article linked above. The short version: there are two main factors in a happy outcome. First, getting it applied correctly, which isn’t as simple as slapping on fresh paint – that includes exposing the suspended copper, too. We outlined the step-by-step process on Totem. Second, the expectations from boat owners on how it works (it’s not magical! Less frequent, easier cleaning… not zero cleaning).
Ultimately, the DIYers tend to be happier campers. Nobody cares about getting it right as much as you do! We’re also more likely to be ready to pop into the water to wipe down slime. OK, except when it’s cold and we’re stuck in a dirty harbor… this was not a banner winter for our crew. Thus the touch of trepidation we had before getting a look at the bottom upon last month’s haul.

How Totem’s Coppercoat fared
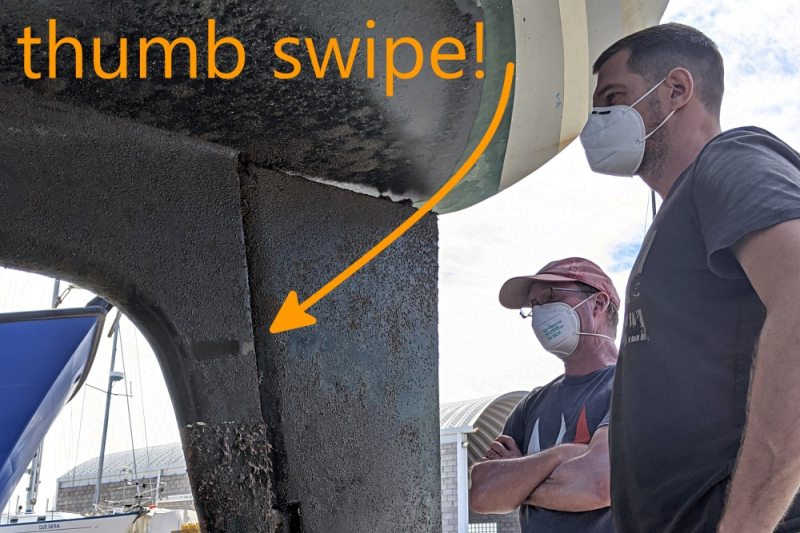
Jamie and I stepped back from the Travelift, and checked out Totem’s bottom. The first look left us slightly dismayed; from a distance, we could see some three-dimensional striation on the hull. We looked at each other, shrugged, and got on with other tasks. To understand the range of experiences, I spoke at length to a number of cruisers to try and get a handle on the critical success factors, and why it worked for some but not others – although the story told is ours.
Realizing key benefits
Coppercoat has been a big win for us, and getting into our third year of cruising in a high-growth area gives us confidence in the results. We’re experiencing most of the major benefits first hand (hauling again is for other reasons!):
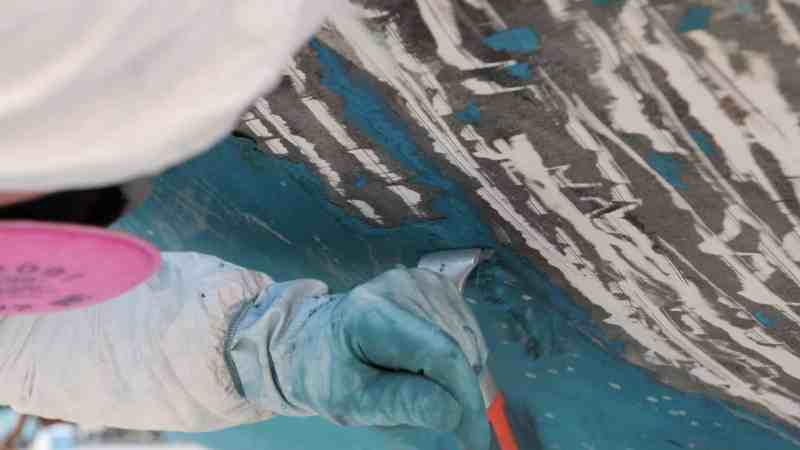
Cleaning less often. At first this was deliberate. We wanted to observe the rate and type of growth first hand. Now we know how much less cleaning is needed, at least in Pacific Mexico. It’s not just less frequently needed (about monthly), it’s mostly soft, and even if there’s some hard growth—cleaning is dramatically easier with the hard epoxy bottom compared to conventional paint.
Being kinder to the environment. This is such a big win, and where we value Coppercoat most: how it has allowed us to be kinder and gentler to the marine environment around us. I’m so happy about this!
Hauling less frequently. One of the real assets of Coppercoat is not needing to haul as often to repaint the bottom. Oops! We’ve hauled anyway, but not because we had to address bottom paint.
Is Coppercoat expensive?
There was no difference in cost for us to apply Coppercoat, in comparison to the second-choice hard paint we had picked out as a Plan B. But we had the benefit of starting from a bare hull. Bottom preparation can be extensive (we wrote about ours in detail), and it’s both important and necessary: this why people complain about the cost of Coppercoat. So the cost isn’t Coppercoat; it’s the level of prep you may (or may not) be required to do.
Four other Coppercoat stories
In preparing for the article in Cruising World, I spoke I spoke with a number of folks who shared their experiences. Here are a few that didn’t make it into the final piece; each highlights a different aspect of the antifouling to consider.
Complexity: overseas sourcing
Jim and Barbara Cole took a cue from evolving regulations when deciding what to put on their Hallberg-Rassy Complexity’s bottom in Malaysia. Standards were bending towards more environmentally friendly rules: they looked for a paint that complied with strict California law. While researching copper leaching data, Barbara learned that Coppercoat exceeded the California standards by a factor of 10!
Their international application had a few hiccups as they pieced together supplies. “The rollers that were available for the application had too long of a nap. This left a lot of texture in the finished surface. I spent many days sanding off precious copper. If I had it to do over again, I would seriously consider hiring the local spray painter to apply the Coppercoat.”
In 2020 they sailed from Southeast Asia to the Mediterranean, through the Red Sea. “Before each leg of our passages to the Med, our young crew cleaned the bottom. There was very little to scrape, mostly just slime. What few barnacles were on the bottom came off very easily. When our crew cleaned bottoms for other boats in our group, it sometimes took them several days to do one boat. They could always do our bottom in an hour or so.”
Soulianis: DIY perspective
Lauren and Kirk decided to DIY their Coppercoat application when they put it on the bottom of their Tartan 37, Soulianis in Florida in 2018. They cruise the warmer waters of the Bahamas and Florida, and have had to haul a few times for travel away from the boat. “I am super pumped I haven’t had to paint again each time before splashing. That for me is the biggest win so far.” But to hear Kirk’s description of the maintenance routine—”last year, we were in the water from Feb-June and only scrubbed it twice. There has been some growth but not much”—it’s sounds like a win on the antifouling front, too.
The couple are clear about the tradeoff of cruising kitty funds for effort: “…it absolutely IS a DIY job; you can do it with zero experience, and our hull is proof. But, be forewarned: It is one hell of a big job.”
Grateful: bottom prep blues
Jamie and Niki knew application was key, and decided to research experienced pros to put Coppercoat on their Fountaine Pajot Lavezzi 40, Grateful. “After stripping old bottom paint down to the epoxy barrier, our contractor insisted on applying an additional epoxy barrier prior to the Coppercoat. Six months after the Coppercoat was applied and on the other side of the Atlantic Ocean from our contractor, we found several areas where the second epoxy barrier coat had peeled off and others with numerous tiny blisters.” Coppercoat remained tenaciously adhered to the epoxy – but the epoxy was literally falling off the boat! They suspect a residual chemical contamination from paint stripping, but they’ll never know.
When hauling a year later, the fix was a low-drama event: they applied Coppercoat on the exposed, original epoxy. This has been problem-free in the years since.
Distant Shores III: incomplete initial application
Paul and Sheryl Shard know their way around boats, after more than three decades of living aboard and cruising—sharing their stories by videos first on TV, and now also on YouTube.
They decided to put Coppercoat on the bottom of their third and most recent Southerly, Distant Shores III. But the rush to launch and get the boat to the boat show in Düsseldorf meant that the application wasn’t completed properly. The cured epoxy wasn’t burnished to Coppercoat’s instructions, and it might have been snowing during the application. Antifouling fail resulted!
The couple later hauled the boat under warranty in Annapolis to have the bottom re-done and properly burnished. The difference in performance is striking. Sheryl says: “Distant Shores III was in the water in Panama for seven months of lockdown, but looked like new when we returned.”
Touching up Coppercoat
Totem is getting some spa treatment here at Cabrales Boatyard. Among the projects: hull painting. This means we could adjust the waterline slightly and it’s tempting. While we don’t need to raise the waterline, per se (a tactic used when boats are loaded down more than they should be), the fact that growth does creep above the waterline makes it tempting to push it up. The verdigris tint would be a fine peek of color below whatever we pick for our boot stripe… thumb wrestling on that choice is ongoing! Otherwise, our antifouling shouldn’t need work for many, many years.


