It is most important to make and stow lines, such as heaving or mooring lines, in such a way that they will be usable straight away when required. There should never be any need to re-coil the line when it is take not of stowage; this wastes valuable time, especially if it involves lengthy storing out of knots and snarl-ups. It is far better to take a little time and trouble to coil the line neatly and secure it properly when about to stow it away and so make sure it will come out ready for use next time.
The half hitch coil and the buntline or gasket coil provide two simple, quick methods using nothing more than the line itself.
How to Tie a Half Hitch Coil
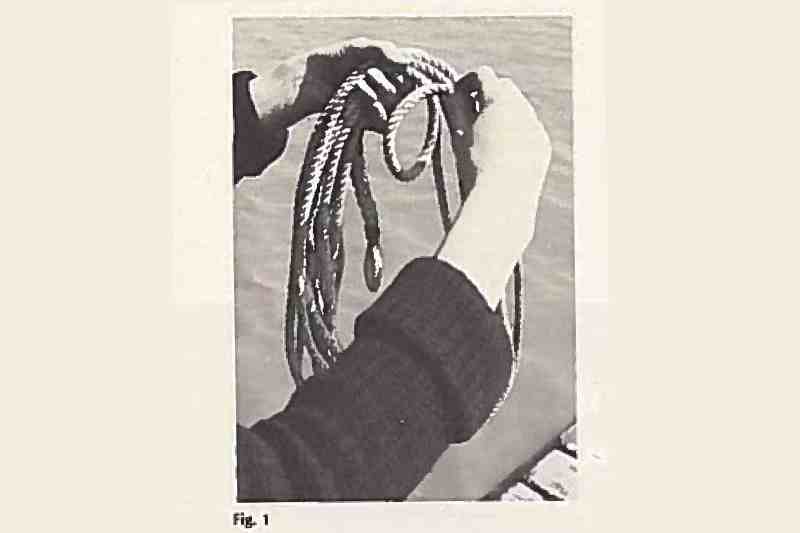
To make the half hitch coil, first coil the line in the normal fashion, giving a slight twist in the direction for the lay for a laid line and working in figures-of-eight for a plaited line. The last few feet are left uncoiled, and with the line held in the left hand (Figure 1), a loop is formed in the remaining line by twisting it in the direction of the lay (clockwise in the case of a plaited line).
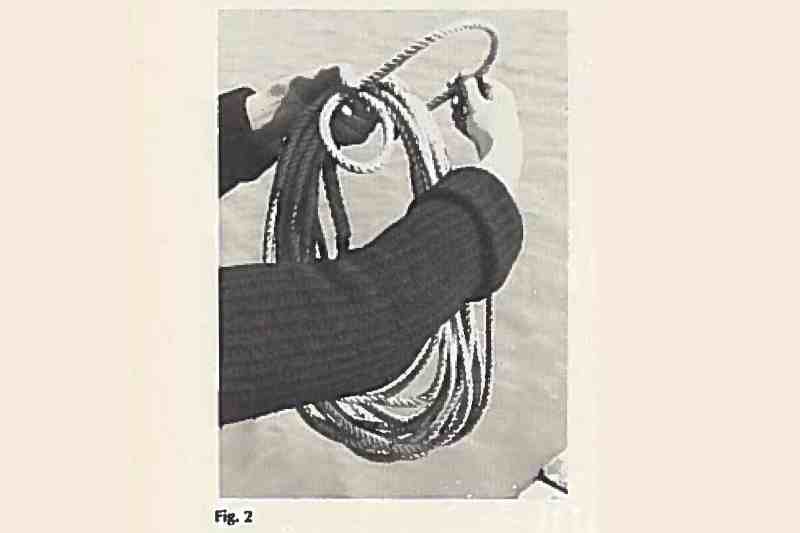
This loop is then held under the thumb of your left hand (Figure 2) while you take the bitter end back over the top of the coils and pass it forward through the small loop, enclosing the top of the coils as you do so.
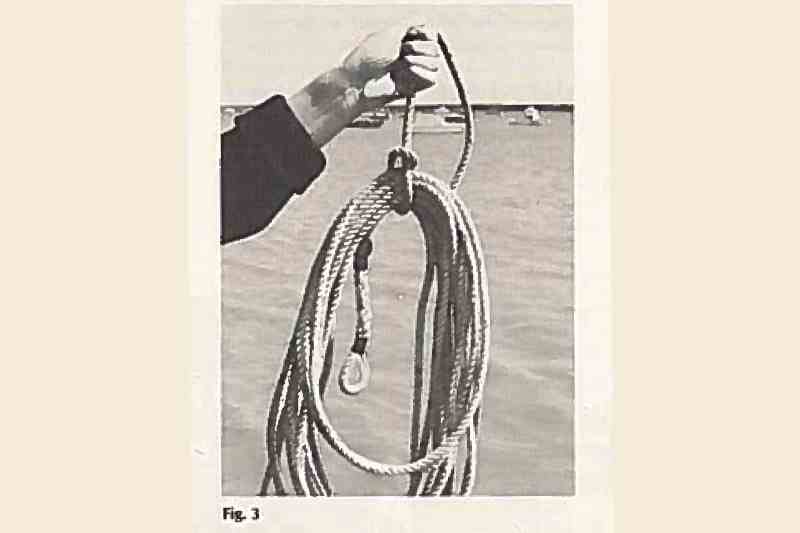
Finally, the hitch is settled (Figure 3) and the tail of the line that’s left can be used to hang the coil. The simplest way to do this is by forming a clove hitch around a hook in the check or bosun’s locker.
How to Tie a Gasket Coil
The buntline or gasket coil is only slightly more complicated than the half hitch coil but is more secure and should be used when the line on which it is formed is to be stowed without hanging it up. If the half hitch coil is just dropped into a locker, the hitch may loosen or even come undone and allow the coils to tangle. With the buntline coil this will not happen.
Deriving its name from the buntlines on square sails which, with one end permanently attached to the sails, had to be coiled and secured in situ, the buntline coil can be used not only to make a line for stowage, but also to hold it neatly against a cleat.
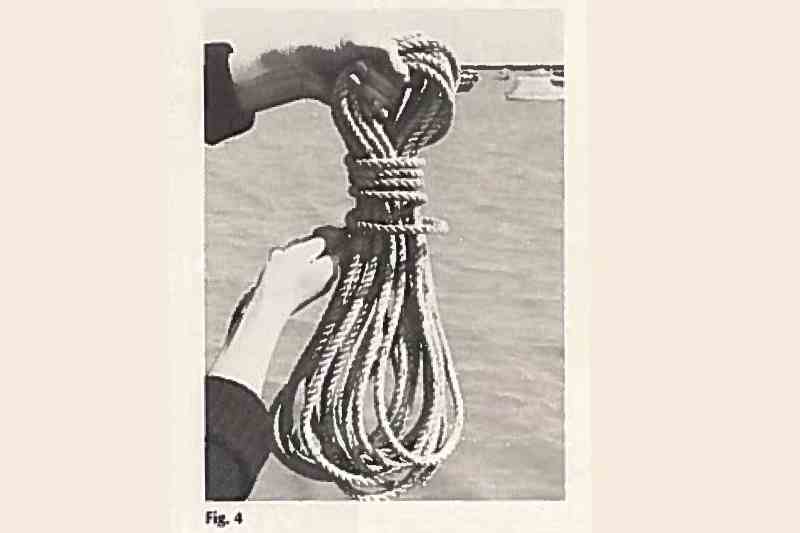
To begin the buntline coil, the line must be coiled in the usual manner of loops or figures-of-eight according to whether it is laid or plaited line. The last few feet of it are then wrapped around the upper parts of the coils (Figure 4) in a series of frapping turns.
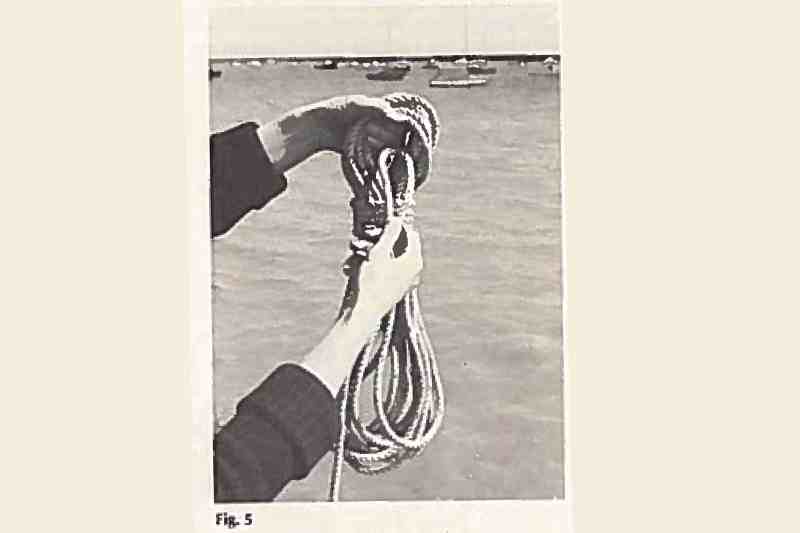
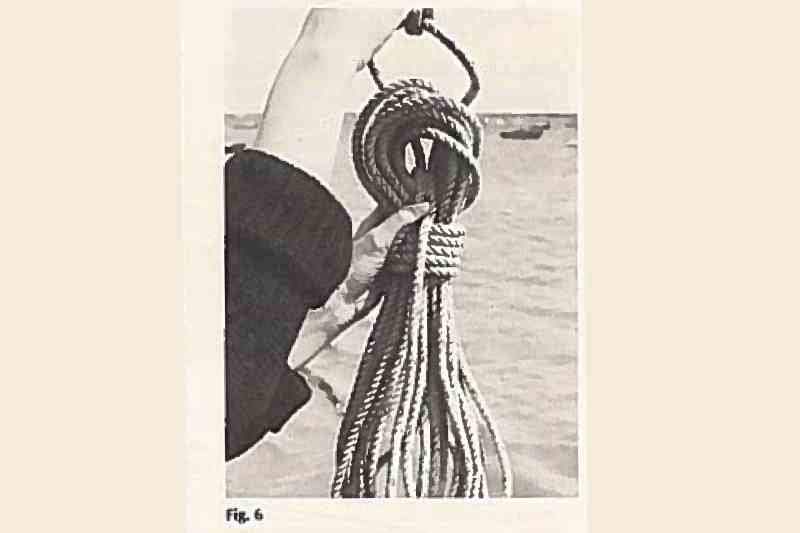
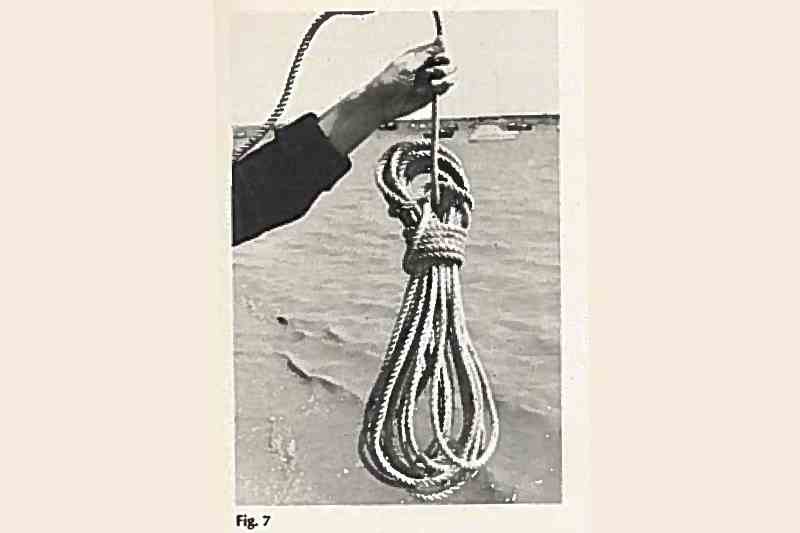
When several turns have been made like this, a loop is formed in the line that is left (Figure 5) and is passed back through the upper part of the coils. This loop is then spread out (Figure 6) while being held under the thumb of your left hand, and is dropped down over the top of the original coils. It is now enclosing the tops of the coils and lying on op of the free end of the line. The whole thing is then settled so that it looks like that sown in Figure 7 and is ready to be hung up on a hook using a clove hitch (as described for the half hitch coil).
When you want to sue the line again, the loop is simply lifted off the tops of the coils and the frapping turns undone – there is no need to feed the bitter end all the way back through.
A line also may be made up with a buntline coil when one end is fixed to, say, a leaf; in fact this is more or less its original use, as mentioned earlier. In this case the line is coiled up beginning some distance from the fixed point and working toward the free end. Then, using the length of line between the fixed point and the coils, frapping turns are put on by rolling the coils along the line towards the fixed point. (This is done to avoid inducing twists and kinks as would be the case if the line were passed around and around the coils.) A bight is taken in the remaining line and passed forward through the tops of the coils. It is then lifted up, spread out and dropped over the tops of the coils as previously described.
How to Coil Very Thick Line
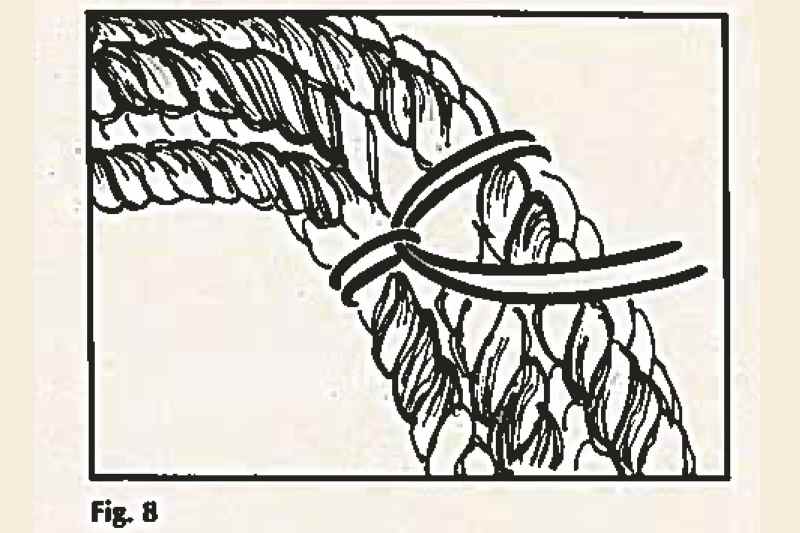
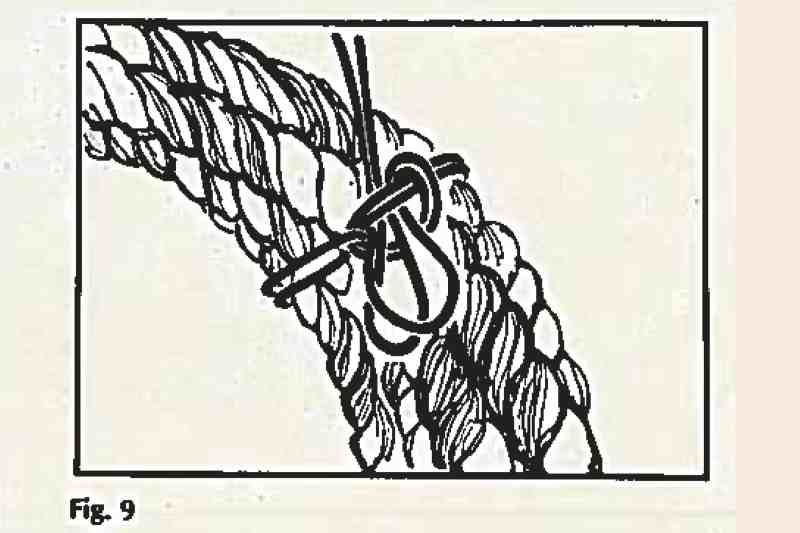
If a very heavy mooring warp is to be made ready for stowage, a different method may be required. First coil the warp down on deck, then use some lengths of light line to “stop” it at three or four points around the coils. Double each piece of the light line, pass it around the coils of the heavy warp and bring the two ends up through the bight to form a cow hitch (Figure 8). Finish off with a slipped half hitch (Figure 9) so that the stops can be removed in a hurry.
It pays to keep lines neatly coiled and stowed because one day you will need one quickly, possibly to avoid damaging your boat. At such a time it’s no good shouting, “Wait, wait!” as you struggle to unravel a line. So coil and secure them properly, then stow them where they can be easily grabbed and put into service.
This article first appeared in the September 1980 issue of Cruising World. Colin Jarman, a former features editor for Britain’s Yachting Monthly lives with his wife Mary in Essex, England. He is the author of three books on cruising and seamanship (a fourth was in the works at time of printing).