A fracture in the pressurized shore-water line in my 50-foot schooner, Britannia, caused major flooding. It would have sunk her had I not managed to pump out the water quickly. I subsequently stripped and thoroughly cleaned five electric pumps, which worked again flawlessly. I also drained the engine oil and transmission oil and replaced them. Then, remarkably, the engine fired up immediately, as though nothing had happened.
Because the engine continued to start every time, I assumed that the starter motor was fine. During the hot summer months in Florida, we hardly visited the boat anyway, and rarely started the engine. This was a mistake.
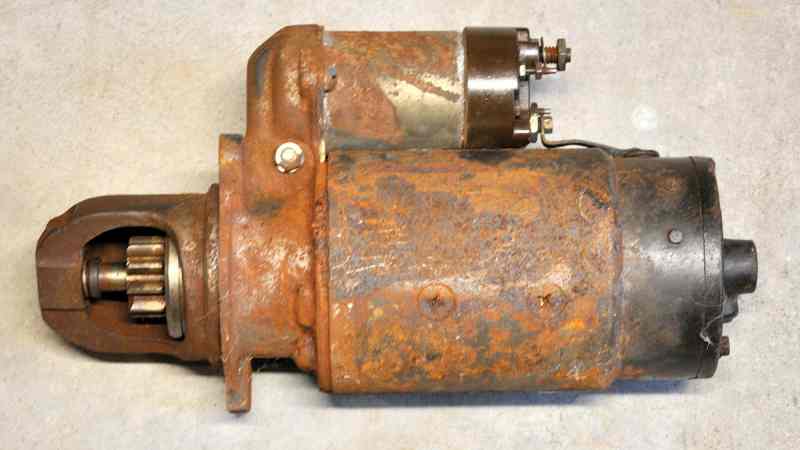
Over time, the starter began to turn the engine slower and slower, as though the dedicated battery was at the end of its five-year life. I installed a new battery but saw no change in the sluggish turnover, which was by then hardly sufficient to fire the engine at all. I also cleaned the heavy cable connections, but it made no difference. There was only one thing left to do: Remove the starter (Figure 1) and examine it.
The thing about starter motors on heavy diesel engines in boats is this: They’re darn heavy. My engine is a Perkins 4.236 that weighs half a ton, and the starter is low down in the bowels of the bilge, secured with three very rusty three-eighths-inch nuts—one of which was almost impossible to reach with a wrench. After hanging upside down over the engine for half an hour, I finally got it off and hauled out the thing using the battery cable attached to the solenoid. It is 15 inches long and weighs 34 pounds. That’s the same weight as my number two CQR anchor.

Dismantling the Starter
There are two main parts to these normally reliable starters (see Figure 2). There is the solenoid (Figure 3), which throws a tiny pinion gear on the motor shaft into mesh with the flywheel attached to the crankshaft. The 10 teeth on the pinion gear are tapered, so they mesh smoothly with the flywheel teeth. It is called a Bendix Drive, after the inventor, Vincent Bendix, who patented it in 1915.
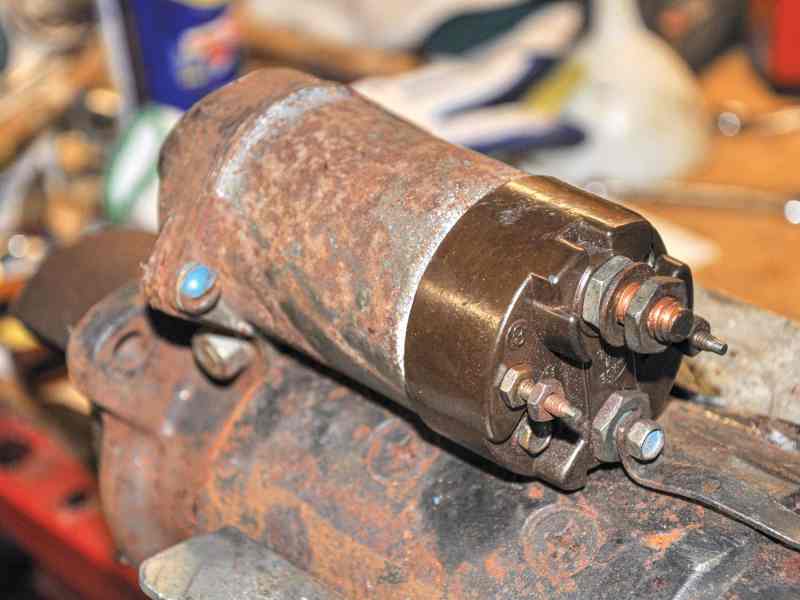
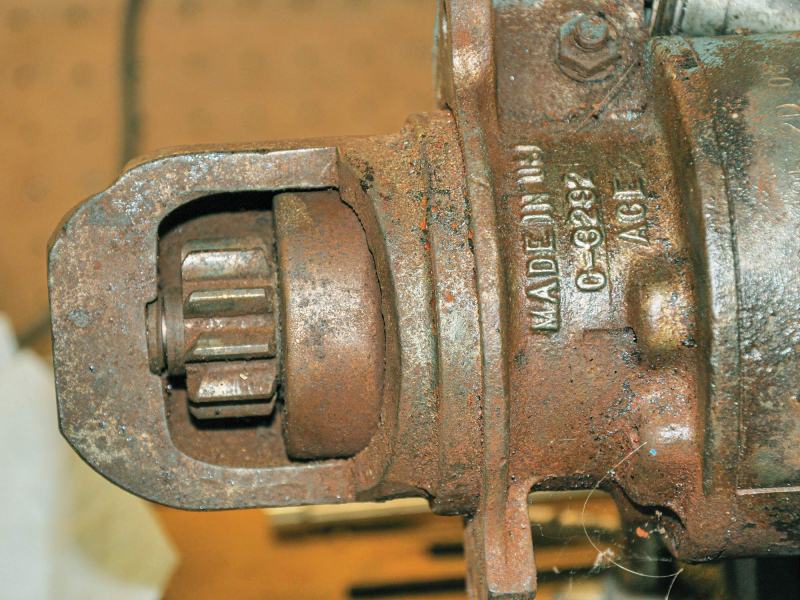
The other, much-larger part is the actual starter, containing the armature that spins the pinion gear (Figure 4) and turns the flywheel, thereby firing the engine. There could be numerous reasons why this was not happening, so everything on the starter needed looking at. I began with the solenoid.
Solenoid
After securing the starter firmly in the jaws of the big swivel vise in my garage, I removed the two screws holding the solenoid to the starter casing, along with the screw holding the electrical cable to the body. The solenoid still would not come away from the body, until I discovered it needed rotating a little to dislodge it from the groove it was locked in. It then almost removed itself, thanks to a large, heavy spring inside the solenoid that keeps the pinion disengaged until it’s electrically activated.

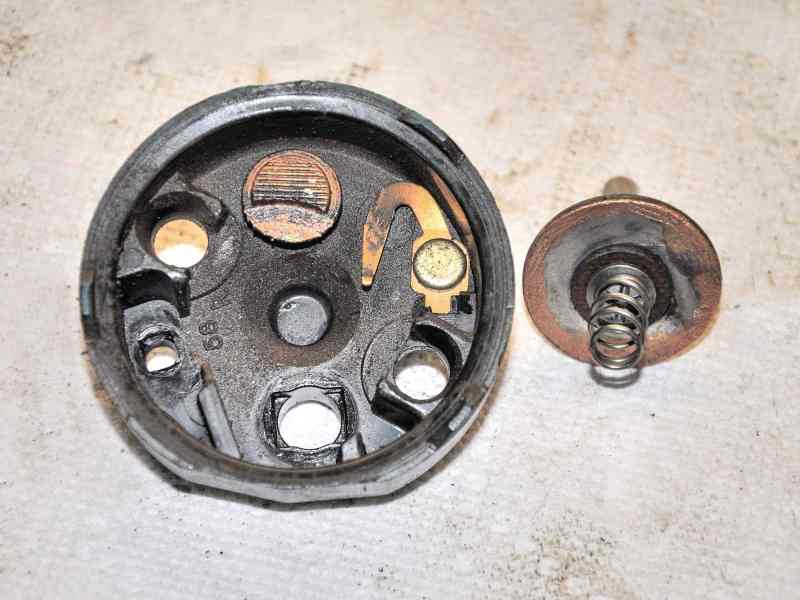
Removing the solenoid revealed the 1-inch-diameter piston (Figure 5), which throws the pinion gear forward about three-quarters of an inch in to mesh with the flywheel. There is actually nothing else inside the body of the solenoid. All the electrics are in the endcap.
I unscrewed the two small electrical terminals and the screws holding the endcap of the solenoid, and carefully pulled off the Bakelite cover. The contacts inside were dirty and badly pitted, telling me that a good electrical connection was no longer being made (Figure 6). The contacts can be removed from the endcap and cleaned. It’s best to clean electrical contacts with nonmetallic abrasives like Scotch-Brite or equivalent. Then I cleaned the inside of the endcap, greased the piston, and oiled the lever arm and pinion shaft with waterproof lithium grease. Finally, I put it all back together.
When the starter key is turned (or the button pressed on my boat), an electromagnetic field is created in the solenoid, causing the piston to retract against the spring and throw the pinon gear with great force in to mesh with the flywheel. Simultaneously, at the end of its travel, the piston also pushes the contacts together, transmitting the full voltage from the battery into the starter. This rotates the starter, which in turn rotates the engine, causing it to fire. On releasing the button, the starting current is discontinued to the solenoid, the pinion gear retracts, and the starter stops rotating.
After replacing the solenoid on the motor, it can be tested by applying a 12-volt positive voltage to the small terminal and the return on the body of the motor. The pinon gear should shoot forward on the shaft. Warning: Do not connect the heavy-duty battery wire to the solenoid during this test, or the starter will also rotate, creating significant counter-torque.
Starter Body
I next withdrew the two long setscrews from the rear of the starter casing, and removed the backing plate. This revealed an unbelievable mass of sludge and grime covering the four brushes and the commutator (this passes current from the brushes to the starter motor’s coils or windings). Some of it was so heavily encased that it refused to be dislodged, even after prodding with a screwdriver. Other parts dropped out in solid chunks.
It was quite remarkable that the starter had even turned with so much water and conductive dirt inside. I washed out as much as possible with a strong jet of water from a hose—three times. I then sprayed the inside with degreasing liquid and dried it all out with a heat gun.
Even these steps didn’t remove all the dirt, so I removed the armature to clean and inspect the windings. This was done by holding the casing in the vise and pulling out the armature. The brushes remained attached to the outer casing, and the commutator slid off them.
The windings inside seemed quite clean, no doubt because of the dousing they had just received. I mounted the armature in the vise, with aluminum soft jaws installed, and then gently rotated a strip of 400-grit sandpaper around the commutator until it gleamed. The armature windings were then cleaned, and the end bearing and throw lever greased.
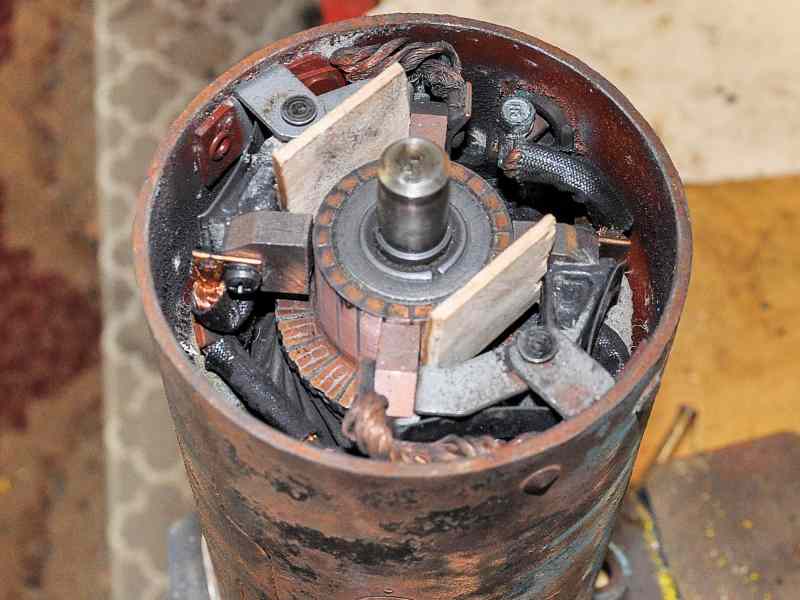
Before I could reinstall the armature, I first had to retract the four brushes so that the commutator would slide between them. On this motor, the complete brush assembly pivots, making the task easy using two small slivers of wood wedged between the arms on the brushes (Figure 7). When the armature was fully installed, I pulled out the bits of wood, and the brushes seated perfectly on the commutator. I then replaced the end plate, and the job was complete. [Editor’s note: The above procedure would benefit from a blow-down with compressed air, and then a washdown with a solvent such as brake cleaner, to remove all sanding dust, which contains copper, to prevent any possibility of a short across the windings.]
I decided to make a bench test of the operation of the starter, mounted securely in my vise. Using a car battery, I clipped a jumper cable to the larger positive solenoid terminal and the negative to the starter body. Nothing happened because the contacts inside the solenoid were open.
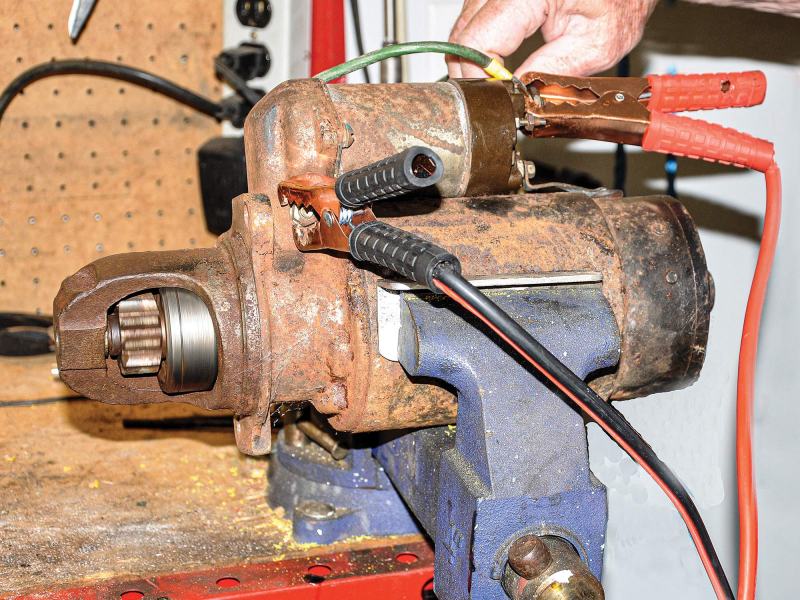
Then, I held a second, thinner green wire to the terminal that normally carries the wire from the starter key or button (Figure 8). The motor pinion gear flew forward, and the motor spun furiously. On removal of the green wire, the motor stopped and the Bendix Drive retracted the pinion gear. I was sure that I heard the starter heave a sigh of relief, being free from all the foreign matter that was buried inside it.
A final touch was to repaint the whole assembly black. I had built myself an almost new starter motor.
It has performed perfectly on multiple starts, even when the battery was low, and it is a reassuring feeling to know that the engine will start at the push of a button.
Hailing from New Bern, North Carolina, Roger Hughes has been messing about on boats for half a century, as a professional captain, charterer, restorer, sailing instructor and happy imbiber. He recently completed a full restoration and extensive modification of a well-aged 50-foot ketch. Learn more at schooner-britannia.com.
Editor’s note: CW does not recommend the use of pressurized shore-water lines
on any boat. If you have one, water pressure should be off whenever you are not aboard.


