When my family and I were living on our British-built ketch in the Mediterranean, we visited many American boats, and I always admired the way they employed teak and maple for their cabin soles. A shiny teak sole certainly enhances the interior of any vessel, and it was one of the reasons I bought my present boat, Britannia, a Down East 45 built in the United States.
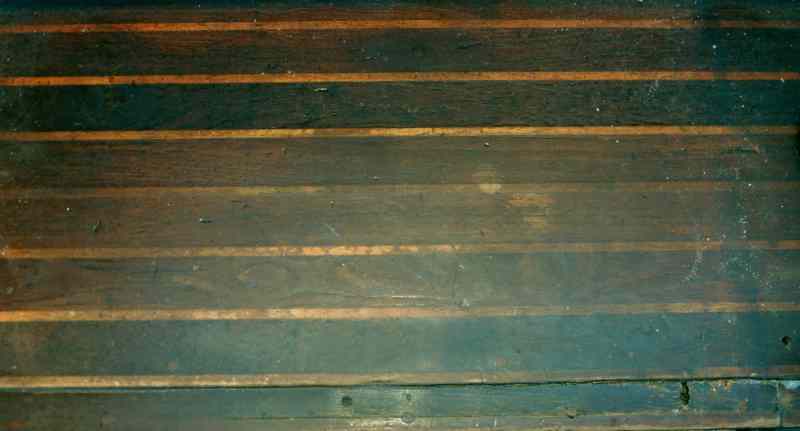
Since I have owned Britannia, I have made some quite-drastic alterations. I changed the rig from a ketch to a brigantine schooner, with a square sail on the foremast. I completely remodeled the aft cabin, both heads and the galley, and fitted a new ceiling throughout. During all this time, I used the forward cabin as a workshop and traipsed through the saloon with all manner of equipment and tools. I didn’t remove my shoes every time either — it was just too much trouble — so the floors suffered and became scratched and dull. The white maple strips were hardly visible in places, and the whole floor was crying out for attention. So as the major modifications came to an end, I began to think how I might restore the floorboards.
Whatever the restoration technique, a high priority was to ensure they were finished with a nonslip surface. Six months earlier I had slipped in the saloon and snapped both bones in my lower left leg, and dislocated my ankle. So good nonskid was imperative. Period!
Preparation
The easiest sections to begin with were the dozen three-quarter-inch-thick lift-up plywood floorboards. The dirty, ingrained varnish needed stripping from the thin veneer, and like any wood restoration job, preparation was the key. The more effort made at this early stage, the better the final result.
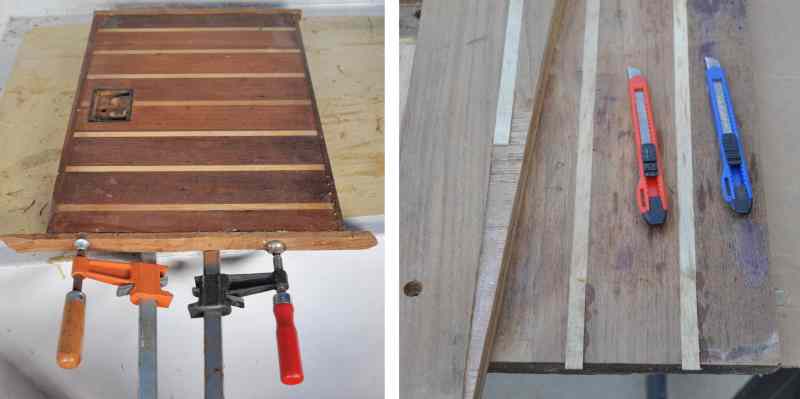
Before I could even start cleaning the boards, I had to repair some of the damaged and missing sections of the maple strips and edging. Luckily I had some spare pieces of the original floor, so I carefully scored both sides of the maple strip joint with a sharp knife; then, using a newly sharpened quarter-inch chisel, I was able to actually ease the three-eighths-inch strip out of its groove. After cleaning out the damaged groove in the floorboard, I inlaid the new strip in place with glue and clamped it tight, with a flat plate.
Many of the edging strips around the boards were also broken or missing, so I cut new quarter-inch-wide teak strips on my table saw and glued them along the edges. I filled smaller indentations and chips with Plastic Wood filler sourced from the local hardware store.
The underside of the plywood must have been insulated at one time, but all that was now left was a dirty layer of dry adhesive. It quickly clogged my belt sander, so I had to use paint stripper and a wide chisel to scrape it off before sanding the plywood smooth. I also removed the brass lifting handles, which were recessed into each board.
Eventually all the boards were repaired and ready for sanding and cleaning.
At this point, I must give fair warning to anyone planning to work on his or her own veneered floorboards. Even when new, the veneer is thin, and if it has been worked on previously, it might be extremely thin. Mine looked to be generally about 1 mm thick (or 3/64-inch), but thinner in places where it was scratched and dented.
I began sanding a board using a square orbital sander with 80 grit, but it hardly removed anything and would have taken forever to sand the hard varnish off. So I switched to my 3-inch belt sander with 100 grit. This removed more of the old varnish and grime, but it also highlighted areas that were slightly lower, which the sander skimmed over. Attempting to sand down to these levels with a belt sander was a mistake because I cut through the veneer in a few places, exposing the plywood beneath.
I have hardly ever done a job on a boat that has not created another job — or two — and this project was no exception. It brought back the maxim every DIY sailor should have tattooed on his arm so he sees it before he starts a new project: “If it ain’t broke, it probably will be when I fix it!”
There was nothing I could do about this error until I started varnishing, so I continued sanding, but considerably more carefully. Belt sanding did not remove all the varnish or ingrained dark spots and scratches in the wood, so I pasted the boards with Goof Off Semi-Paste Pro Stripper, then scraped it off with a 1-inch-wide chisel. I also scraped the dirt and varnish out of the deeper indentations with a sharp knife, then sanded them by hand to blend into the remainder. It was a slow but effective process.
Eventually, over about a week, I repaired and sanded all the removable floorboards.
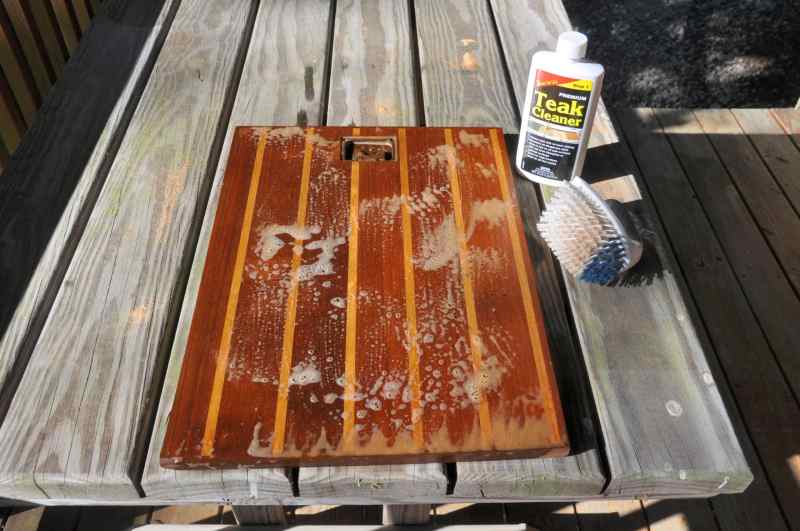
A final preparation was to wash them with Teak Brite and scrub them with a nylon brush. This still released an amazing amount of dirt, and I did it twice on a few boards, but eventually they dried into a clean bronze color, with beautifully highlighted maple strips.
Varnishing
Before starting to varnish, I wanted to do something about the undercuts I had made with my belt sander that exposed the plywood. I had previously used a wood stain called Varathane Golden Mahogany on plywood to make it look roughly the same as teak. I carefully brushed this over the exposed areas and hoped for the best.
I then replaced the brass lifting handles and masked the edges. This was easier than trying to mask the actual recess without the handles in place. If varnish dried in these cutouts, it would need to be scraped out again to allow the handles to fit back flush with the floorboards.
Normally, the objective of varnishing on a boat is to achieve a high-gloss finish, but this is invariably slippery, especially when wet. Given my recent mishap, my concern was to finish up with a nonslip surface. I therefore asked everyone I could how this might best be achieved, and found different methods.
I also called some of the major paint manufacturers and learned that two — Epifanes and Rustoleum — have a fine granular substance which, when mixed in the final coat of varnish, leaves a dimpled nonskid surface. There may be others as well.
I also learned of an intriguing method on the Internet, which advocated sprinkling salt on the final coat of wet varnish. Then, when the varnish dries, you hose it off with water, thus dissolving the salt and leaving a nonslip surface.
The easiest method that was suggested was simply not to sand the floorboards between coats of varnish. I especially liked this idea, because hand-sanding 12 floorboards every time, between five coats of varnish — not to mention the large fixed-floor areas — sounded like excruciating work.
Even though two-part urethanes would probably have given a harder finish, I didn’t want to use them due to the number of times I planned to apply different varnish/thinner mixes.
I decided to use Epifanes clear-gloss wood varnish because its instructions specify the varnish can be over-coated within 72 hours “without the need for re-sanding.” That fit my plan.
The first coat was a 50/50 mix of varnish and mineral spirits, to make sure it soaked into the wood. I laid it on with a new medium-hard brush, always with the grain. I was pleased to see that even after the first coat, the areas I’d stained blended quite well with the teak, and the maple strip repairs were almost invisible.
I allowed the boards 24 hours to dry and had to remind myself not to sand the surface (old habits die hard). The second coat was roughly a 75/25 varnish/thinner mix, which brought out the color and beauty of the wood even more, already with a hint of a shine.
By this time, my garage was littered with floorboards resting on benches, boxes, and anything else I could find to keep them flat and off the floor. After two more applications of the 75/25 mix, the boards gleamed.
A final coat was neat varnish, and I also gave the edges of the boards two coats.
Since I had not sanded between coats, the surface remained quite coarse to the touch, but not enough to be felt with deck shoes or even bare feet. Upon testing a wet board, it proved to be remarkably nonslip, yet it was also glossy. I therefore didn’t need any of the other procedures I had researched.
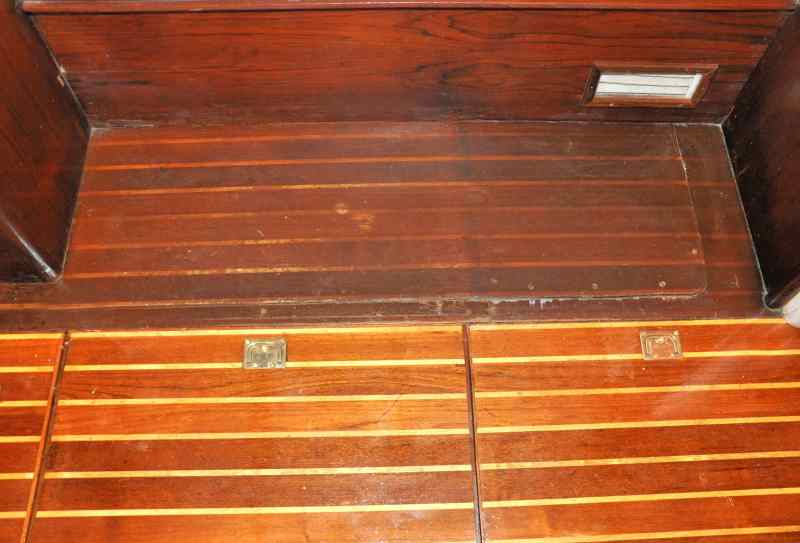
But there was still one final operation on the removable boards, the bottoms of which were still bare plywood, so I carefully masked the edges and painted them white. It was a great relief to finally see all the shiny boards in place on the boat, but they also highlighted the grubbiness of the fixed sections of floor that I had not yet touched.
I then set about the backaching job of sanding and cleaning the nonremovable sections. Some of these were also damaged and required new maple strips spliced in. I stripped off the old varnish using a combination of belt sander and vibrating sander (to get into the corners). But I still had to use paint stripper to remove the really stubborn spots. These sections were harder to do than the removable boards. Then there were multiple coats of varnish to be applied, but no rubbing down in between, thank goodness.
It was harder work cleaning the fixed floorboards, but all the time I had the removable boards as an incentive. Eventually they all had a gleaming, matching, nonslip surface.
If I do say so myself, the appearance is now spectacular. The cabin sole appears new, with a clean, safe, professional-looking finish. My only predicament now is, I hardly dare walk on it.
Hailing from New Bern, North Carolina, Cruising World‘s resident “DIY Guy” Roger Hughes has been messing about on (a lot of) boats for half a century, as a professional captain, charterer, restorer, sailing instructor and happy imbiber. He recently completed a full restoration and extensive modification of a well-aged 50-foot ketch. This included converting the rig into a brigantine schooner, with a rollaway squaresail on the foremast, along with other innovations and inventions. Roger is a freelance writer for boating magazines in the US, UK, Australia and New Zealand. Read more of his articles at schooner-britannia.com


