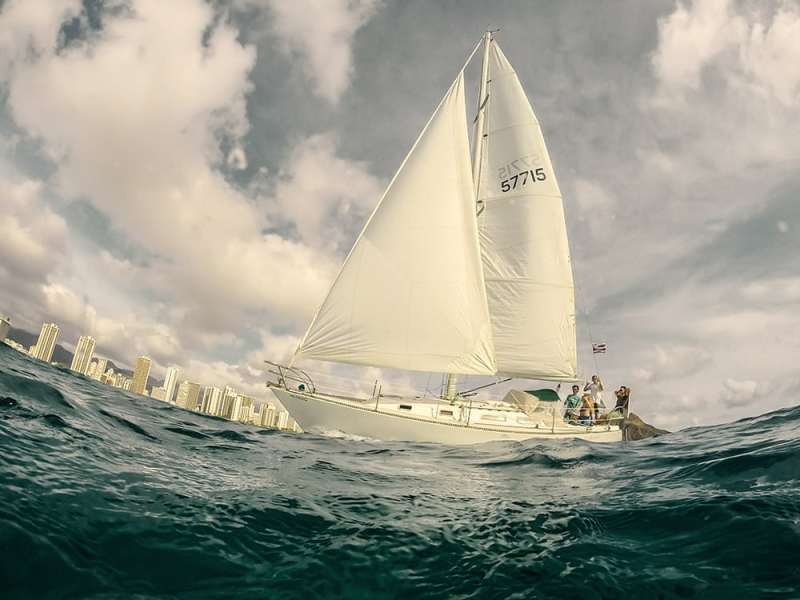
Reaching out of the channel in a moderate breeze, Quiver leaned on her big, overlapping genoa and accelerated up to hull speed. Surrounded by a fleet of vessels of similar speed, we had managed a clean and conservative start to our first Friday night beer-can race on my new-to-me cruising yacht. The headsail was eased and furled slightly before we reached the final red channel marker. As I turned up, the mainsail was trimmed in and the now-smaller jib sheeted home. Quiver powered up, heeled over and took off upwind. The Doug Peterson-designed 34-footer was clearly in her element when going uphill, and I looked forward to working our way through the fleet on the long port-tack beat toward Oahu’s Diamond Head.
Mere seconds after going hard on the wind, there was a loud bang. And then the headstay went slack. Without enough time to contemplate whether the mast was going to stay upright, I quickly evaluated the situation and decided to turn up into the wind instead of bearing away to a run. Once in irons, I handed off the helm and ran two spinnaker halyards forward to help secure the mast. Amazingly, we were still able to furl the jib. Motorsailing back to the dock with just a mainsail up, I played every possible scenario through in my head, unable to diagnose exactly what had happened or what had broken.
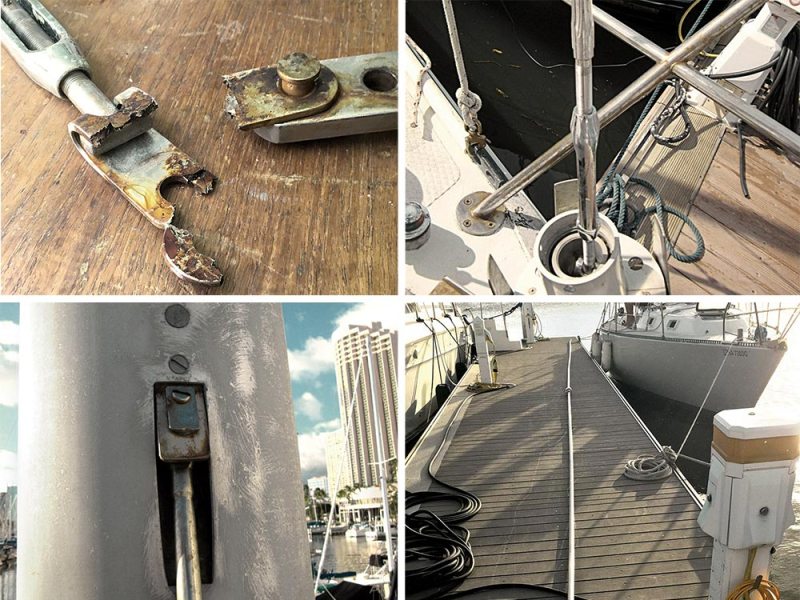
Back at the dock, there was ample daylight left to pull the headstay and furler down to investigate — much more easily done with the presence of a few friends. At first, nothing appeared to be broken at the bottom or the top, making it that much more confusing as to what had failed. Once I pulled the furler drum apart, however, I quickly found the smoking gun. The toggle at the bottom of the headstay, which connects to another toggle and effectively lives inside of the furler, was extremely corroded and had failed catastrophically. Fortunately for me and the boat, which I had purchased just five days earlier, the failed toggle could not fit through the furler’s aluminum foil; that was all that kept the headstay from physically separating and the boat potentially dismasting.
The entire experience was a shocker, to say the least. I had sailed the boat on a sea trial with the previous owner as part of the purchase. In 20 knots of trade-wind breeze, we sailed into the channel all powered up, with a reef in the main and a partial jib, with not a care in the world. Back at the dock, I had a friend help crank me aloft to complete a rig inspection, something that was very common for me to do in my years of working as a professional yacht rigger and as crew and preparateur on high-end racing yachts in the San Francisco Bay area. When all looked satisfactory up the rig, I bought the boat for $10,000 cash and sailed her back to Waikiki that day. Five short days and a couple more daysails later, the one rigging component that was out of sight during my visual inspection nearly brought the entire rig crashing down on my first Friday race with the boat.
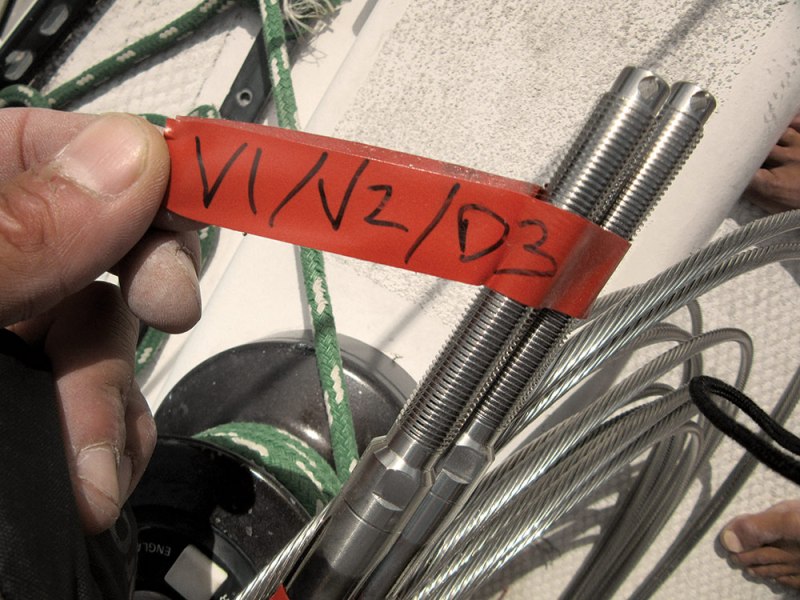
Following the old handyman’s adage of “measure twice, cut once,” my helpers, Mike and Kristen, and I all took great care to get the measurements right before placing our order for new rigging.
After a trip to the chandlery and an afternoon work session with a friend, I had the blown-apart toggle replaced with a shiny new one, making the boat, in theory at least, perfectly sailable. Without fully knowing how old the standing rigging was, however, I decided that now was the time to fully rerig Quiver. I had planned on doing this before I did any serious sailing with the boat, but after our early mishap, this expensive yet basic maintenance project took on a new urgency. While rerigging the boat, I would also inspect the chainplates and make sure that all was structurally sound with them. I had dismasted a boat before, and as much fun as my time fixing that boat had been, I sincerely didn’t need to dismast another.
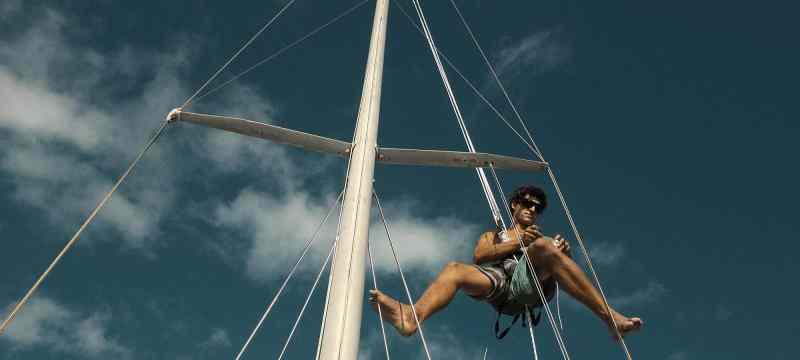
First things first: I needed to measure the rig for new stays, so I grabbed my mast-climbing gear and got right to work (see “Going Up,” at the end of this article).
As I headed aloft, I took a minimum of tools and cranked myself up the mast, taking the butt end of a 100-foot tape measure with me. With a helper at the bottom, I held the zero mark on the tape measure tightly against the center of the clevis pin at the top of each shroud (depending on how your stays are attached to the mast, look for the center of the load-bearing point at the top).
Standing on deck with the spool end of the tape measure, my helper pulled the tape tight and measured to the center of the clevis pin at deck level. Once he called out a measurement to me, we would take our respective ends of the tape off of the shrouds and then measure again. Once we were confident that we had it measured as accurately as possible — down to one-twentieth of an inch — we recorded the measurement and moved on to the next. In some cases where there were slight differences between port and starboard (only a couple tenths or a half inch) we just averaged the two sides and took that as our measurement for the new shrouds.
Following the old handyman’s adage of “measure twice, cut once,” my helpers, Mike and Kristen, and I all took great care to get the measurements right before placing our rigging order.
Getting boat parts and work done in Hawaii can often be a challenge because there are fewer marine facilities and resources in the islands than there are on the mainland, and everything is an expensive and slow ship or plane ride away. As a result, a bit of resourcefulness is always of benefit when cruising or living in a remote place. In my case, the resourcefulness was measuring the rig myself and ordering all of the parts from an outfit that I knew could fill the order in a timely fashion, give me great service and get me better deals on parts than I could achieve locally. I called up my old friend Logan at Rigworks in San Diego. He was pumped to get the opportunity to help out and got right back to me with an invoice, all done up with some good-guy pricing. Everything was in stock, and they could have my shiny new rigging to me in a week. Perfect.
Comparing apples to apples, it’s interesting to note that the rigging for my Peterson 34 was right at about double what it was for my Cal 27 and Cal 29, owing to the nature in which boats get exponentially more expensive as they get larger.
With the rigging on the way, I needed to have two chainplates made locally. The smallest chainplates on the boat, for the forward lower shrouds, needed replacing as the starboard one had a crack in it. My quickest and most convenient option ended up being a general machine shop located in an industrial zone in an alley in Honolulu. Ed Dang Machine Works custom ordered 316 stainless-steel stock and, using the originals as patterns, built two custom chainplates and backing plates for a reasonable price. Built in the afternoon on a Friday, they came out a bit off and had to be remade. The machinist fully owned up to his mistake, apologized for the inconvenience and remade the chainplates the same day, for the original price, which was greatly appreciated because I was on a mission to get Quiver back on the water on time and on budget.
Installing the new chainplates, backing plates and cover plates was straightforward and simple. I also made a point to pull a couple of other chainplates out for visual inspections. Like the headstay’s lower toggle failure that easily could have dismasted the boat, it’s usually the hidden part of a chainplate, where it passes through the deck, that poses the biggest potential risk. Corrosion can develop there because of a lack of oxygen, causing the metal to fail.
Once the new rigging arrived, it was merely a job of installing nine shrouds one by one and then tackling the hardest, the headstay, last.
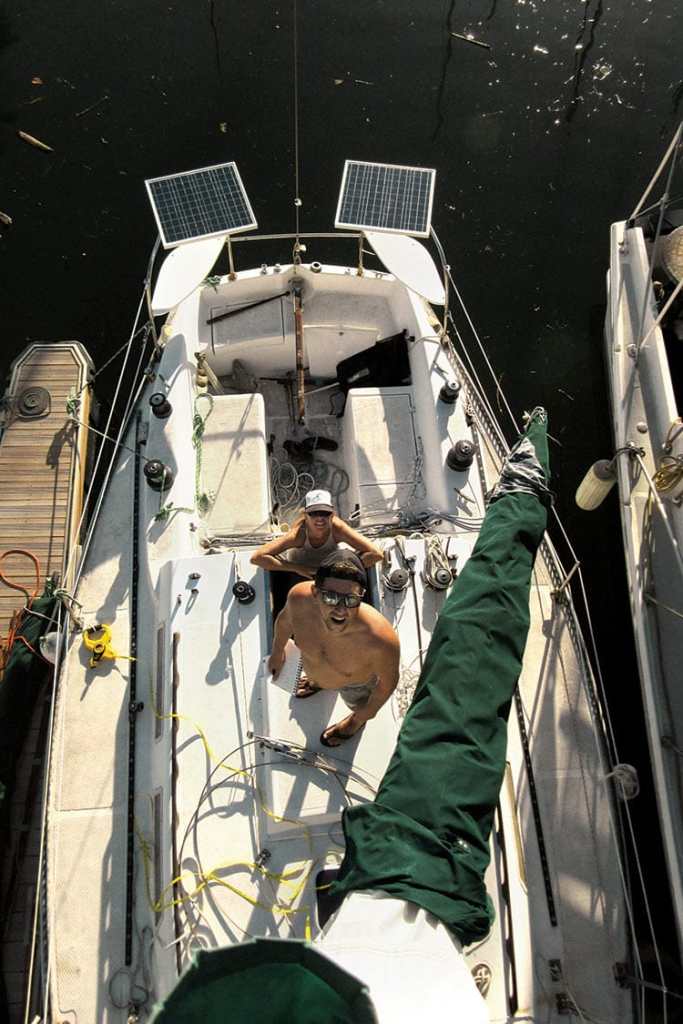
Slacking off all four lower shrouds before going aloft, I cranked myself up to the first of the two sets of spreaders and locked off my block-and-tackle harness with a double slipknot. Carefully unpinning one shroud at a time, I tied a tag line through the marine eye fitting and slowly lowered each shroud down to my helper, who would then remove the old wire and tie on the new one. Pulling the new shroud into place and then untying it from the tag line, I could then pin each shroud to the mast.
Carefully unpinning one shroud at a time, I tied a tag line through the marine eye fitting and slowly lowered each shroud down to my helper, who would then remove the old wire and tie on the new one. Pulling the new shroud into place and then untying it from the tag line, I could then pin each shroud to the mast.
Installing the new shrouds with the rig up, in the slip, is a surprisingly easy job, especially when you have competent help and no major hiccups. With proper techniques and a thoroughly planned, safety-first approach, it is well within the scope of many cruising sailors to measure, remove, replace and potentially repair their own rigging.
A few weeks and a few thousand dollars after nearly dismasting, Quiver sailed out of the same channel, hung a left at the last red marker and turned hard on the wind again. The drama of headstay failure was over.
With the nine new shrouds in place, it was time to move on to the headstay, which would be by far the most difficult and laborious task. Tying an 1⁄8-inch Dyneema messenger line around a rigging component at the top of the headstay and then securing it to the masthead, I ensured that I could not drop the headstay while unpinning it, which was critical because the headstay weighs so much more than any other shroud due to the furling unit and its aluminum foil extrusion.
After unpinning and lowering the entire unit to the dock, we chopped off the swageless eye fitting at the top. There are methods of splicing an old headstay to a new one to help pull the new headstay in place, but with a foil that looked fairly large and easy to work with, we just pulled out the old wire and fed the new one up the foil, jiggling it around each time it got stuck at a joint between two sections. With the new headstay now in place, I measured it and used a hacksaw to cut it to the proper length. Next, I picked apart the strands and carefully installed a Hayn Hi-Mod swageless fitting, making sure to use anti-corrosion Tef-Gel where needed.
Once everything was ready, I went back aloft, pulled up the new headstay and pinned it back in place. It wasn’t exceptionally easy to pull the shroud up and install it while 50 feet in the air, but again, with a thoroughly planned, safety-first approach, it was quite a manageable task.
Though I still plan to pull the mast and give it a thorough overhaul before any long-distance cruising, Quiver now has brand-new standing rigging and a couple of new chainplates. A few weeks and a few thousand dollars after nearly dismasting my new vessel, I sailed Quiver out of the same channel, hung a left at the last red marker and turned hard on the wind again. The drama of headstay failure was replaced with the sheer pleasure of sailing a good and powerful 34-foot tiller boat upwind.
Over the next 19 hours, the breeze eventually went light, and died altogether a couple of times, but my thrown-together crew of four sailed to Lahaina, on the island of Maui, for Quiver‘s maiden voyage with the upgraded rig.
Power-reaching into Lahaina at 0100 with a stiff offshore breeze, I had my first epic bit of night-sailing on the boat. I had sailed to Maui to attend my close friend “Uncle” Tony’s wedding. He had sailed his previous Kaufman 47 Knot Tide Down to New Zealand from Hawaii, alongside my old Cal 2-27 Mongo. The night before the wedding, Quiver served up a picture-perfect sunset whale-watching tour for the bride and groom and some of their close friends, complete with numerous humpback sightings. It was a fond new memory to add to my collection from the past.
While I still have many more projects to complete before taking off on my first long bluewater cruise aboard the 34-footer, the unfortunate gear failure just after purchasing Quiver turned into a valuable experience that signaled the beginning of another good old boat’s resurrection. Quiver was already in better nick than she had been in years, and the dream of voyaging to distant lands was well and truly back alive after months of boatlessness. After a ripping sail home to Oahu via the north shore of Molokai, Quiver had proved herself. Only one question still remained: Where on earth will you take me, boat?
Going Up: Ascending a Mast
Before working on any mast — unless it’s a crewed race boat with lots of muscle to haul me aloft — I much prefer to assemble my own rig-ascending setup as opposed to being dependent on a helper to help crank me up and down the spar. To do this, I use my bowman’s harness, which is essentially just a rock-climbing harness, and attach a block and tackle to it.
I use a 3-to-1 purchase, meaning that I need roughly four times as much rope as the mast is long. In the case of Quiver, that meant buying about 200 feet of 5⁄16-inch double-braid polyester line. A 4-to-1 purchase is also quite useful; it merely costs and weighs a bit more, along with the additional rope required. There are many other ways to ascend a mast, but for performing work aloft by one’s self or pulling rigging jobs on the side, the block and tackle attached to a harness or bosun’s chair is my preferred method. Once I reach the desired height, I use a double slipknot to secure myself in place.
Ronnie Simpson, a frequent CW contributor, is a sailor and writer living in Honolulu while he pursues a degree in integrated multimedia at Hawaii Pacific University. He is the co-founder of a wounded veterans sailing nonprofit.


