The germ might not have sprouted on the Spanish Camino de Santiago in June 2013, but it found fertile ground there. By bicycle we were traversing the 1,000-year-old pilgrim’s route to the mythical crypt of St. James, and on crossing into Celtic Galicia, where the landscape starts feeling witchy, we both realized we wanted to travel more deeply along Europe’s outpost edges. We’d each lived in European capitals before, but now we wanted to dwell in places still older than those: not Madrid but Catalonia, not Paris but Brittany, not Dublin but Connemara.
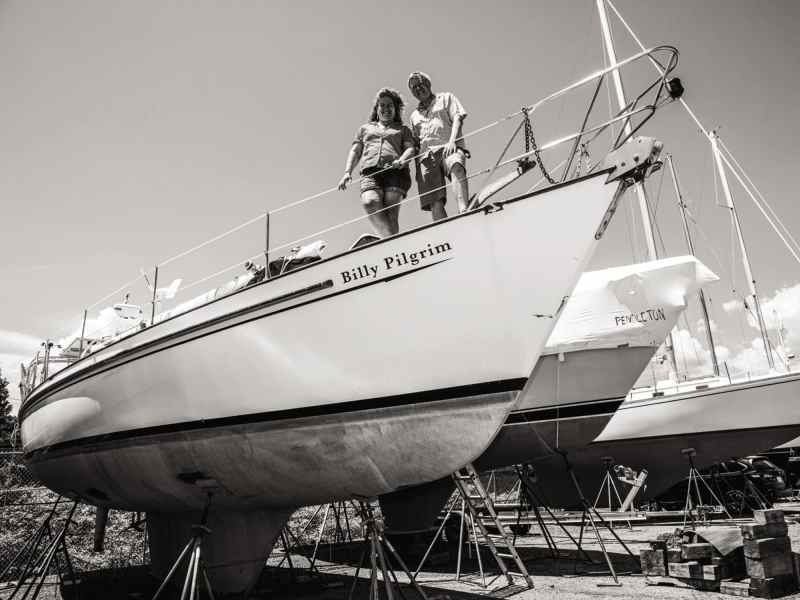
Cycling was a great way to travel deeply in foreign countries, and we proved to ourselves that even in remote places, we could fix flat tires and adjust cables as simple mechanisms faltered. But our scope was ultimately limited by the twin 20-liter paniers each bike carried, and that revelation soon set us off to thinking about sailboats for some extended traveling. After many months exploring the yacht-brokerage market, in fall 2017 on Florida’s Atlantic coast, we found the right boat for our project: a 1988 Passport 40, designed by Robert Perry. She was Hull No. 141 of the 148 P-40s built in Taiwan between 1980 and 1991, and we named her Billy Pilgrim—a nod to our own peregrinations but also to the Kurt Vonnegut character who came unstuck in time. He or she; never they: Billy P abides gender fluidity but abhors sloppy grammar.
Porthole Project
The Punch List
The Passport 40 was perfect for us in a hundred different ways. Still, there’s no getting around Billy Pilgrim’s 30 years of living. We knew that a shakedown would reveal items to update and refit. Sure enough, by the time we sailed from Florida to our home port in New England, we loved Billy P all the more, despite a pressing short list of shortcomings. One category earned its place at the top of the list: leaks. Fixing those became our priority when we hauled the boat for winter at Maine Yacht Center in Portland.
Tim has worked through boat problems before. As a teenager, he slept aboard his family’s liveaboard CT-41 ketch surrounded by Tupperware to catch the downpours from a leaky cabin top. Since then he’s partially refit a 1974 Vineyard Vixen 29 (see “A Jade Mist Dream Come True,” CW, October 1998). Lesley’s experience with boat ownership was limited to a fleet of kayaks and a 1985 Boston Whaler 15. She’s owned homes built more than a century ago and knows that when you address one problem, you inevitably uncover others, and that sometimes it seems best to just leave the damned dominoes alone rather than set off the whole series. Still, this particular home would also be oceangoing, so it was clear that some projects couldn’t be ignored forever. We went into the refit as enthusiastic amateur marine technicians, eager to learn. Yet the more we got into it, the more we realized there are some things the eight-hour-a-day guys know that we didn’t even know we didn’t yet know.
We determined that unwanted water was coming into the boat from three sources: portholes, chainplates and hatches. The process for stopping the leaks at each source suggested the same steps: Remove the items without damaging vital parts; keep track of what went where; and re-bed the parts snugly so that they don’t start leaking again.
One crucial choice stood over every part we removed: Repair it or replace it?
Re-bedding Portholes
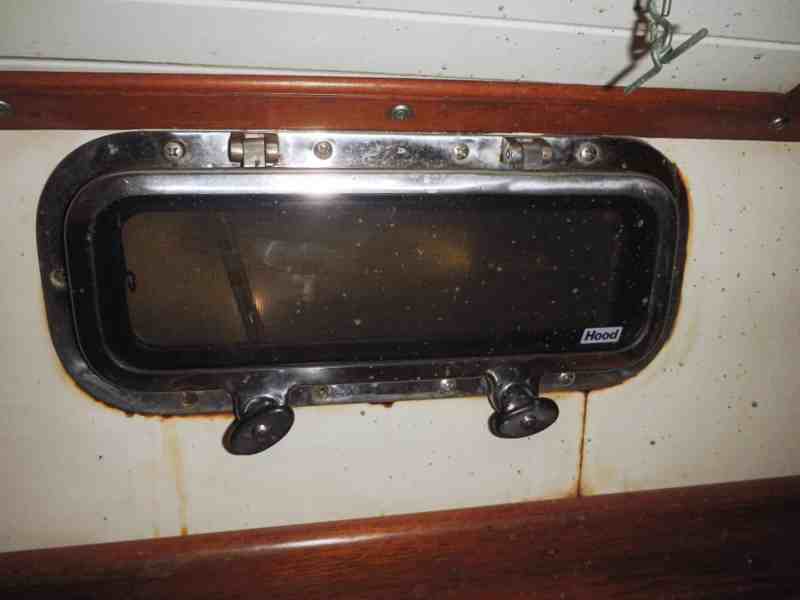
On examination, the gaskets that seal the glass lens in the porthole frames weren’t compromised, nor were the frames themselves. Water was instead leaking in through the cabin house around the edges of the porthole assembly. We determined that five of our 10 portholes needed re-bedding: one on either side of the V-berth, two portside in the galley, and one above the starboard settee.
Each Hood porthole assembly comes in two parts. Installed from inside the cabin is the body of the porthole, which comprises the glass lens, stainless-steel frame, hinges, and a flange that protrudes from inside to the exterior. Outside the cabin, a flat trim ring fits over the protruding flange and provides surface area for sealant. Both the frame and trim ring are secured with wood screws into the plywood cabin side and are bedded in marine adhesive sealant.
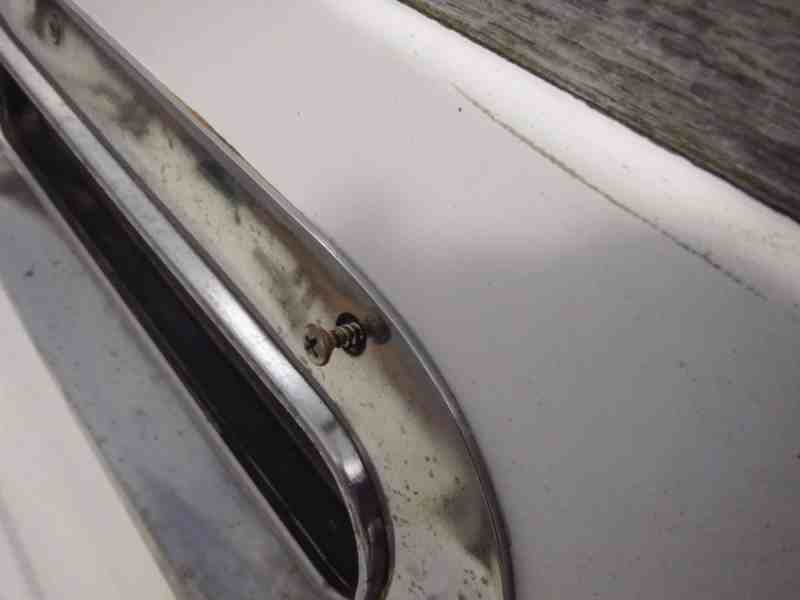
Removing the wood screws was straightforward enough. But in order to remove the porthole, we had to break the seal of the 30-year-old sealant without damaging either the stainless fittings or the cabin sides. It may have been crusty and leaky, but it sure didn’t want to let go! We rank amateurs started by using a series of putty knives, screwdrivers and pry bars, working around the edges of the frame, slipping in the blades to loosen the sealant, and prying to get it to release from the cabin side, while at the same time trying not to scrape up the surface or bend the stainless trim ring. A slender putty knife with a certain amount of stiffness worked best to get under the edge and move around the trim ring’s circumference to break the seal. After our initial trials, one of the trained professionals at Maine Yacht Center came by to offer advice and provide us with a selection of small wooden wedges to replace our metal tools when we’d broken the seal. We were now able to move our tools and break the bond on another section.

Once the exterior trim ring came off, we had to break the seal on the porthole flange inside the boat. To do this, we started from the outside by bonking the flange toward the interior with a rubber mallet, trying to move it evenly so that the porthole would slide out at the same angle it had been inserted through the hull—challenging because we were still working against the ancient sealant. Our first porthole removal was not entirely elegant. Some of the melamine surface inside the cabin got a little chipped, but we hadn’t ruined anything vital. One down, four to go!
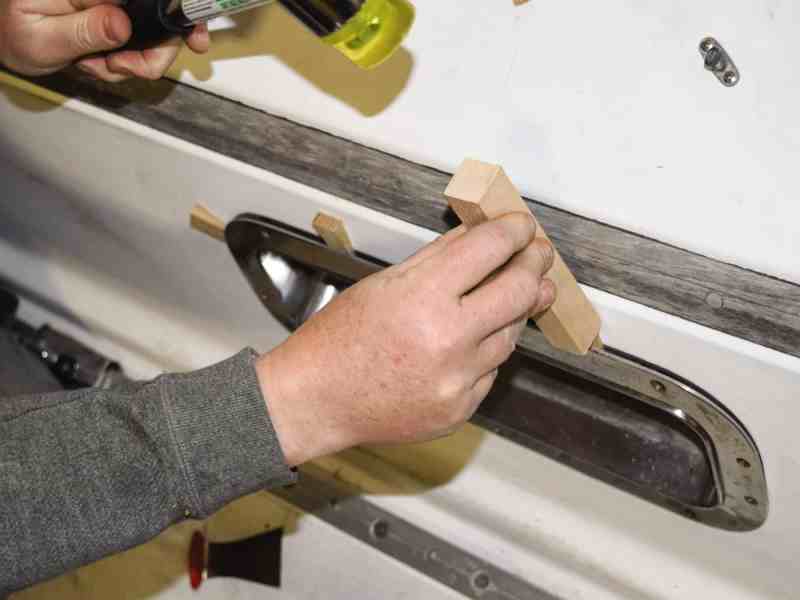
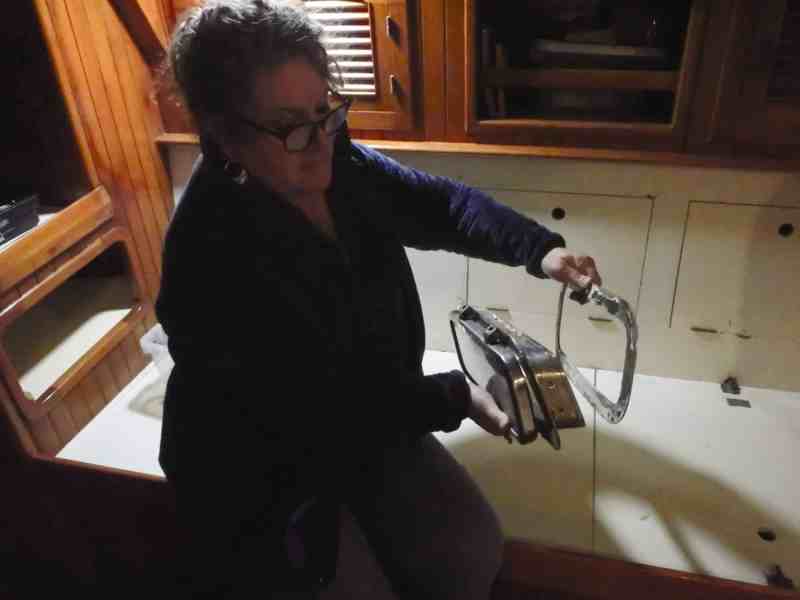
For the remaining portholes, our friends at Maine Yacht Center provided us with a simple custom-made porthole puller: a wooden contraption that looks kind of like an old-school vise with two feet. Using the puller, you still have to break the seal of the old goo under the trim ring. That done, you put the two feet of the puller against the interior cabin side and the other end against the outside edge of the flange; then you torque the nuts of the two bolts, thereby pushing it toward the inside of the boat. This was a revelation, a process far tidier than our bonking method.
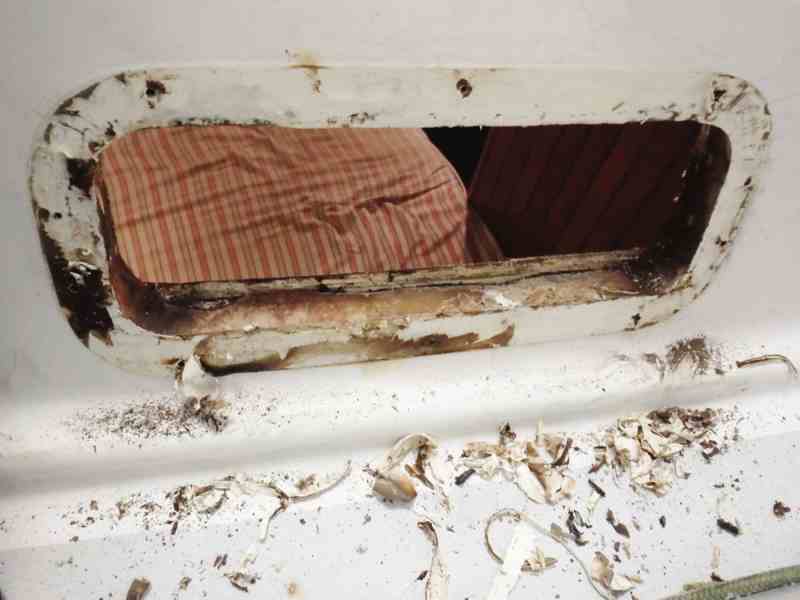
With the portholes removed, now it was time to clean up the surfaces before reinstalling them. Both the porthole assemblies and the cabin-side holes through which they pass needed some work. The water that had seeped in had made a mess of things.
So we cleaned up all the nasty debris, using sandpaper and a stiff brush to get any loose chunks off, then we sealed all the plywood edges of the cutouts with thickened West System epoxy. In the worst spots we applied polyester filler with a putty knife, taking care not to alter the shape of the hole. On the stainless-steel porthole assemblies we used a wire brush, sandpaper and even a Dremel tool in the spots that showed some pitting corrosion. All cleaned up, our parts were ready to be installed.
One charming moment came upon removing our second porthole, when a little note fell out of the cabin side. In Mandarin, we later learned, it read, “Good luck for selling your boat.” It was a sweet surprise to hear from one of the souls in Taiwan who had built our boat decades before.
We now needed to be very clear about two things. One was labeling. All the portholes we’d removed looked like they were the same size and shape. That wasn’t exactly true, but it was important that everything got labeled, to a kind of ridiculous extent. The second thing came before we started with the re-bedding: We vigilantly covered everything. We taped all edges religiously; we had tons of gloves and rags easily accessible; we covered any nearby surface with cardboard or plastic.
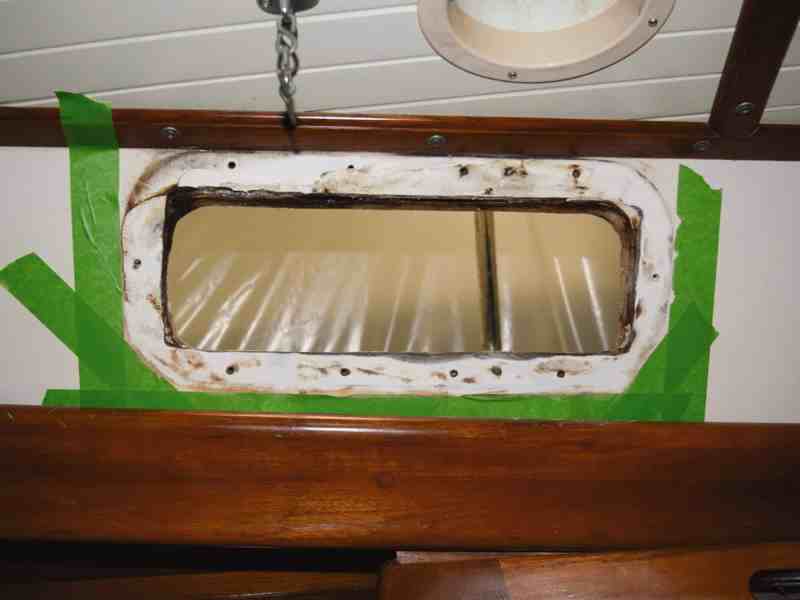
For our marine adhesive sealant, we used white UV-resistant Sikaflex Marine 295. Working with this stuff is basically like working with the insides of a well-toasted marshmallow. We tried hard not to get it on anything; once cured, it’s a nightmare to get off. So we taped around the work area, leaving about a quarter-inch gap to make a nice fillet around the edge of the frame or trim ring. We kept a trash bag ready to receive all of the nasty we were about to produce. We squeezed generous gobs of Sikaflex on all the parts (not just the backs of the trim rings, but also inside the tubular part of the porthole flange that protrudes through the cabin side) so that when we fastened them back into place, an ample amount oozed out the entire perimeter. This was our proof that the sealant filled all the voids where water might be tempted to leak in. Then we secured the trim rings and frames with new stainless-steel wood screws. With a clean gloved finger we made a nice fillet around each edge. Before it cured, we carefully pulled our tape, leaving an elegant arc of sealant between cabin side and stainless plate. This is really a four-handed job so that one person can remain goo-free and can clean the stainless with water-soaked rags. Our final step was to clean up all the unintended Sikaflex before it set and then gaze with pride. The fine white line of that fillet was the only visible sign of all our work.
Chainplate Project
Re-bedding the Chainplates
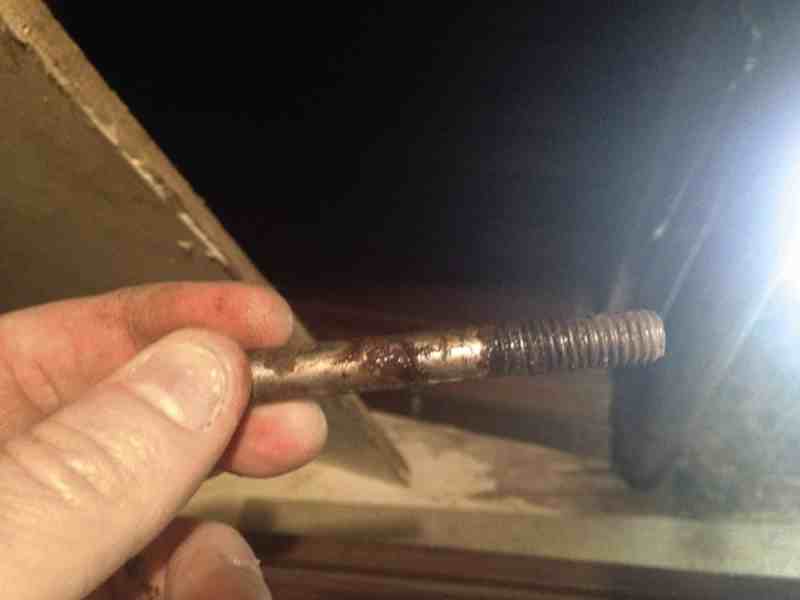
Chainplates are hidden workhorses. Before this project, Lesley hadn’t really been conscious of their existence. Ours are flat strips of stainless steel that pass through the deck. Below deck, they’re through-bolted to structural members massively laminated to the hull. Above deck is a hole in the chainplate through which the shroud terminals are pinned. These unsexy but crucial pieces of steel carry all the dynamic sailing loads, holding up the mast against all the forces from the sails and the waves.
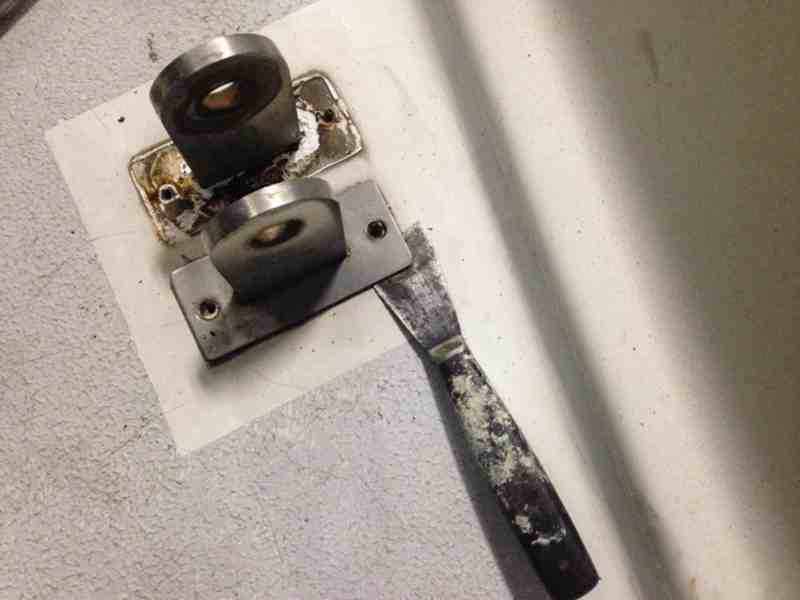
On each side, the Passport 40 has four shrouds and therefore four chainplates. Capping the hole in the deck through which each chainplate passes is a flat, thin, rectangular steel cover; the receiving end of the chainplate sticks up through a slit in this cover. It looks kind of like a light-switch cover about 1/16-inch thick and mounts flat on the deck. Because the Passport has 4-inch bulwarks around the deck perimeter, seawater or rainwater sometimes stands deeper than these chainplate covers. It’s a recipe for leaks and crevice corrosion. Once we determined that we’d need to pull and re-bed all eight chainplates, we decided it might be a good time to add an upgrade: a step or a riser, which would raise the deck cover above the level of soaking saltwater pools. This presented us with a design project.
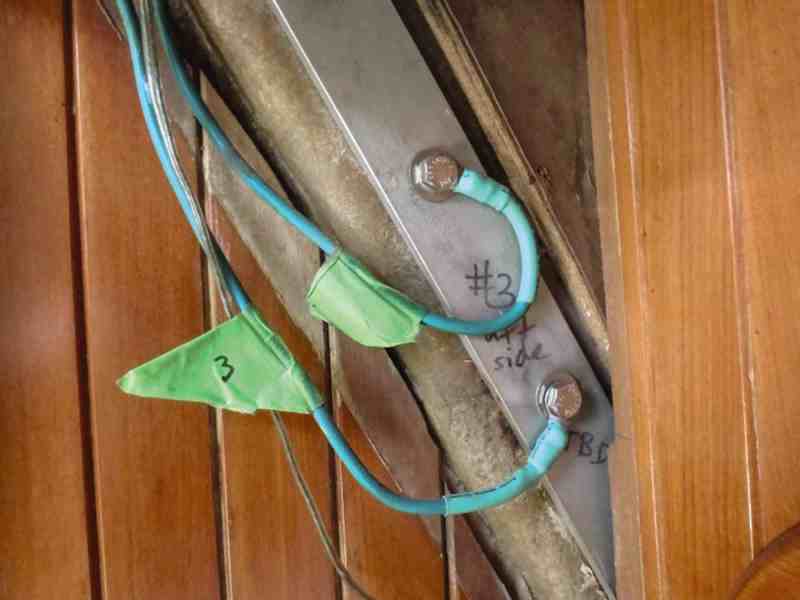
Inside the cabin, we removed the teak cladding that conceals the chainplates. Next, we carefully removed and labeled all of the grounding wires that were attached for galvanic bonding. Because these showed 30 years of corrosion, Tim replaced all the ring terminals and sealed them with heat-shrink tubing. Then we removed the nuts, washers and bolts from the chainplates. On deck, we removed the cover plates, which were attached with sealant and wood screws into the deck. Finally, we had to wiggle the chainplates out of their slot through the deck. Of course, inside the boat the chainplates are located in one awkward place or another: inside cabinetry in the head, behind other cabinetry in a hanging locker, or in the saloon. Each set of bolts required a different set of yogic contortions to access, but we are fortunate in that Lesley is right-handed and Tim’s a lefty, giving us options for any configuration. In several places we could read a nasty tale of leaked water. We had to release the grip of the old sealant and slide the chainplates up through the deck without distorting them. Our rubber mallet and some more bonking from above helped to free them. We again labeled everything compulsively, cleaned up any water damage, and gave white surfaces some fresh coats of paint.
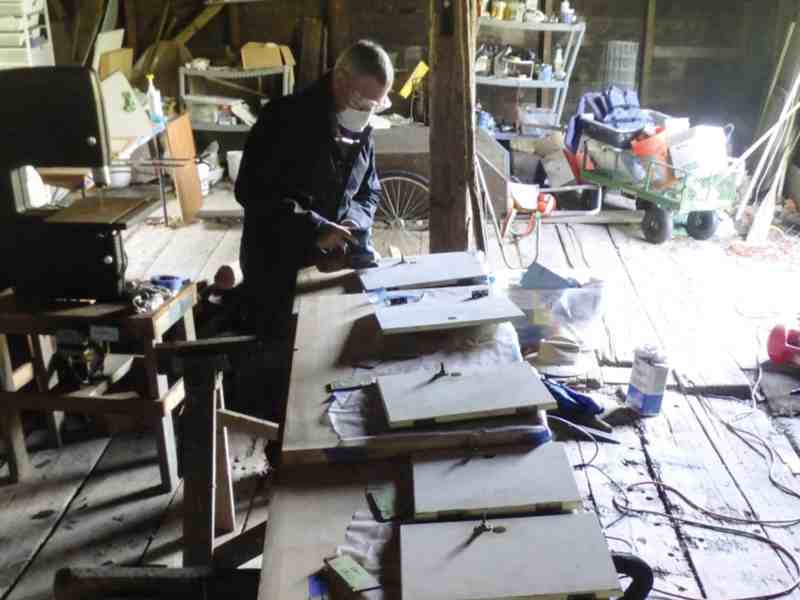
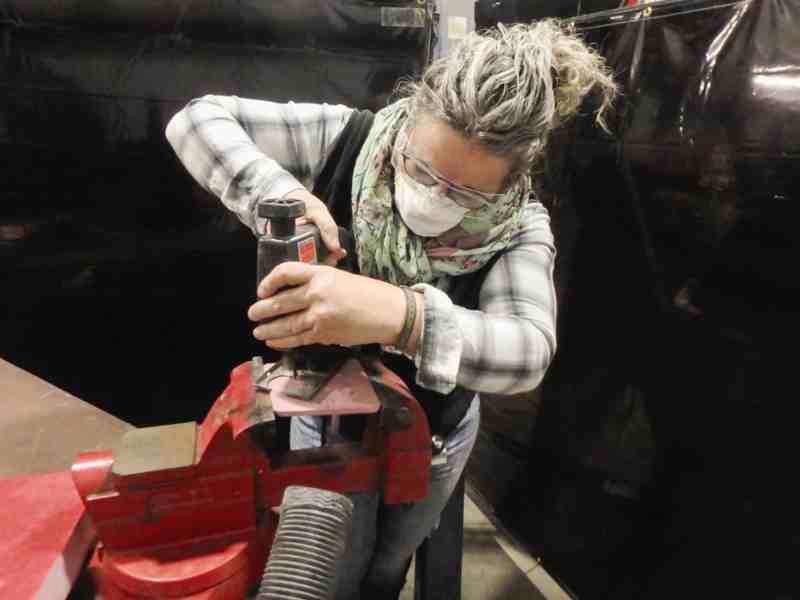
Lesley made paper templates to create new risers from 3/8-inch fiberglass sheet—higher than standing water but not so high as to introduce toe-stubbers. In this new configuration, the screws that hold the deck covers in place would no longer penetrate the deck or sit in standing water, diminishing the likelihood of new leaks. Lesley cut out the risers on a band saw, then rounded the corners with a sander and sprayed each with Awlgrip. The new risers are a thing of beauty, and now the plates and their fasteners sit well above any standing water on deck.
When it came time to reinstall, we had to make a decision about how removable the new risers would be. Should we bed them to the deck with epoxy (permanent) or Sikaflex (removable with a bit of effort)? What kind of legacy were we leaving for the imaginary future owners of Billy Pilgrim if they were ever going to re-bed or replace their chainplates? The Trained Professionals we consulted strongly advocated for Sikaflex, not epoxy, and we followed their advice. After examining the chainplates to ensure that they were still sound (they were), we refastened them with all new stainless-steel bolts, washers and nuts. This step presented some puzzles to detangle. Some bolts originally ran from fore to aft and others from aft to fore in order to fit inside the teak cladding. In some places it seemed like the interior furniture was built around the chainplates when the boat was built in Taiwan, and it took some fiddling around before we got everything snugly in its original place, bolts tightened and grounding wires reattached. Now we were ready to reseal from above.
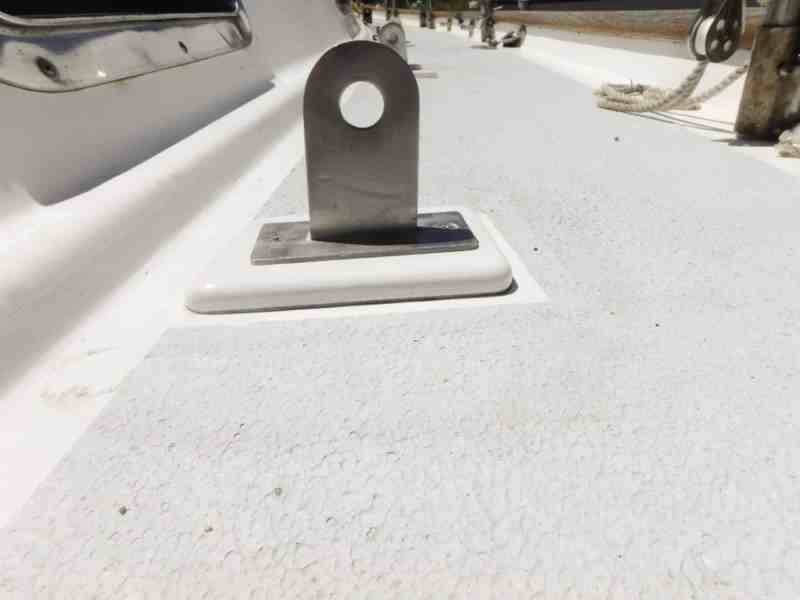
We made a dam underneath each hole that the chainplates traveled through on the deck using 3M Strip-Calk butyl tape—the Trained Professionals call it dum-dum tape—which comes on a roll and is basically the consistency of chewed gum. This way enough Sikaflex can be injected to fill in the gaps, but the Sikaflex won’t drip into the whole cavity under the deck. From above we taped around the risers, as we’d done with the portholes. Next we squeezed Sikaflex to fill the hole around the chainplates, covered the bottom of the new risers so that it oozed out all sides to seal that bond, then covered the bottom of the steel deck plates to seal them onto the risers. Finally, we fastened the deck plates with stainless-steel wood screws, which no longer penetrated the deck. One less opportunity for water to come in!
Replacing and Installing New Hatches
The last of our three leak-eradicating jobs was perhaps the most straightforward: hatches. Billy Pilgrim has four—two big, two small—all made by Atkins & Hoyle in the mid-1980s. The aluminum struts had collapsed on themselves, and we sometimes found little chunks of powdered aluminum in the V-berth sheets. Previous owners kept these hatches open with wooden blocks, a proposition that always bespoke smashed fingers. More consequentially, the aluminum frames of two of the hatches were cracked—not a case for re-bedding or repair but rather full-on replacement.
Hatch Project
For the past 20 years, Tim has either directed or judged Cruising World’s Boat of the Year event, giving him the chance to see and sail more than 500 new sailboats, as well as the gear that’s installed on them. That experience led him to prefer Lewmar Ocean series hatches, both for their security and user-friendliness. And no more wooden blocks to hold open the hatches.
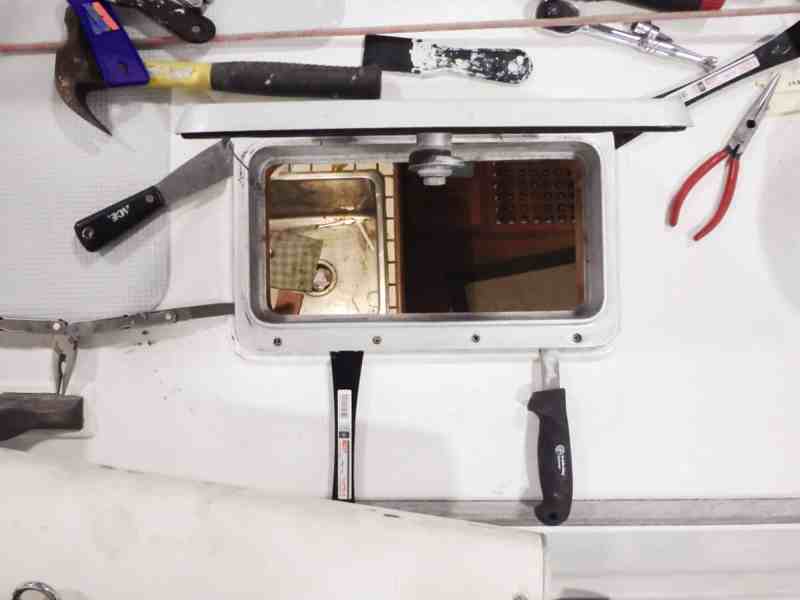
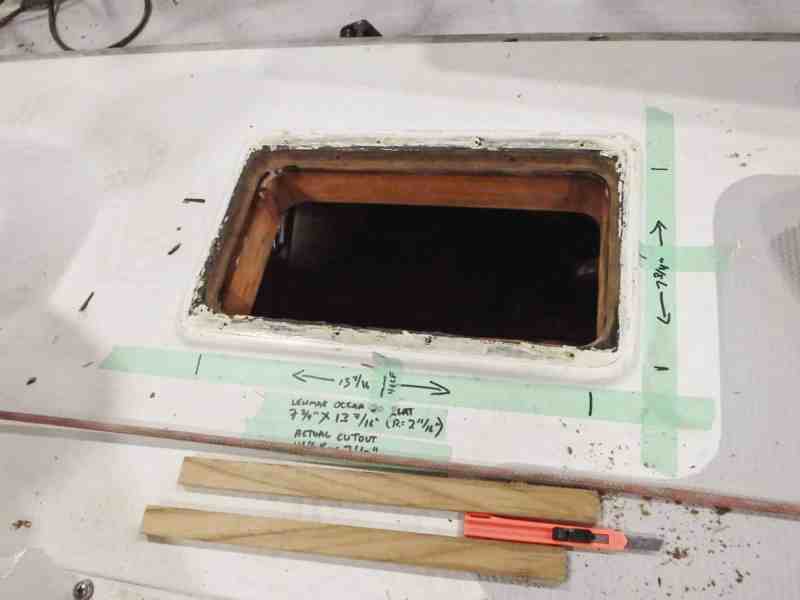
Removing the old hatches was very much like removing the portholes and employed many of the same tools. Same goes for cleaning up the surfaces on which the hatches sit.
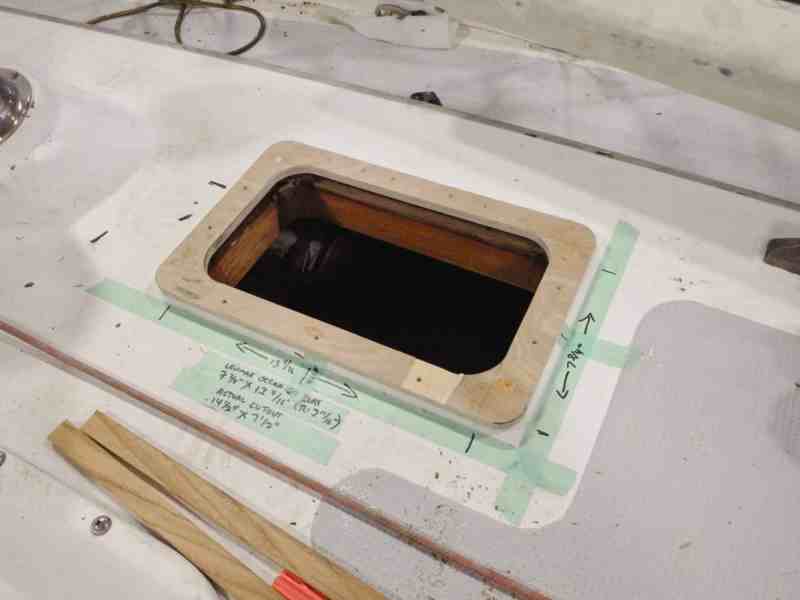
The main puzzle this job posed was that the frames of the Ocean hatches are slightly smaller than the composite bosses that are molded into the boat’s deck. We fashioned a solution from a ½-inch-thick flat marine plywood, finished off in the same way Lesley finished the chainplate risers. For each hatch, we cut out a piece whose outside perimeter matched the outside edge of the boss, and whose inside cutout matched the inside of the hatch frame. We used wood screws and Sikaflex to fasten them—no more aluminum powder in the bed!
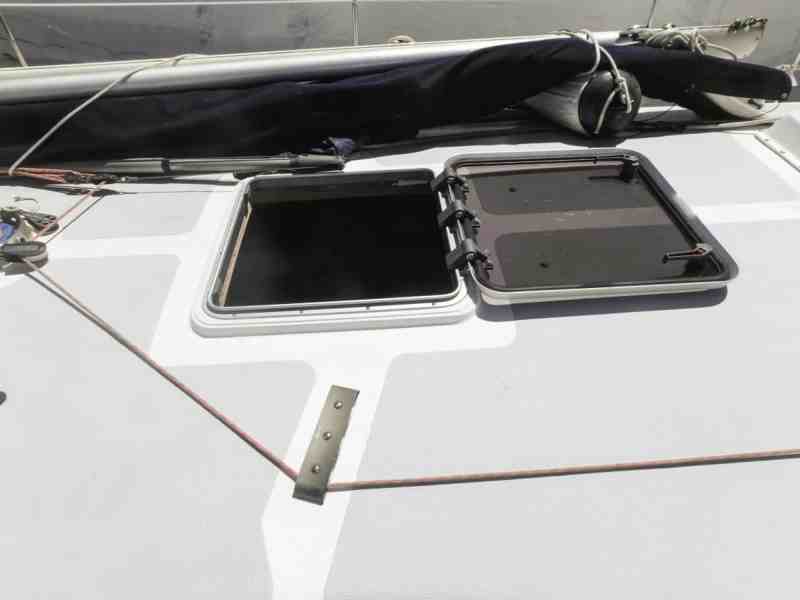
Better still, no more unwanted water in the boat.
Billy Pilgrim has a permanent mooring in Gloucester, Massachusetts, but spent the COVID-19 summer of 2020 hauled out at Maine Yacht Center in Portland, Maine, where Lesley Davison and Tim Murphy visited on self-quarantined day trips so that work could progress.


