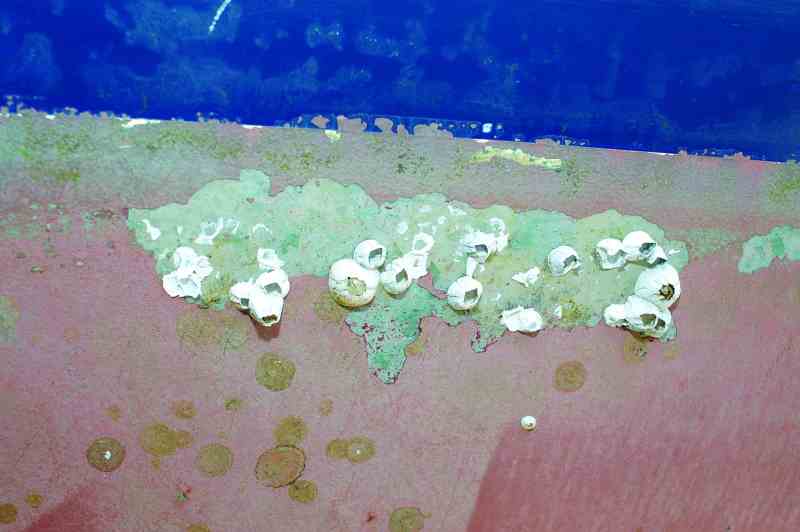
For the underbodies of sailboat hulls, the first barrier coats were born of necessity. In the 1970s an insidious malady began to plague fiberglass yachts, growing in strength and frequency over time. By the 1980s, the condition known as osmotic blistering was a full-blown epidemic (see “Banishing Bottom Blisters,” April 2012, for a full explanation of the causes and cures).
A study by the University of Rhode Island eventually determined that the cause could be traced to the permeability of polyester resin, the “glue” from which nearly all fiberglass boats were built at the time. The proposed solution involves the use of a different resin called vinyl ester, or epoxy. Unlike polyester-based products, vinyl ester — which is virtually blisterproof — gave builders and buyers of many brand-new boats peace of mind. However, it didn’t help sailors with used boats, or ones being built or recently completed using older resins. Furthermore, vinyl ester and epoxy cost more than polyester, and using epoxy requires different skills and techniques that some builders weren’t ready to adopt. Eventually, for many owners, the solution was an epoxy-based barrier coat applied to existing hulls.
Most modern barrier coats achieve the desired protection by using either the inherent impermeability of epoxy, and/or a high solids content, which forms a shell-like water shield when cured. If you lift a can of barrier coat you’ll note that most are especially heavy, a measure of the solids contained within.
Most boatbuilders have embraced vinyl ester or epoxy resin, either for the entire hull or as a skin coat; a few layers provide the required osmotic protection. Still, barrier coats have remained popular. For any new boat that doesn’t utilize one of the blister-resistant resins (an exception to the rule these days), barrier coats are a prerequisite. And they’re also employed on hulls that don’t necessarily require them for osmotic blister prevention, for a straightforward reason: Barriers make excellent primer coats for anti-fouling paint.
Ensuring that anti-foulant tenaciously adheres to a bottom can be challenging, as the gelcoat over which it’s applied is both slippery and typically contaminated with surface waxes, a side effect of the lamination process. De-waxing and then sanding is required, and even then bottom paint often fails to stick. Barrier coats are epoxy-based, and epoxy sticks to just about anything, making them an effective tie coat between virgin gelcoat and anti-fouling paint.
When employing a barrier coat as a primer, it’s desirable to achieve one further means of adhesion, the chemical bond. The bond between the hull and the barrier coat is mechanical; the epoxy locks onto the sanded surface, for which it’s especially well suited. The bond between barrier and anti-foulant, however, can be chemical; in other words, the two interlock chemically, rather than mechanically. The chemical bond is far more aggressive, virtually eliminating the dreaded possibility of paint release. If you opt for a barrier, ensure those who are applying it understand the importance of, and technique for, achieving the chemical bond. Barrier coats are two-part epoxies and as such they are especially noxious. As a result, in most cases they are applied by pros with the right gear. If you do it yourself, be sure to observe all manufacturer safety and health guidelines.
Steve D’Antonio offers services for boat owners and buyers through Steve D’Antonio Marine Consulting (www.stevedmarineconsulting.com). This article first appeared as “Waterproof Coat” in Cruising World, June 2014.