
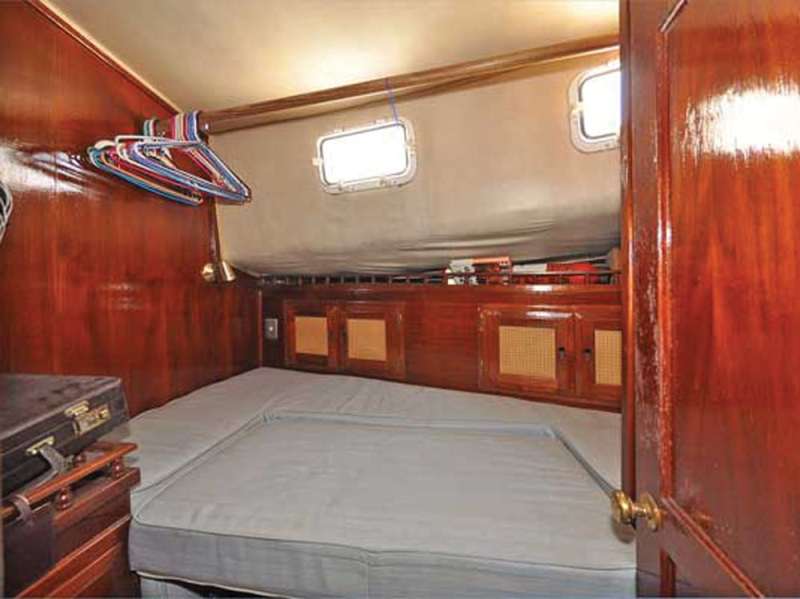
The portside cabin on Britannia, my 1977 Down East brigantine schooner, was an odd layout, which I could only flatteringly call a “traditional” concept. The bunk configuration was ridiculous! A large 36-inch-wide-by-19-inch-deep section had been cut out of the bed to create a seat. To use it as a berth, there was an infill cushion, similar to what is often used to turn two V-berth bunks into a single bed. In seat mode, with the cushion removed, the remaining mattress was an absurdly narrow 12 inches wide in the middle!
Making matters worse, a row of four lockers was outboard of the bunk, another reason that it was a narrow place to sleep. These were pokey little spaces with doors that couldn’t be opened when the bed was made because they had been built flush with the 4-inch-thick foam mattress.
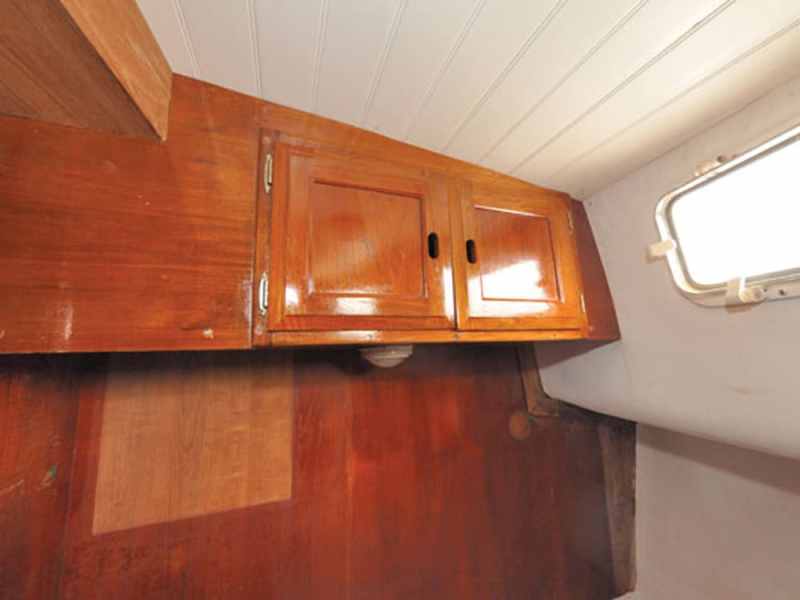
Above the lockers was a shelf edged with pin rail, which looked very nice, but there were only 4 inches between the rail and the turn of the hull, so the actual shelf space was quite limited. The final straw was that this was the only one of our three cabins that did not have a hanging locker or a 120-volt AC power socket.
I decided to make a few changes.
The first step was to dismantle the side lockers. I removed the full-length pin rail from the shelf by drilling out 20 teak plugs and stainless wood screws (the rail was only 80 inches long!), and did the same with the locker doors and their frames. This widened the berth by 8 inches all along its length and had the immediate effect of making the cabin seem larger.
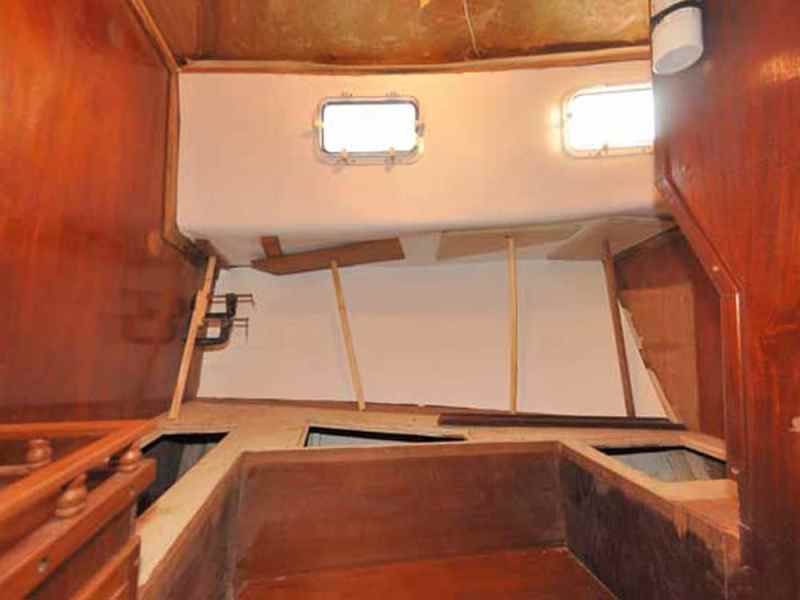
The original vinyl liner on the hull and ceiling was faded and torn, so I stripped it all out with a box cutter, exposing the hull and underside of the deck. This entailed twisting out hundreds of staples using long-nosed pliers; the fasteners were spaced about an inch apart. I’m amazed by how many screws and staples were used in the construction of this boat — no wonder Britannia weighs in at 20 tons!
RELATED: Standing Rigging Replacement
To re-cover the cabin sides, I bought two 4-by-8-foot sheets of Plas-Tex PVC paneling from Lowe’s. This is 1/16-inch thick, and very pliable, waterproof, washable, and easily trimmed with scissors or a box cutter. I have used this material throughout the boat to replace all the tattered and faded original vinyl side panels.
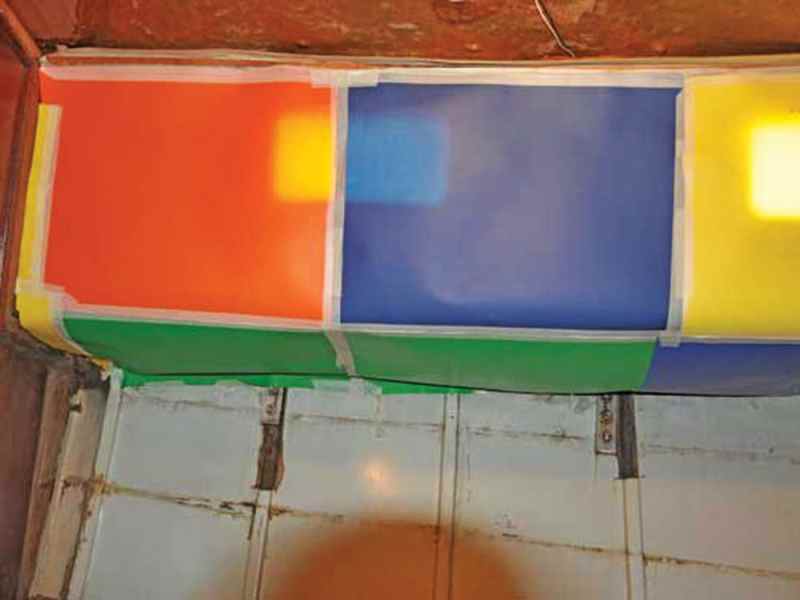
I removed the cabin’s two ports, then made templates of the areas that needed to be re-covered by using art board from Walmart. Making throwaway templates is a bit tedious, but I’ve found it is the only way I can ensure an accurate fit on a boat, with its many angles and curves and uneven edges. Next, I transferred my templates to the plastic sheets on the marina dock and cut them out, then glued them to the side of the cabin with contact adhesive. For this, I prefer the gel-type adhesive that doesn’t “string” — a handy trait when gluing upside down. To hold the overhead panels for the side deck in place while the glue set, I used boards to spread out the load and made props to hold them in place. Replacing and re-caulking the ports also helped to hold the Plas-Tex where I wanted it.
The original lighting for this cabin — totally inadequate — was a single 12-volt DC dome light and a small reading light in the corner. Before fitting a new ceiling to the overhead, I wired in a second dome. I also installed two 120-volt AC sconce lights on the walls and wired them into the shore power. I connected both sets of lights to switches near the door, which is much more practical than groping in the dark for the tiny overhead dome-light switches. The lights can now be turned on and off using the wall switch, or individually from their respective lamp switches.
While rewiring the lighting, I also installed a twin 120-volt AC power socket.
The cabin was now beginning to look a lot more functional and clean, but there was still the bare overhead ceiling to deal with. To re-cover it, I used tongue-and-groove wainscot-style PVC boards, which I got at Lowe’s and have used throughout the rest of the boat. Each board is 7 inches wide, ¼ inch thick and 8 feet long. One side is molded with two strips and the other with three thinner strips; I used the two-strip side. A benefit of using this material on a boat is the rot- and mildew-free lifetime guarantee it comes with. Plus, it’s easy to clean with soap and water. Its thickness also provides better thermal insulation through a hot deck than thin vinyl material would.
Each panel had to be measured and trimmed individually to account for the taper of the cabin ceiling. I used stainless-steel brads and blind-nailed the new covering to the existing wooden battens that had supported the original vinyl.
With 6-foot-8-inch headroom, the cabin had plenty of height, so I decided to reposition two of the original locker doors and frame above the head of the bunk to form a large storage locker. I cut a base from a ½-inch sheet of plywood and supported it with battens screwed to the bulkhead and sides. I also glued a sheet of teak veneer to the underside and varnished it to match the bulkhead. Then I fitted two of the old locker doors to the front. My wife, Kati, wanted maximum access for bedding and pillows in this large dry area, so I left it partition-free. It actually has more cubic capacity than the four original side lockers. Its base, meanwhile, provided me a spot to mount the new dome light, where it can be switched on and off when in bed.
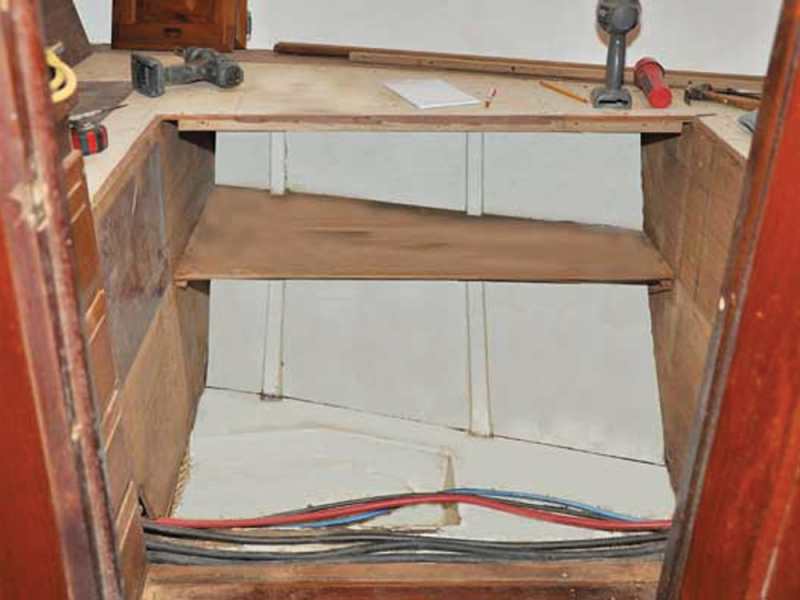
My next goal was to get rid of the seat and cushion surrounding the infill. I twisted out another pile of staples and removed the foam. Then I dismantled the seat, exposing a large space that was just too big to be left unutilized.
RELATED: Replacing Teak Decks is a Monumental Job
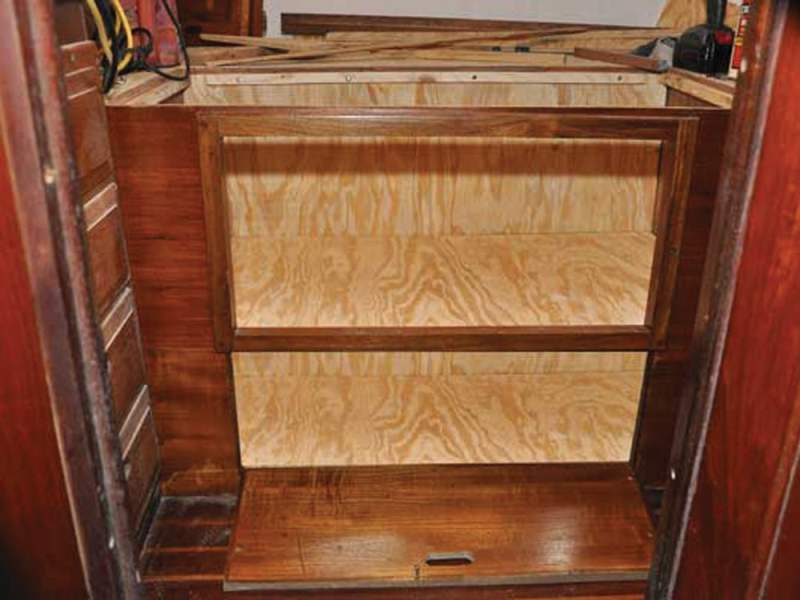
I fit a base in the bottom of the cavity to cover the wires passing along the cabin floor. Then I took the panel under the seat that faced into the cabin and added a piano hinge to its bottom so it could open downward. At the level of the old seat, I built in a shelf and then used the remaining two original locker doors to finish off the front, bringing it up to the height of the rest of the bunk. Kati had the brilliant idea of simply hinging the plywood top flush with the bunk boards, to allow total access from the top for larger items.
The top edge of the new wall under the bunk was finished off with a straight teak fiddle. By replacing the seat, I added more than 10 cubic feet of storage under the bed. Add in the overhead locker, and we gained 13 cubic feet.
But I wasn’t done yet. A 2-foot-deep locker protruded into the cabin (and into the bunk) with an access door into the forepeak. I’d used this space as a bosun’s locker. I tapered the once-straight side of it that landed on the bunk back toward amidships and gained another 5 inches of width at the foot of the bed.
The cabin still had no hanging locker, so I decided to transfer everything from my bosun’s locker into the new space under the bed. Then I removed the three shelves in the locker and fitted a louvered door that had been left over from remodeling the forward head. This large hanging locker can now be accessed from both the forepeak and port cabins.
To finish things off, I also fit a raised shelf over the end of the bed, just below the portlight (having first made a template, of course), and faced it with repurposed pin rail.
Kati had previously removed the cover from the bed foam to machine wash it. I glued the original seat foam inlay permanently to the mattress foam with contact adhesive, and added more foam to the foot of the bed to compensate for the space gained by modifying what was now our hanging locker. This enlarged sheet of foam was just too unwieldy to handle in one piece, so I cut it in half. Then Kati made new covers. The new bed measures 54 inches wide at the head (U.S. double bed), 27 inches at the foot and 81 inches long.
The cabin has now been completely transformed. It was well worth the cost and effort, and makes an excellent sea berth, being amidships and subject to very little fore and aft movement.
Roger Hughes has spent six years and counting restoring his Down East 45, Britannia. For more on his projects, visit his website.
Devilish Details
Something that is rarely mentioned in projects like this is the time and patience it takes to finish the trim, especially when reusing much of the 35-year-old original wood, as I did on this alteration and, indeed, as I have throughout the boat. The original lockers and all the teak-faced plywood had multiple layers of varnish that looked as though it had just been slapped on over the years. This had to be stripped to bare wood, then re-varnished to make everything look uniform and presentable. For this I used nearly a gallon of Goof Off semi-paste paint stripper and a lot of elbow grease. I glued more than 50 teak wood plugs into recessed screw holes, shaved them smooth and varnished them to match the surrounding wood.
The Plas-Tex plastic sheets on the cabin sides needed trim along the edges, which I cut from surplus teak strips and varnished. It also took two whole days to cut, varnish, and fit trim around corners and joints that I had not quite managed to match as accurately as I would have liked.
It took a gallon of white gloss to put two coats of paint on all the new shelves and the inside of the hanging locker. This finishing-off process took nearly as long as the construction.
Material Costs
- Art board for templates, (Walmart), $9.75
- Two 120-volt sconce lights, (Home Depot), $9
- One dome light, (Defender), $32.99
- Two sheets of Plas-Tex sheets, (Lowe’s), $39.98
- Two packs Plank paneling, (Lowe’s), $46.94
- One sheet 1/2-inch plywood, (Lowes), $15
- Piano hinge, (Lowe’s), $5.75
- Goof Off paint stripper, (Lowe’s), $24.98
- Total: $184.39


