Let’s look at the matter of bedding deck hardware from the simplest way possible: I’ve lost count of the number of times I’ve been dripped on while lying in a berth. Because it’s both annoying and completely avoidable, it’s doubly frustrating. Of course, there are plenty of other very important reasons for keeping leaks from developing, including maintaining the integrity of the decks through which they pass. Follow these steps to keep the water on the right side of the cabin and decks.
Bedding Compounds
Bedding compound, also referred to as sealant or caulk, serves as a flexible gasket of sorts between deck hardware—from cleats, stanchion bases, chainplates and sail tracks to pedestals, pulpits, winches and clutches. The bedding you select should be easy to apply, long-lasting and elastic. Its primary use, when sealing hardware, is as a gap filler, with the aim of preventing water from passing between the hardware and deck/cabin surface. Options include polyurethane, polysulfide and silicone. Each has its own strengths and weaknesses.
Polyurethane is by far the most popular bedding compound, starting decades ago with the introduction of 3M’s now ubiquitous 5200. Originally developed for use with timber hulls, it has all the attributes one could ask for in a sealing formula—and then some. With some exceptions, PU sealants are also adhesives, which can make hardware removal a chore and even destructive in some cases. It can be affected by some teak and other cleaners, as well as fuel. Unless otherwise noted, many PU sealants lack UV stability, although that’s less of an issue where the sealant is primarily protected from the sun’s rays by the hardware. If it’s employed in an application where an exposed radius is necessary, make certain the sealant that’s used includes a UV inhibitor.
Polysulfide is an unsung hero among bedding compounds and my personal preference. Unlike PU, it is not an adhesive; its mission is to seal, and it does so very well, filling gaps readily while remaining resilient and flexible for many years, if not decades. It’s also UV-stable and immune to most harsh chemicals and fuel.
For years, silicone has been considered taboo by boatyards, builders and yards, although not because of performance issues. The aversion is due to its side effects. Unlike PU and PS, which can be painted—though it’s not recommended—SI will not accept paint; in fact, it repels it, and therein lies the problem. The slightest SI residue contaminating any surface that might ever be painted or varnished will drive coating applicators crazy with “islands” of paint/varnish rejection. These are known as “fish eyes” because of their oblong shape, and they can remain present for years.
In spite of that liability, SI remains a very credible and reliable bedding compound, one that is flexible and long-lasting, and it’s available in several colors too. I have successfully used SI in boatbuilding applications, specifically for aluminum-frame hatch installations, where no other compound could be made to work reliably for the long term. Furthermore, manufacturers of some plastic components (such as access and inspection ports) specifically prohibit the use of PU sealants, leaving PS and SI as the only viable options. If you opt for SI, remember the paint/varnish incompatibility issue, to mask carefully, use rubber gloves and not touch varnished surfaces while working with it.
Prep Work
As with paint and varnish application, preparation is vitally important where bedding is concerned. In many cases of bedding failures, especially those that occur shortly after installation, they are the result of improper or incomplete preparation (or no prep work whatsoever). Based on tests I’ve conducted, virtually all deck hardware—whether stainless, aluminum or even plastic—is contaminated with waxes or oils, and this includes the fasteners used to secure this hardware.
Here’s why: When boatbuilders and repair pros want to prevent fiberglass resin from adhering to something (like molds or hardware), they apply wax to those surfaces, which acts as an effective release agent. When metallic hardware is finished or polished, it’s often coated (i.e., contaminated) with polishing wax or cutting oil, which has the same effect; this includes factory-fresh components straight out of the box.
If you are skeptical about this, conduct this test: Wet a clean white rag with mineral spirits, and then wipe down a new piece of hardware or fastener, nut or bolt. (For bedding prep, “clean” means the rag has been rinsed in hot water, wrung out and then allowed to dry. Doing so removes contaminants such as detergent residue, surfactants and scents from even new rags.) The gray or black shading that will almost certainly appear on the rag is your residue, and it will hinder the adhesion of any bedding compound, regardless of its chemical composition.
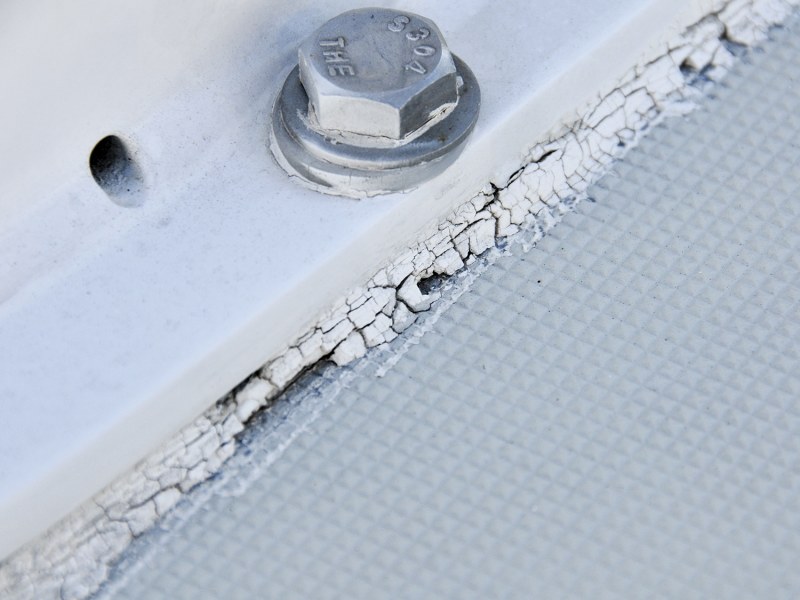
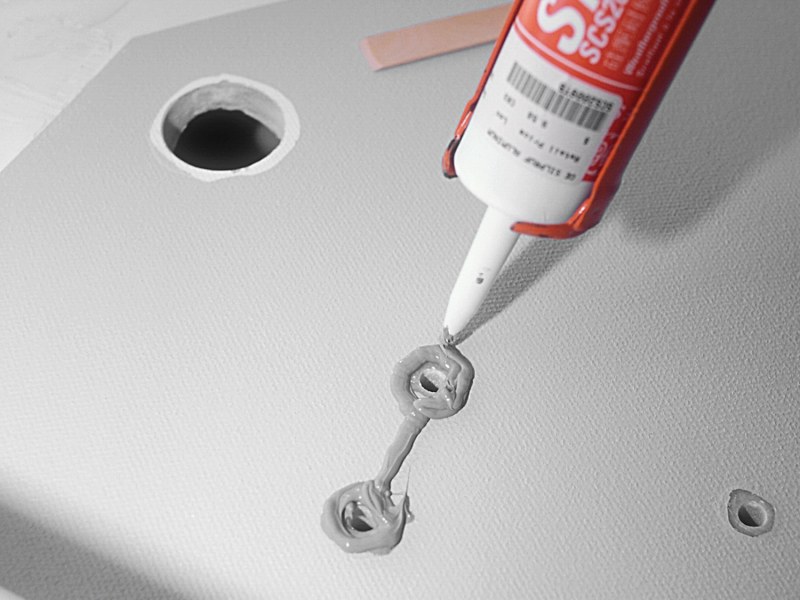
Holes drilled in fiberglass and timber substrates, through which fasteners are to be installed to secure hardware, should have their edges chamfered. The recess created by this practice will allow a “reservoir” of sealant to accumulate here, creating an O-ring of sorts, thereby improving sealing ability.
There are plenty of good reasons to prevent leaks from developing, including maintaining the integrity of the decks.
Surfaces that are to be bedded must be scrupulously clean and free of all contamination. If remnants of previous bedding or loose paint are present, the surface should be cleaned with a putty knife or gasket scraper. While it’s acceptable to bed over glass-smooth surfaces, slightly profiling the surface with 180-grit sandpaper will provide a “tooth” to which bedding can adhere; this goes for gelcoat, fiberglass, polished stainless steel and aluminum. The surface should be cleaned, and dewaxed/de-oiled, before sanding to avoid grinding contaminants into the surface.
Using clean, pre-rinsed rags, wipe down all hardware, fasteners and surfaces that are to receive bedding with a solvent (I prefer mineral spirits). As rags become discolored, they should be replaced so as to avoid distributing, rather than removing, any contaminants. I eschew the use of harsher chemicals, such as denatured alcohol and acetone, as unnecessary overkill; mineral spirits are friendlier to users (you should wear chemical-resistant rubber gloves and eye protection) and will emulsify and remove oils, waxes and most other contaminants without harming most plastic, paint, varnish or cured caulk—provided it is not left in contact for an extended period (i.e., never leave a solvent-soaked rag on any painted or varnished surface).
Depending on the location, you may choose to mask the perimeter of the hardware footprint to minimize cleanup; this is particularly true on teak or nonskid.
Installation
Once the surfaces are clean and prepared for application of sealant, make certain you do not touch them with your bare hands (or soiled gloves) because even oil from fingers can contaminate these surfaces.
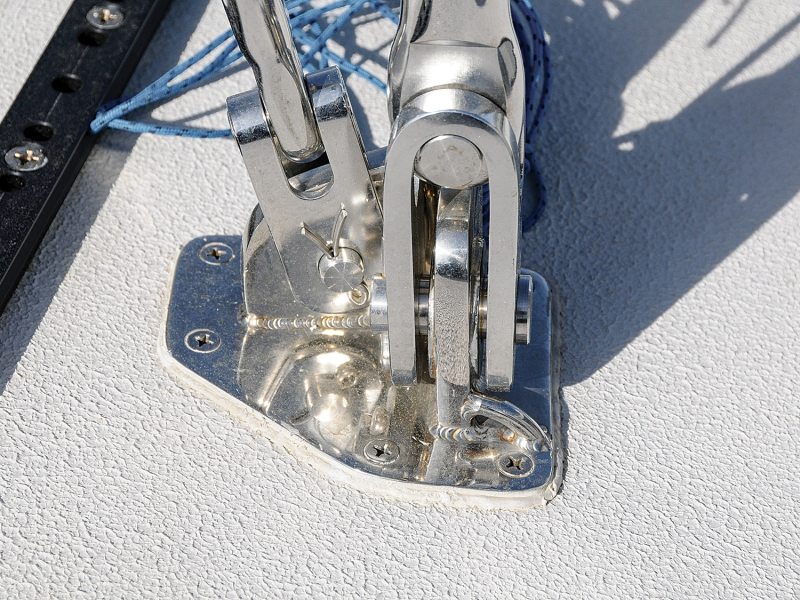
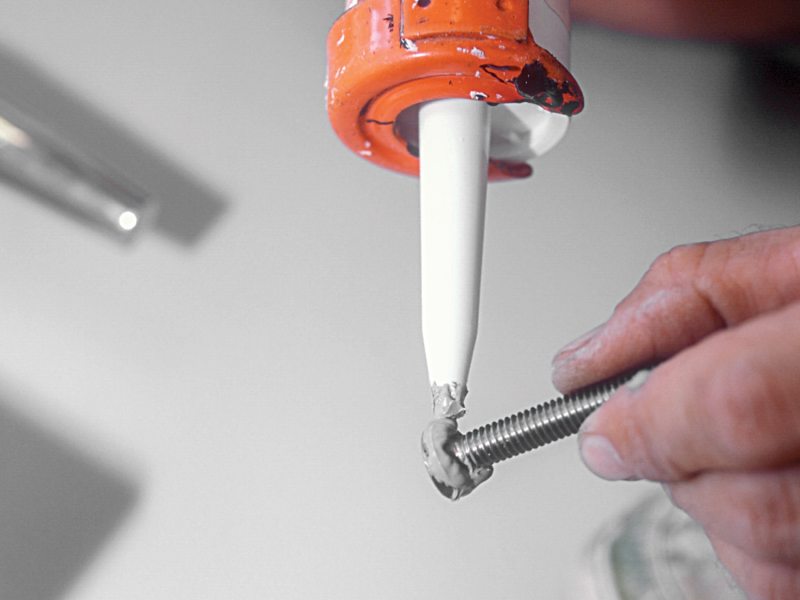
Sealant should be applied uniformly to the entire hardware surface, not just around fastener penetrations. Don’t skimp. The goal is to achieve what’s known as “squeeze-out,” which is a bead of sealant pressed out from under the hardware as it’s set onto the mounting surface. Fastener shanks, as well as the underside of heads, should also be coated in sealant.
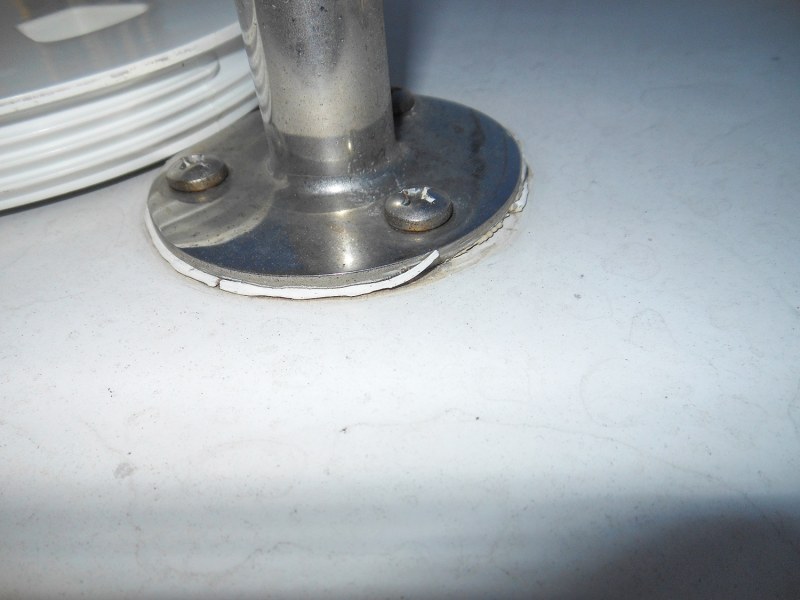
No sealant, however, should be applied to backing plates, washers, nuts, etc. that are installed on the underside of the deck/cabin. The reason for leaving these unsealed is to ensure water is not trapped in the fastener bore holes. If water is trapped here, it can lead to two undesirable side effects: 1. For stainless steel fasteners, it establishes the ideal environment for crevice corrosion. 2. For cored composite structures (nearly every deck and cabin), even when properly closed out (more on this in a moment), standing water in this area only increases the likelihood of penetration into the core. If the weather-deck bedding fails, it’s better that it leak into the cabin—as an alert that it’s time to re-bed—than retain water and cause damage.

Once the hardware is set in place, evenly tighten the fasteners to achieve the aforementioned squeeze-out. Any place where squeeze-out is not achieved is an indication of a void or gap that might exist between the hardware and the bedding surface, a gap into which water can migrate and be retained. Even if this does not lead to a leak, water trapped by stainless steel nearly always leads to unsightly rust-colored “tea staining.”
Fasteners should be fully torqued at this point. The practice of leaving sealant to cure, before fully tightening, is not one to which I subscribe. Sealant, even when fully cured, is not designed to bear the heavy loads imparted by stanchions, cleats and tracks; it’s designed to fill irregularities and small gaps.
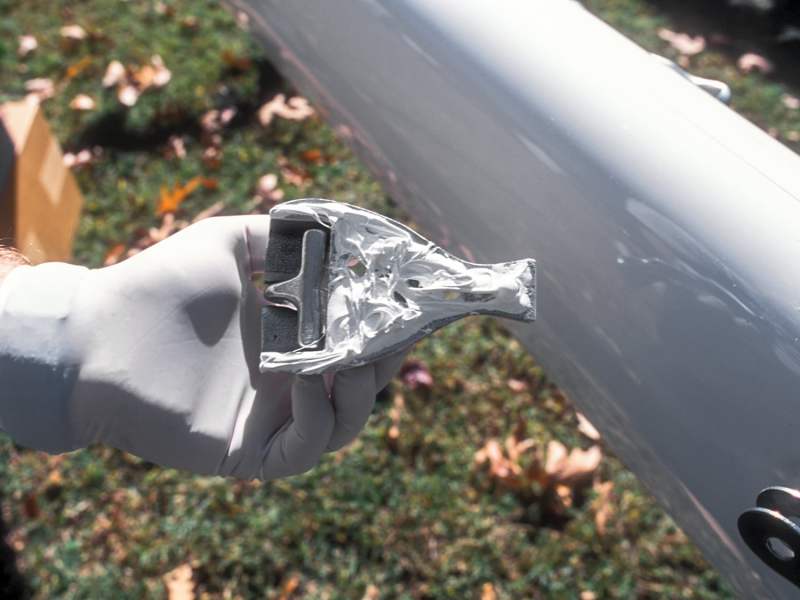
Initial removal of bulk sealant squeeze-out can be achieved using a putty knife and then solvent-soaked rags (be ready with a container or bag to dispose of these), one that is approved by the sealant manufacturer. Use of the incorrect solvent can inhibit the sealant from fully curing.
No discussion of hardware installation would be complete without mention of core closeout. In short, no penetration—in a cored composite deck, cabin or hull—should rely on sealant alone to keep water from migrating into the core, where it can wreak untold havoc. Instead, the core must be fully isolated from penetrations by a permanent annulus, and not just a paper-thin coating, but one made using fiberglass resin, or epoxy, and a reinforcing or thickening agent. This approach provides resistance to water penetration, as well as crushing, when through bolts are torqued.
Following these practices should keep hardware secure and the water on the deck, rather than your head.
Steve D’Antonio is a former boatyard manager who travels the world assisting clients with all manner of refits and technical issues (stevedmarineconsulting.com). He is also the author of CW’s Monthly Maintenance column.


